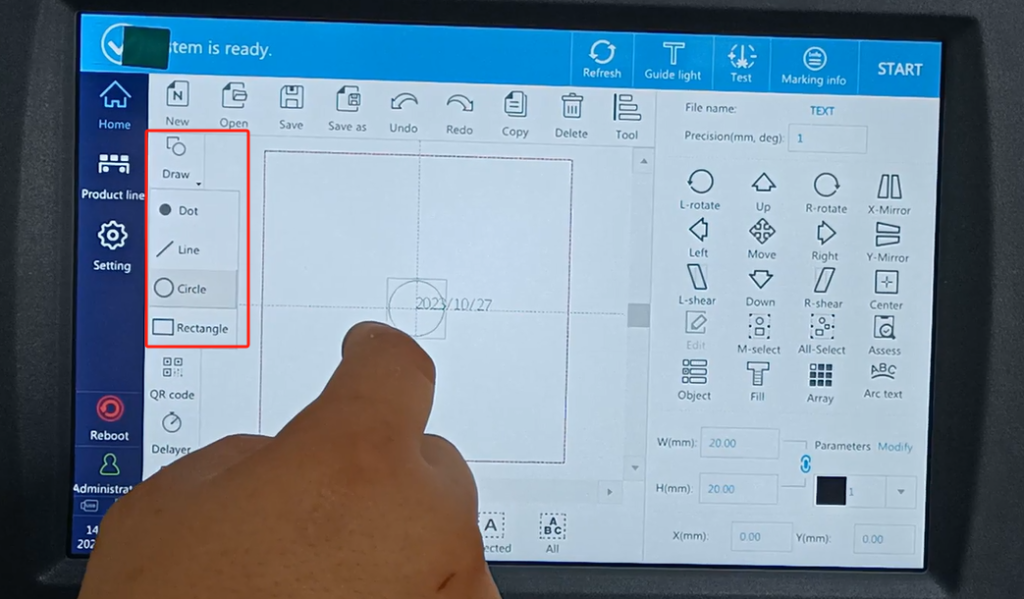
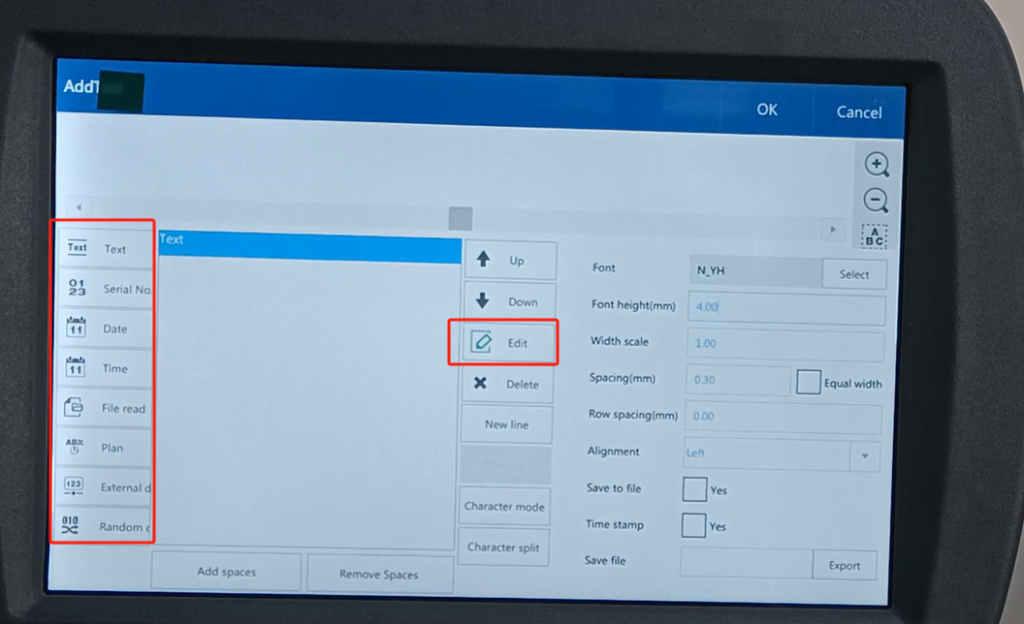
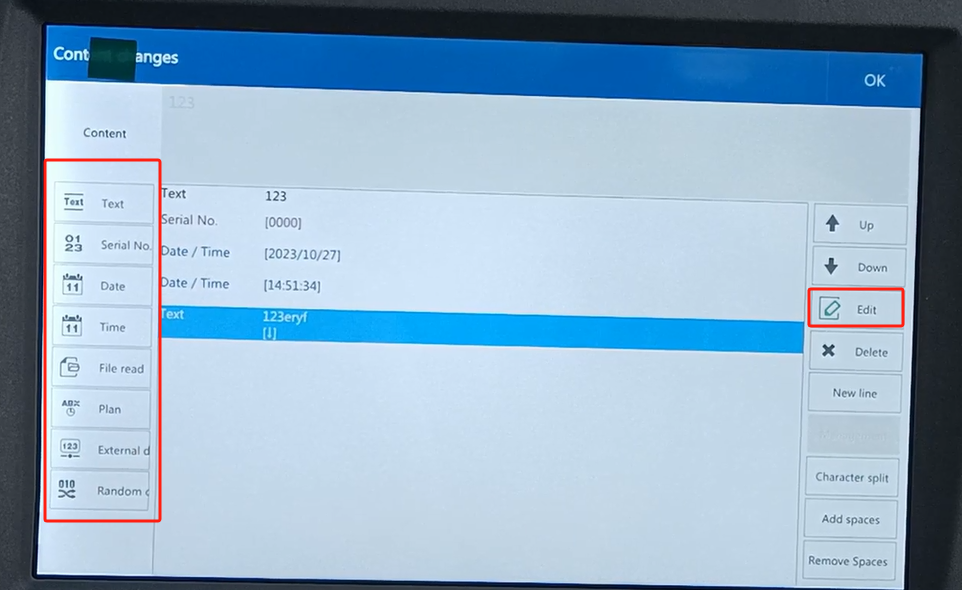
The CFB 2 laser machine it is one of the information editing. We have an edit font here, and we select the text.Then the default here is the fixed text, serial number, date, time, and so on. We’ll simply edit the usual fixed text, which we use most. We click on the fixed text.
Here we can enter one of what we need. And our keyboard language can have Chinese. There are other languages, and Arabic here here. We can either create Chinese here.
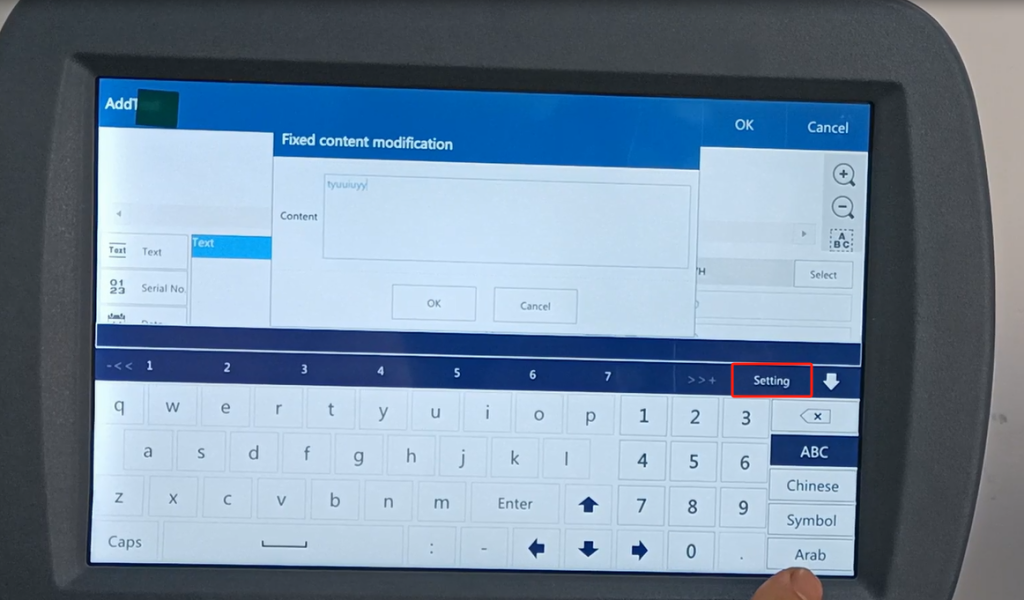
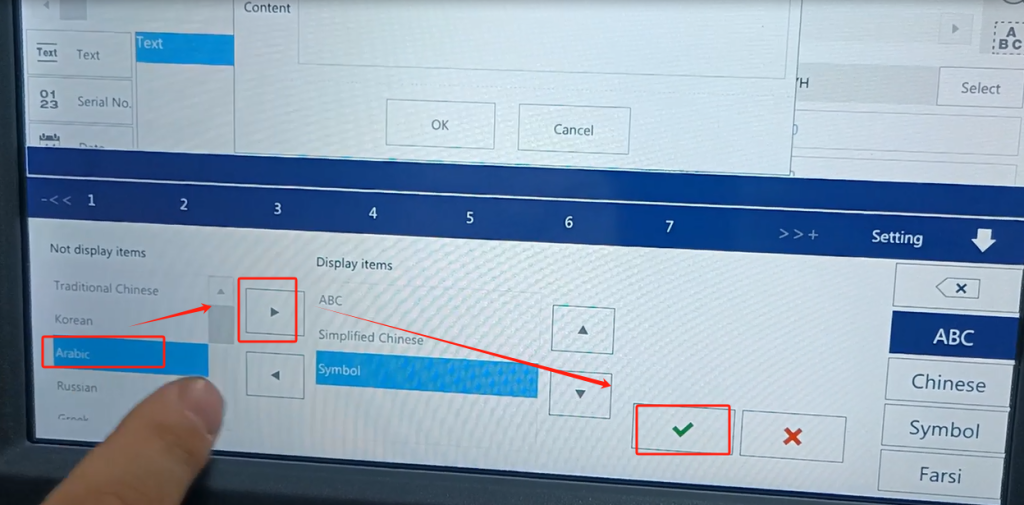
Let’s click on this setting inside. We can see several languages in this place. Let’s look at which language we want, we choose it, and then move it and we have created it, we can move it here. And because it’s four, it’s now three.Let’s pick another one. I’ll be there here. We we point determined. This becomes the language, and the keyboard language does. This is an explanation of the keyboard language.
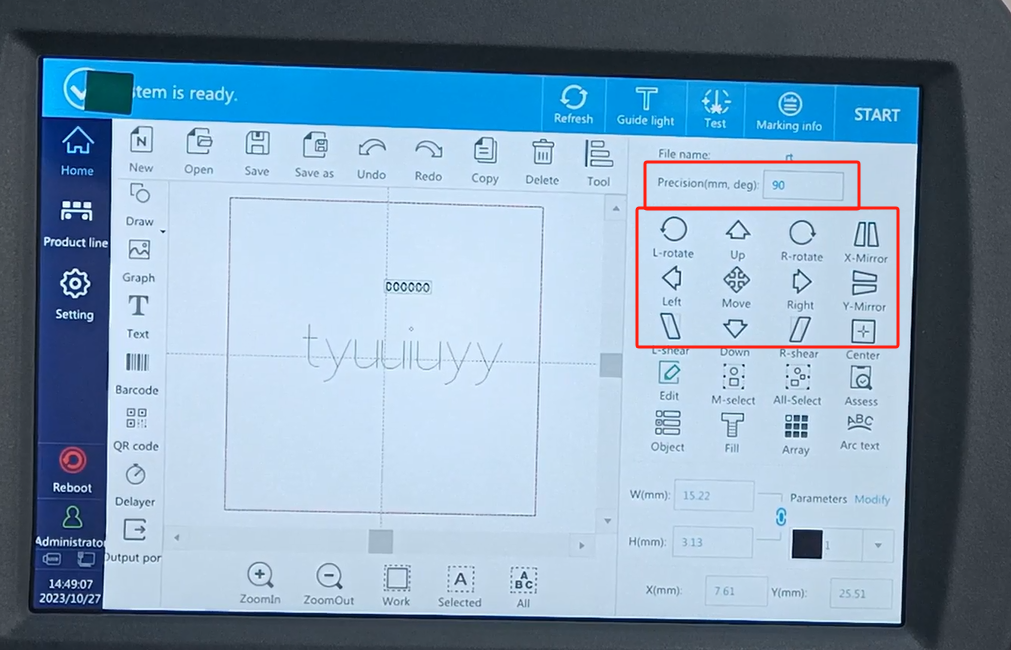
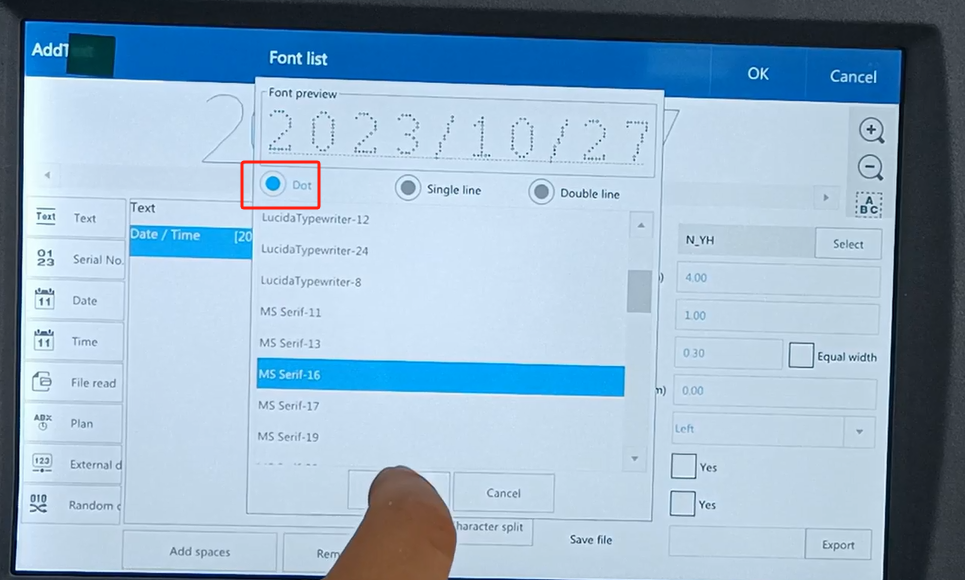
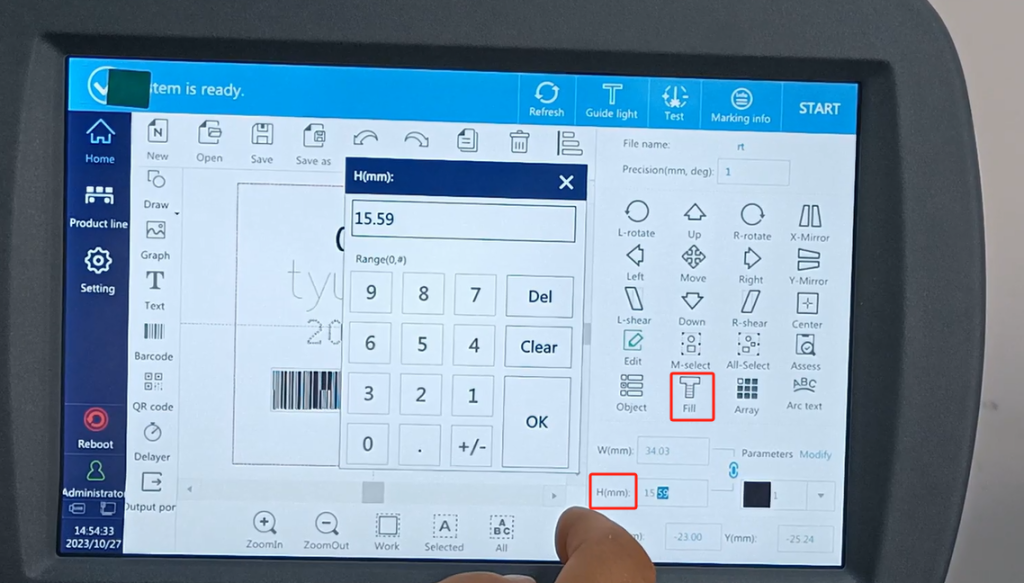
Then point to determine, determine this information. After I build the fixed text, then there is the word height here, so we can adjust the word height. And the word width can be adjusted. We have one of his font choices on this side, with a single-line font.There are so many. There are double line fonts, there are a lot of double lines. We can choose either a single line or a double line. We will now choose this single line. We’ll choose the double-line font again later. There is also our dot array, the dozen is the point, the dozen is composed of the point. We choose a single line, and then select to determine OK.
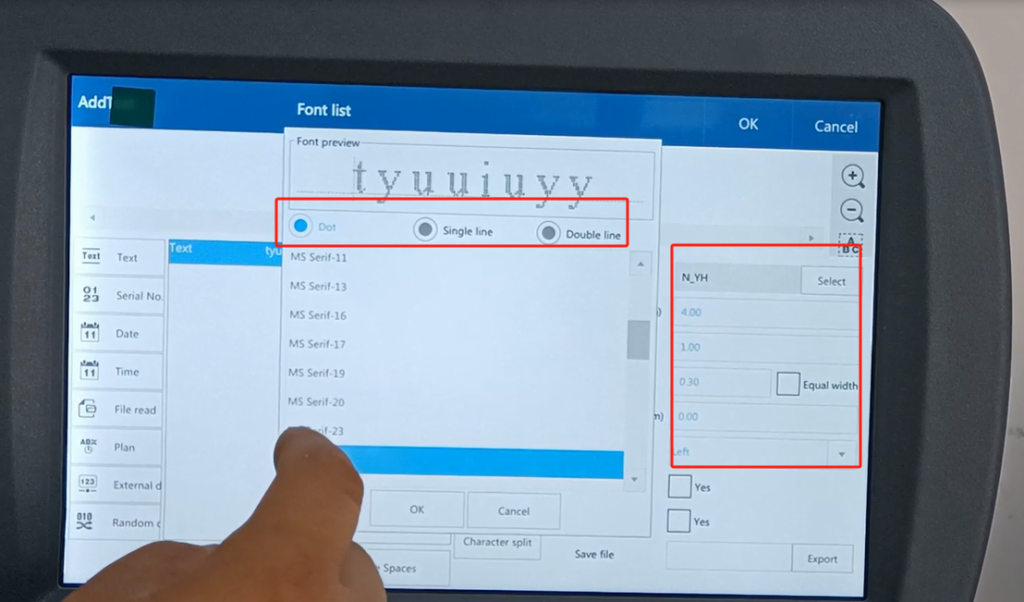
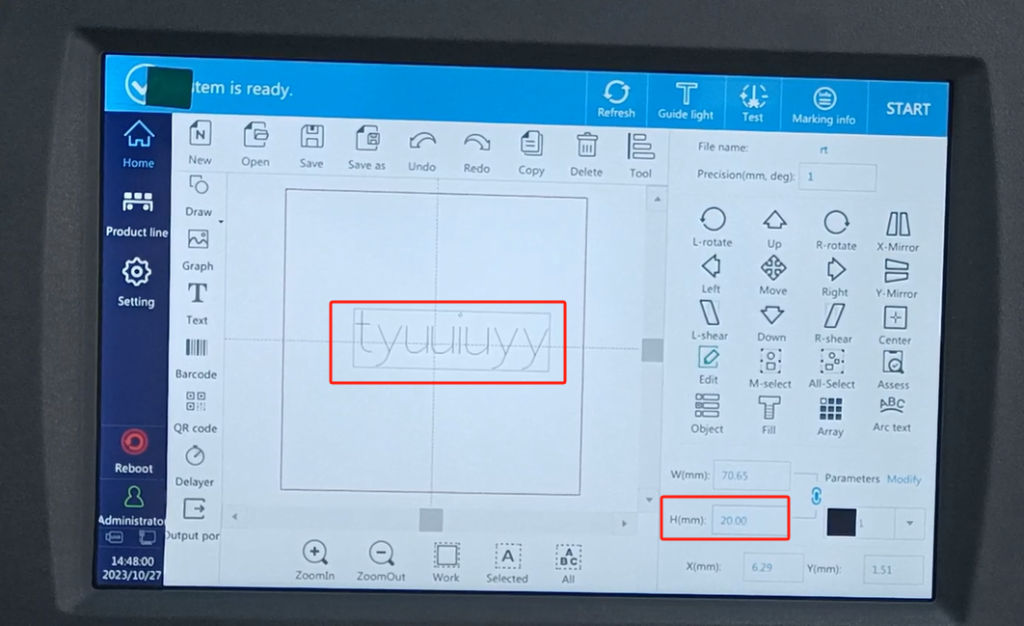
This was built, and now it’s very small. We want to make it a little bigger. Here is the size and the height. The default height is this size, and then we tune a height of 20. It’s so big. It’s a single-line font.
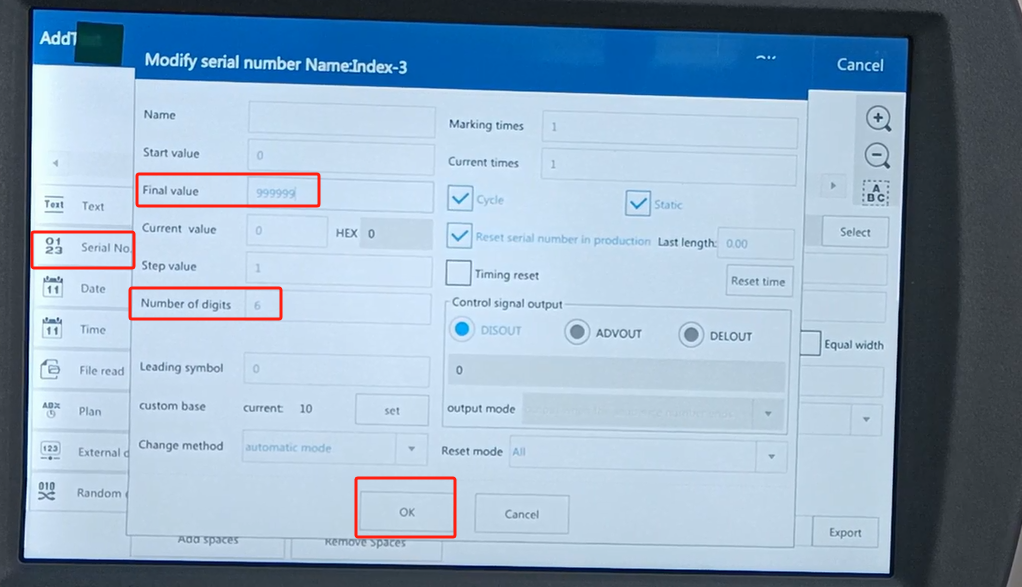
If we create again, then continue to create the serial number. After seeing the serial number, we will click to edit it. In the editor, we have a serial number, which we can choose 6 digits. If we want the 6 bits, we choose the 6 bits. For six places, he can be a few nines and six notines. And then the point is determined.
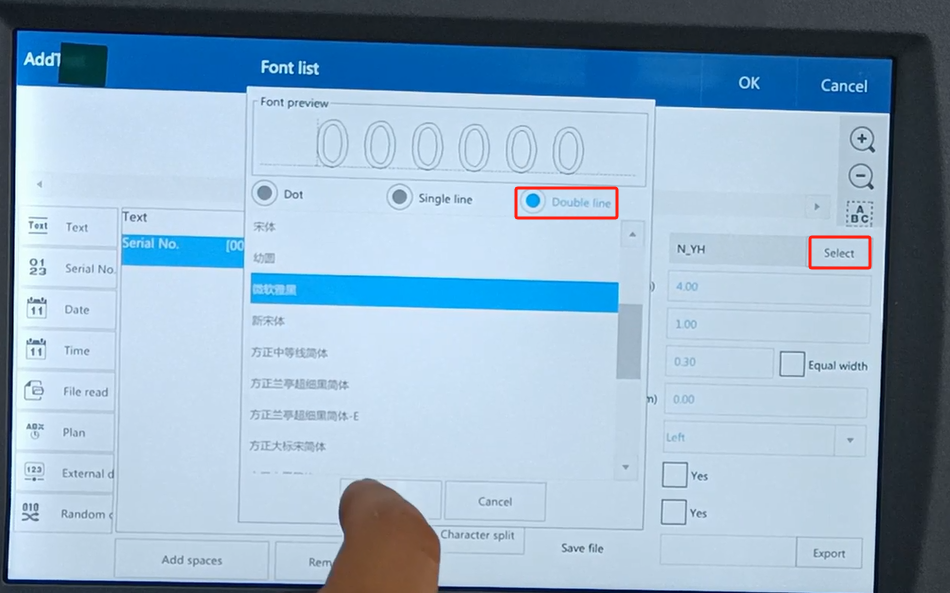
We can choose the font here, so let’s choose the font. Now choose a two-line font. Sure, so OK.
Then we move up. Find we move very slowly. Then we changed this 1 to 10. He moves 10 millimeters at a time. And the Angle, and when can you rotate the Angle? If we change 10 to 90, and then rotate left or right, this rotation represents the angle. And then after we pick him here, we mirror him here. Is a direction of a font.
Our one is a little small now, I choose this 10, a little bigger. Then its hollow-out font, its double-line font is wrong. And then we dot the fill, which has a line spacing, and the smaller the value, the slower we print. The tighter it fills, the darker it becomes. Then close it, and then this filled font is ready. All that, then we can continue to create either the date or the time.

We will just have a date. This is the font, there was a dot matrix we didn’t choose. Just pick an embellishment font, and then make sure.
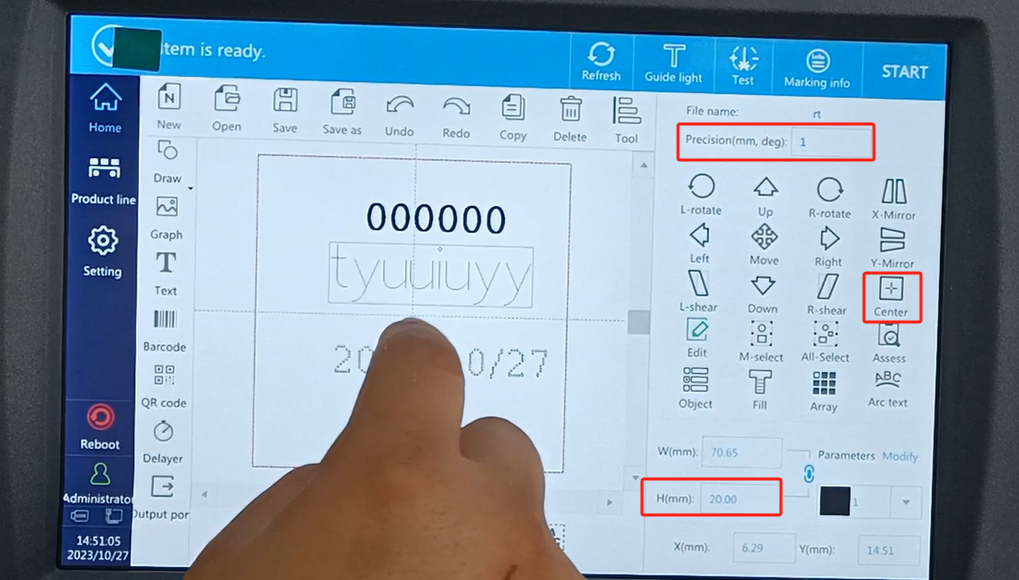
Then we give it a size, 20 is a little too big, choose 10. Note that we just started 90, if you don’t follow the direction, it means 90 mm, one press is 90 mm. So we switch it to 1. Then move down, which is where we point another point. Let’s move it all up a little bit. There is a center here, and if we want the word to center, let’s choose the word, and just click on the center. Then we continue to move up.
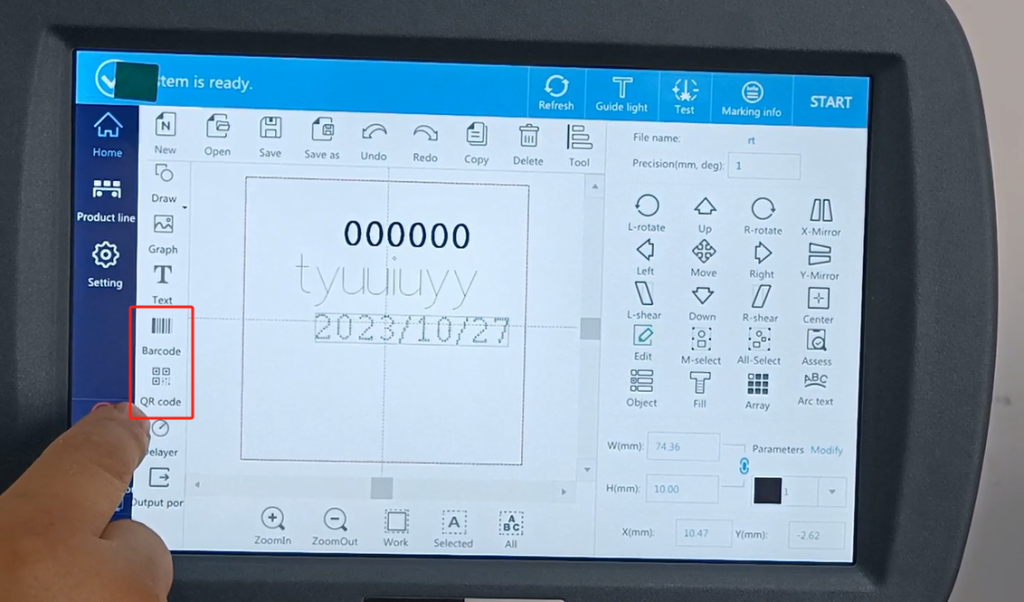
Let’s take a look at qr code creation. We have a QR code and a QR code here. We select the QR code.
Then there is content here. After we click on it, then we can insert the serial number, date, time and so on. Of course, we can make a separate edit of each inserted information. This fixed text, we can also edit on it. The default is 123, I can add extra characters and as needed we can add more characters and determine. We will create this information content.
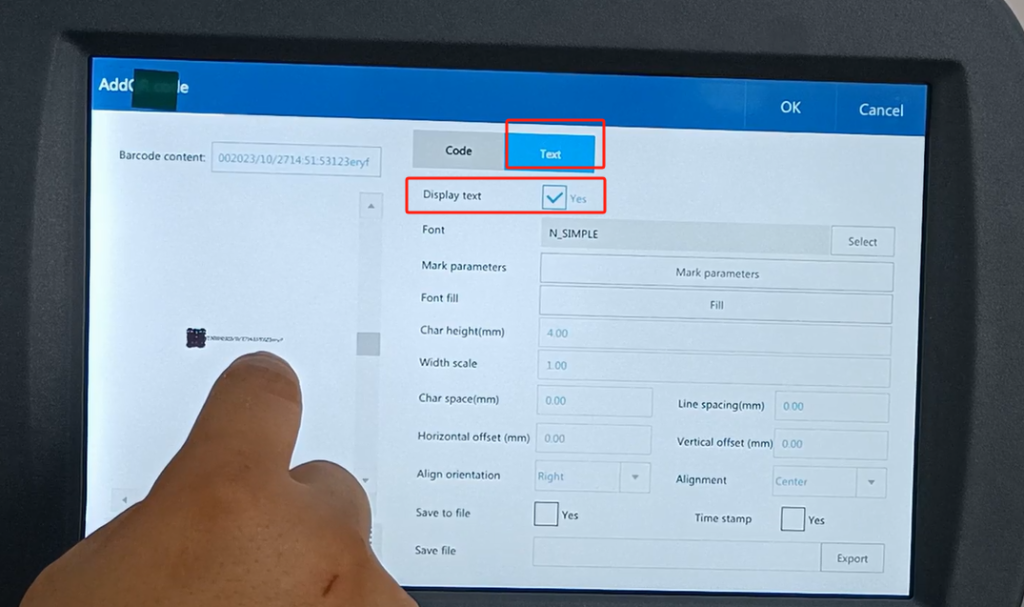
There is so much novel content, if we want to display the text below. Let’s just click on this, and it shows up here. If we don’t show it, we don’t show it. Click OK after the creation.
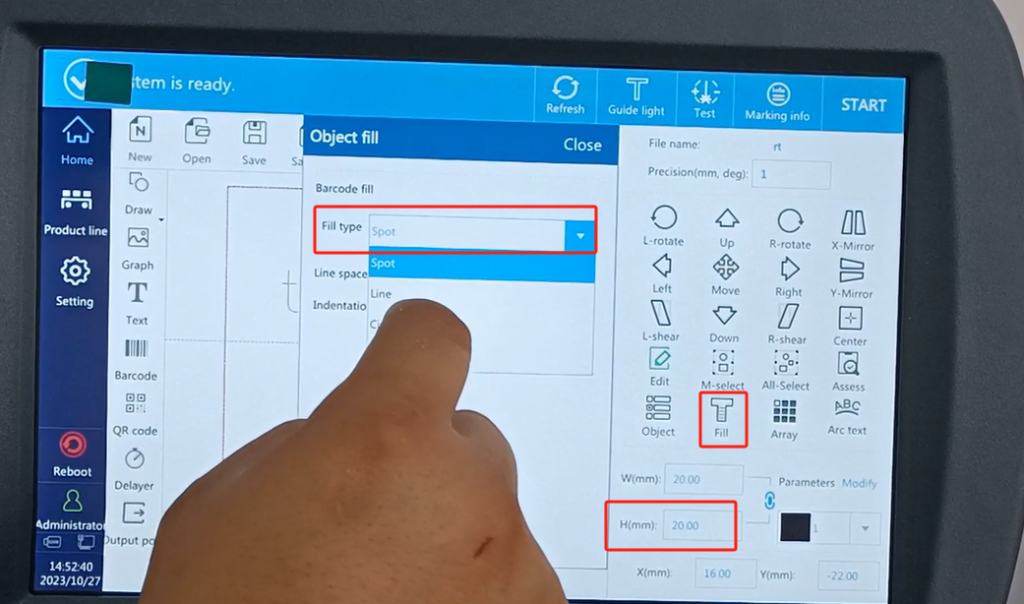
And then now a little small, we enlarge it a bit, 20. OK and then move down, now the QR code is not created well. It consists of points, and if I fill with lines, I don’t have to point, filling here is optional. Now that the point is filled, we choose the line. Then it closes, and it becomes physical. This is a QR code, and you choose the same bar code. Of course, if we edit this QR code for it, it not only has QR code, it has QR QR code, DA two-dimensional code, and a PDF417 code. Can be changed.
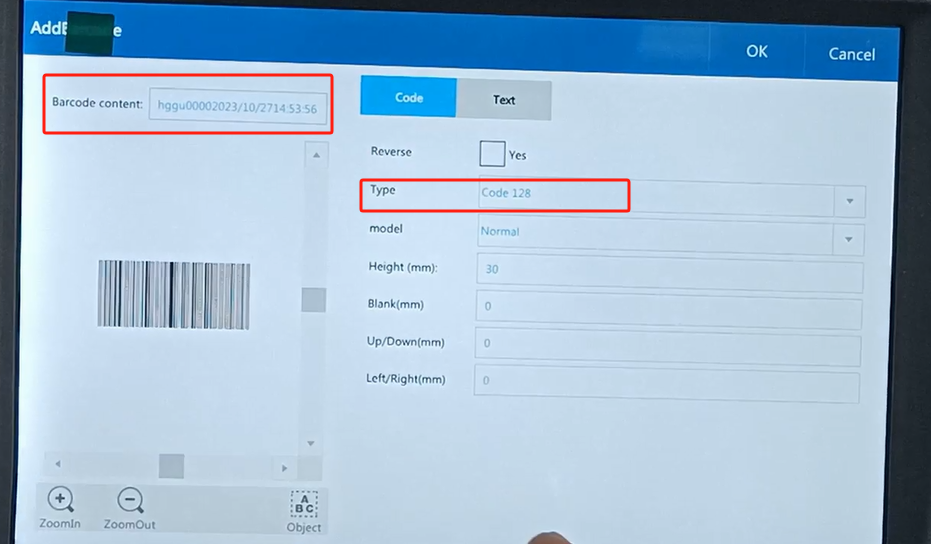
Let’s look at the bar codes. The bar code is the same as the QR code is the same, the creation is the same. We can choose the type here. We’re right here. For a fixed text, we directly enter a fixed text we want. Fixed text is then determined. Then we want if there is a serial number, increase the serial number, increase the date time and so on. It can all be set up here. If we want to set a certain value separately, we can select it and edit the time or date. Edit the type you want in this place and plug it in. After the plug point OK, then point OK. Then we have created the barcode. This line code has already appeared well.
We can fill it in, and after we select it, we can fill it in here, too. And then it closes, and it’s already filled in. So now that you feel very close words. We can increase it a little bit.
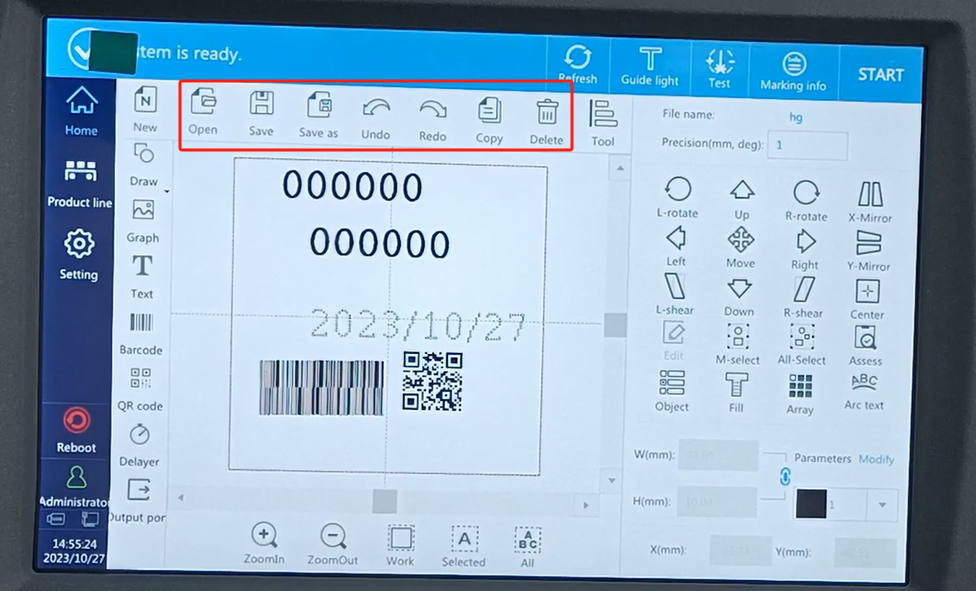
This is what happens if we want to delete a character field. We click him and then delete. So if we are going to copy it. After we selected him. Then you will click on it and you will copy it. If we want to move little faster. Let’s touch the screen. We can move in the touch screen, move with our hands, or move in our direction. After the translation information is built, if we save it, we will click to save it. So if you want to save it as a thing. We save as and enter a name to it. We will keep a name for him. Then click OK.
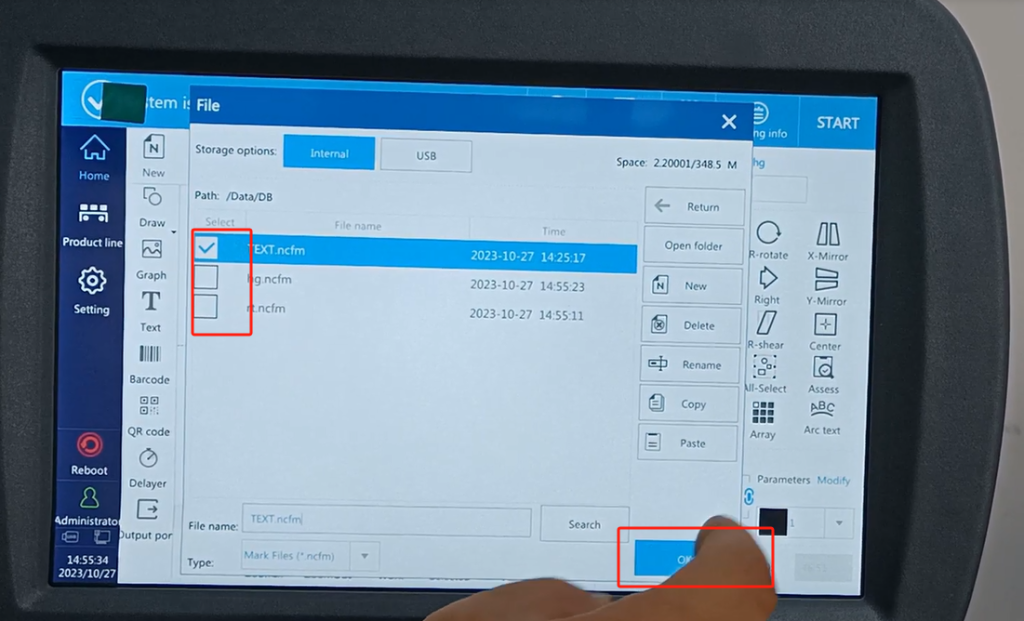
So if we want to open it, let’s open the one we had created before. Save a good file. You pick it, you pick one. Then point open. Then a previous file will be opened.
There are also paintings on here. Painting and you can draw a point. Draw a circle and so on. Draw a circle casually. This round. After it is selected, you can change it here. Change 25 can be changed to 40. This circle can be large, drawing this commonly used. This is an editor of the main message.