
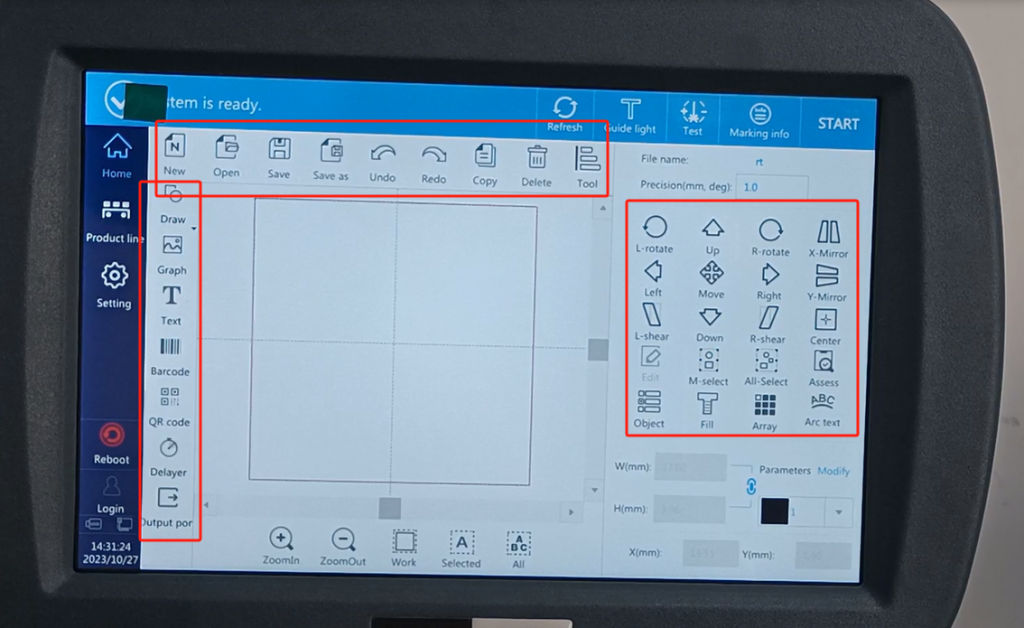
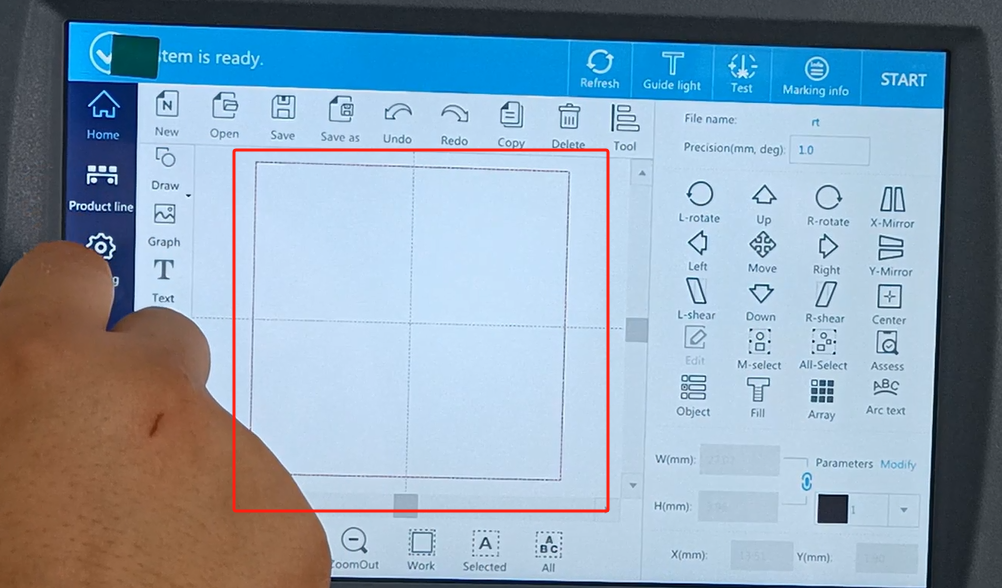
Let’s look at a menu explanation in the English interface of the CFB 2 laser machine. First of all, we have the main interface here. On the main interface, there are new information, open, save, save, restore and cancel, and copy and delete. This piece is the information creation. Then here is a movement, rotation, direction, and so on. This is to create QR codes, edit fonts, draw drawings and import graphics. Here are the few buttons we mainly talk about. There will be some information to create this and we will go on it in detail.
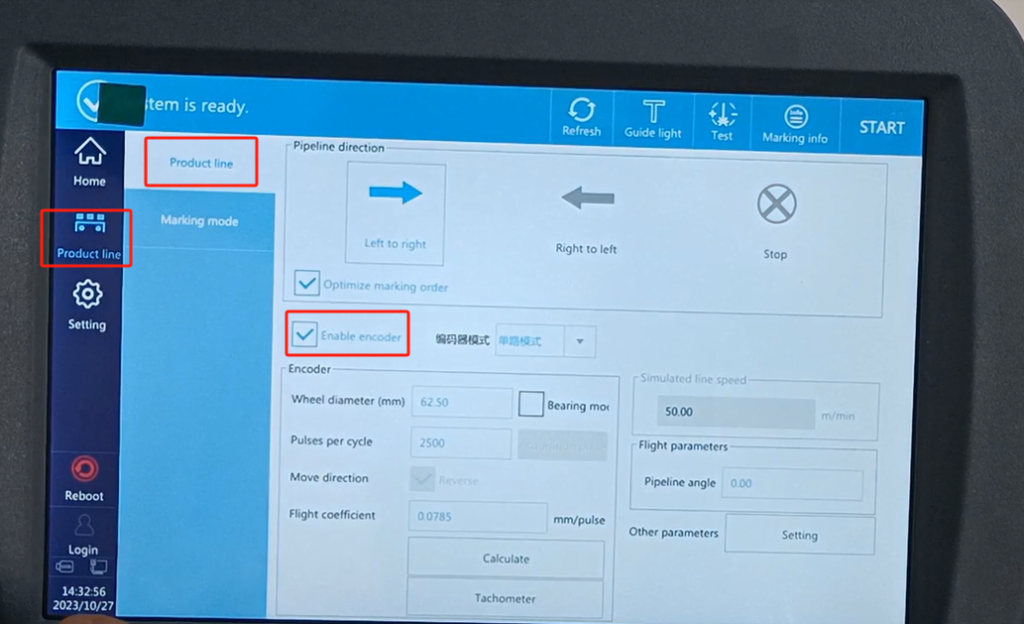
Let’s look at the production line setup. We can see left to right movement, and the product goes from left to right, or go from right to left. It depends on our real product from left to right or right to left. If it’s from left to right, we go from left to right. Of course this is static printing. If we choose to fly, we choose left to right or right to left, and one of those two. We have to enable the encoder. Its wheels must have the same diameter. And this is our pulse encoder as much as a pulse as we fill.
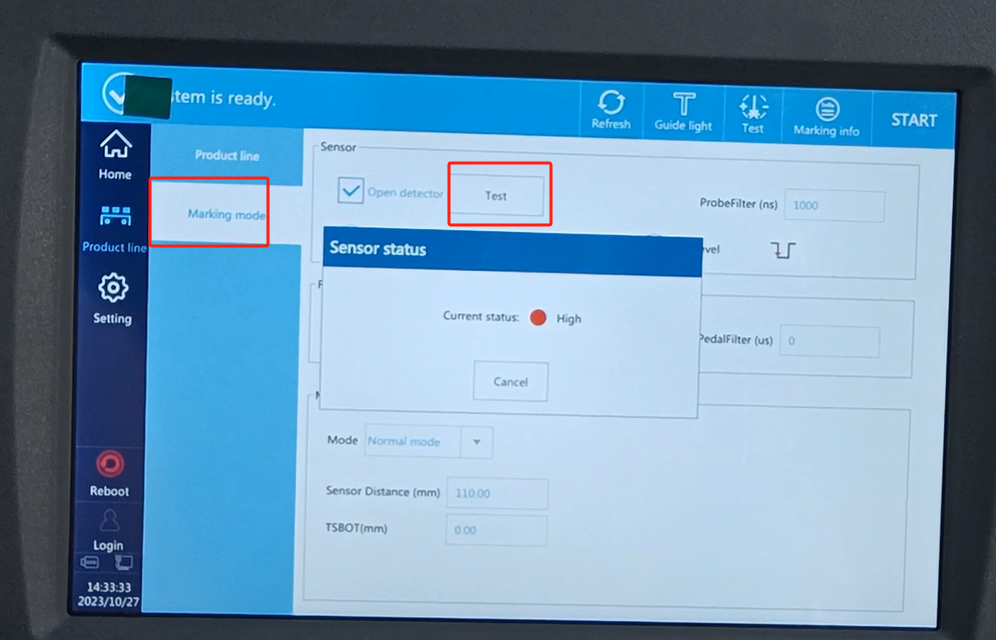
There’s a molecular sensor here, which has high levels and low levels. You can also test the sensor. Let’s test it and then we can look at it being high and low, which means the product is high. If the product is taken away, it is low, it does not sense the product, if the product is not put in, it is low; if it senses the product, it is high, if it is high, give the coder a signal, it will print.
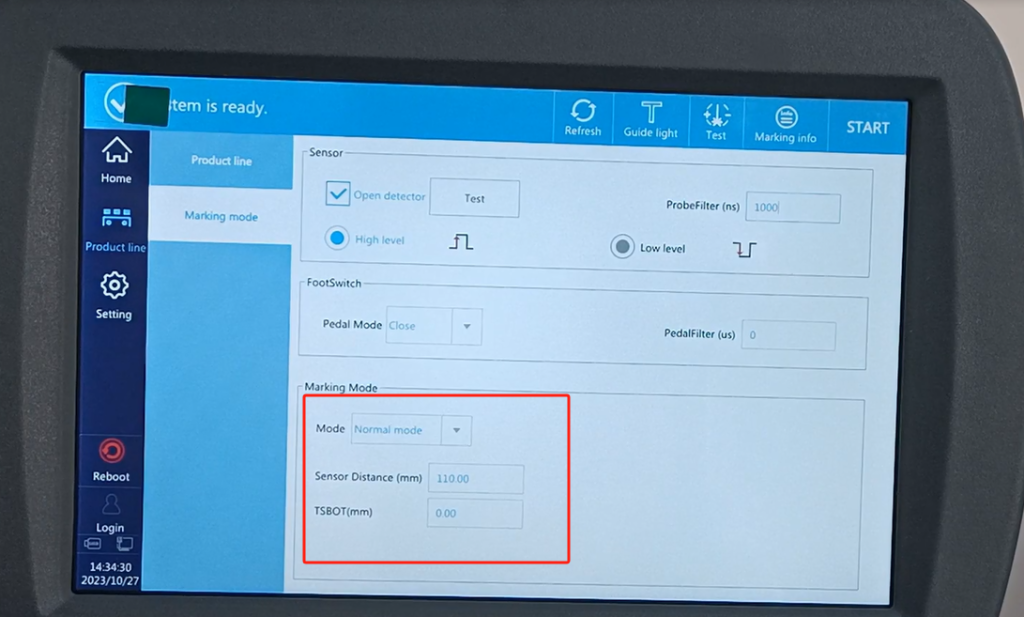
There’s also a pattern below, which is very important. In this mode, it has a normal mode, which means that we just say the induction call once. This is a normal mode dark type once. Then this distance is equal to the delay, and the dark distance to the nozzle. Delay this can adjust the left or right of the product, the left and right of it. This lockdown time is measured in millimeters. If you set a number within this interval of 10 mm. If we set 10 mm, we photosense a product, from the induction to the product to its 10 seconds, this is not time, is within the distance of 10 mm, if the sensor is induced again, or many times, it will only recognize your first signal.
There is a pipeline mode over here. This pipeline mode, this is for pipe, cable or pipe. This unit is a millimeter. The first is that when we first started, from the induction of the light,From scratch, a distance between the first message and printing it. Let’s set it here, this is the following, say the interval between the two information start positions. Remember that there are two information, which is a distance between the starting position of two adjacent information. For example, we need one more distance apart. We first have to calculate the length of a piece of information. A message length is 20,20 cm that is 25 mm. If I want the interval to be 1,000, one meter, and type the second message, then I will set the interval to 1,250. Because the previous one 250 is the information length, the second one is still 1,000 apart, and the blank one is one meter. So he generally set up 1,250, and the gap between the gaps between the two messages is one meter.
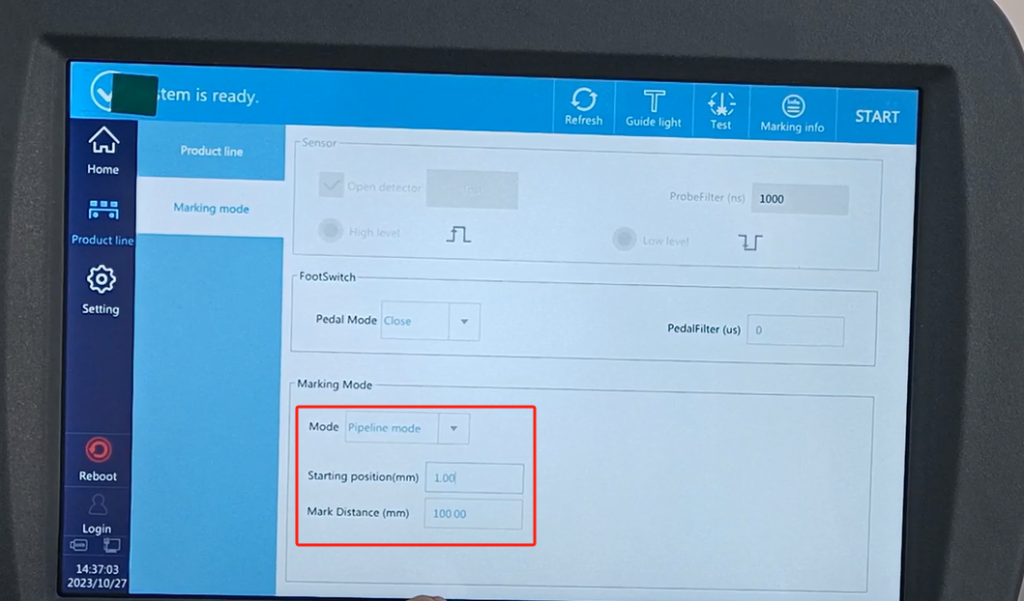
And the following one is a continuous spray-printing. This can also adjust a spacing. The spacing is the same as in the line mode. There are continuous printing here, for example, a number can be once, you can choose two times, three times, four times, you can also choose the infinite point, that is infinite infinite times. We can choose from this one. What we often use is the pipeline mode, and there’s a normal mode. This is our production line.

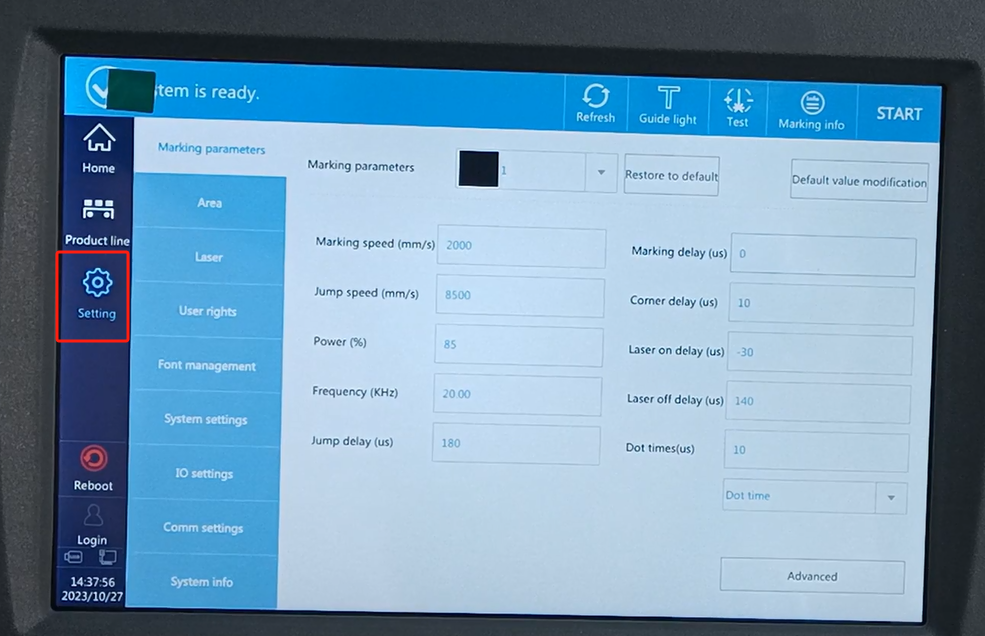
Let’s take a look at the Settings. This page is the most commonly used one. The rest of the words we are the factory has already set good do not need us to move. We need the mobility. Is one is a printing mark a speed, one is the power. This is the frequency, and this frequency is almost unchanged. Because of its value of 20, it is suitable for more than 90% of the products. Then this speed, we can set an appropriate speed according to the direction of the product movement that we can set. When our conveyor belt speed is the same and the same, the slower my speed, the more the printing speed, the more energy. The faster you fight, the bigger you play. When we print at the same speed, the speed of the delivery line is also the same, I adjust the power separately. The greater this power.We print a big energy of a product, and then the stronger the depth of the printing. This is where we are the factory is set and we don’t have to move it. This one is all set up by us.
This is one area of our print.
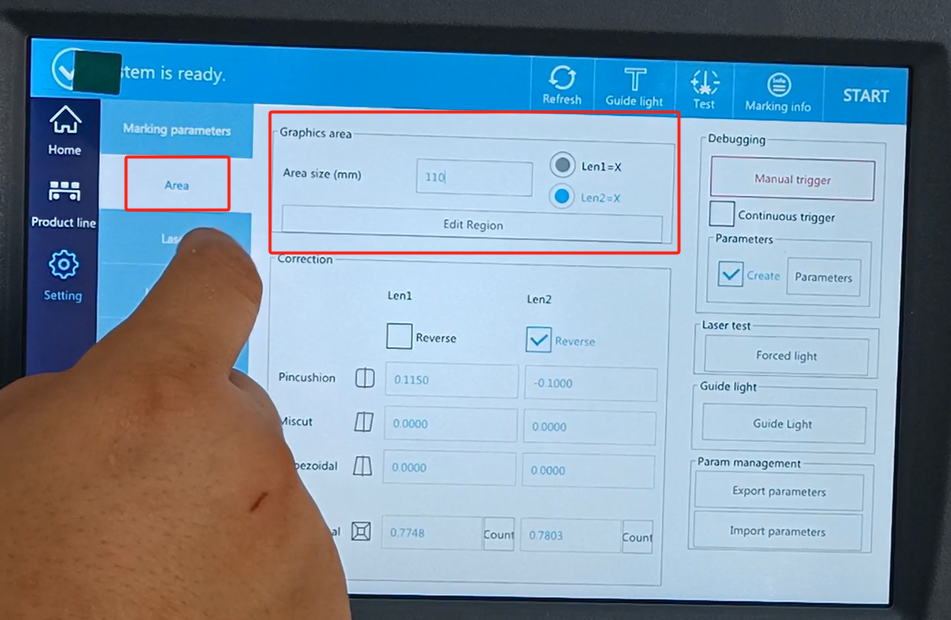
Printing an area is just like us. This is a square of 110.
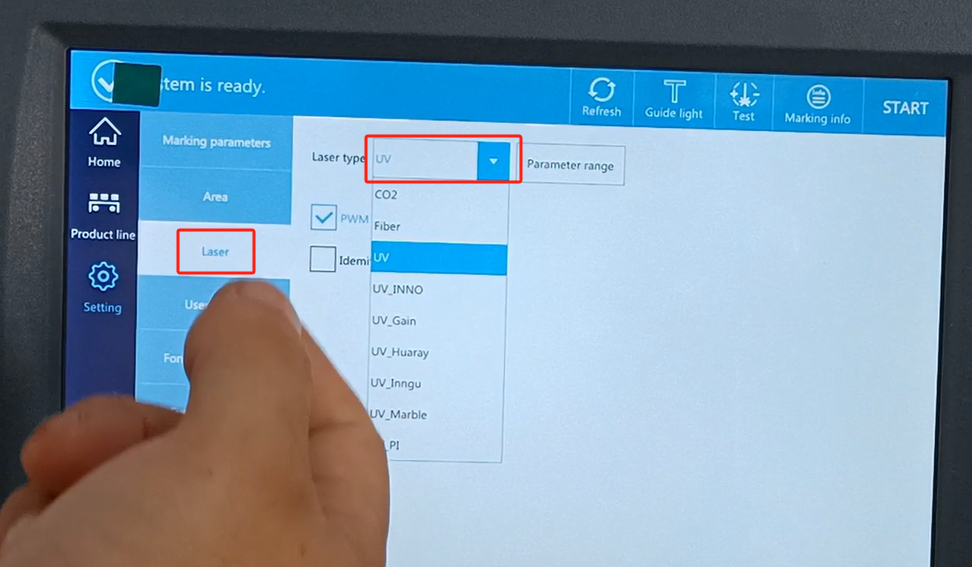
Let’s look at the following type. We are a UV now, so we will choose a UV. Our side is carbon dioxide, so we choose carbon dioxide. Is the fiber, choose the fiber. We have set up the factory operation.Because we have modulated, choose UV, and then the parameters are suitable for UV. So if we choose something else, the parameters may be factory, so we don’t move it.
Let me talk about this language here. There’s a language here, and there’s a time. System time The system setup is inside.The system time can be adjusted. Language can be adjusted, and there are many languages here. What language do we need to regulate it. The rest of the words we are not commonly used, this is an explanation of the menu.

This side is one direction, one direction for the front side, the left side and the right side. Build a random message and say it briefly. Then edit the fixed text to make up a random message, and then click OK. Here we can choose a font, and a single line font, there are so many fonts. We can choose the double-line font. After choosing one, you can just click OK.
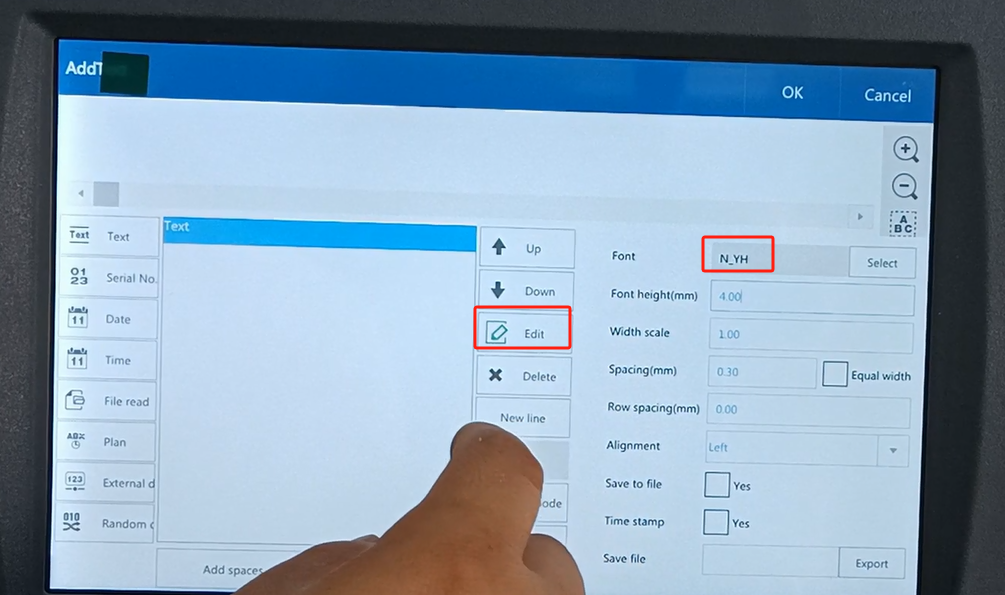
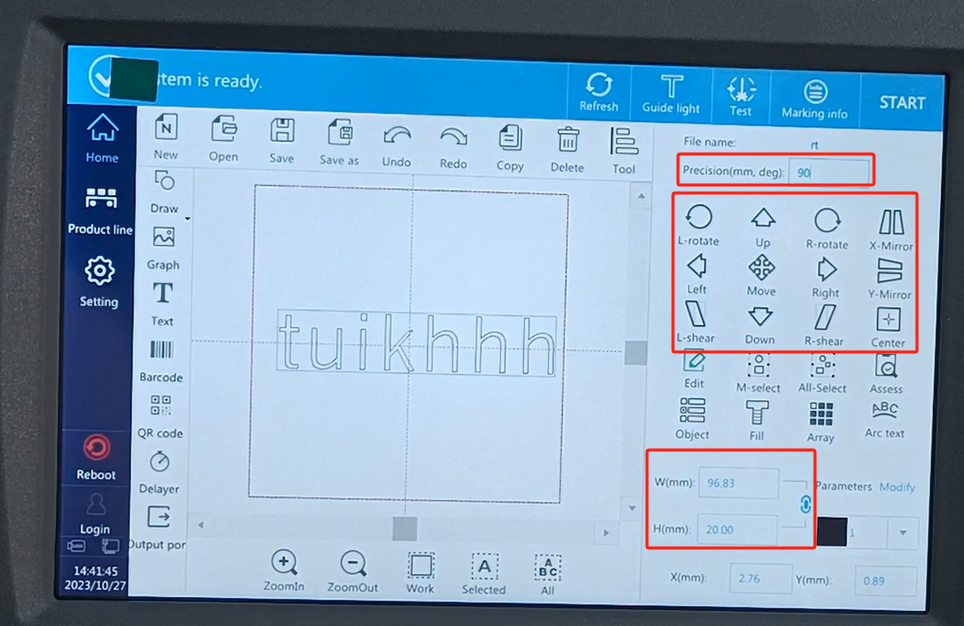
This is the double-line font. Then you can adjust one of its sizes here. After we tune it, we can fill it in or move it. So let’s move up and down, left and right first. Our unit is set at 1 mm.If we move up and down we move 1 mm. So if we choose it with 10, then I move it at 10 mm. If we choose left-right, this represents the angle. So we can choose 90,90 and spin up. If we move left and right, it’s like an Angle. Then there is a mirror image here. It’s just a direction. Then we go to 90 and change to 1, the default 1.
Let’s take a look. There’s all, multiple and all. So if we build another message. Insert a random selection date. We’re choosing one one right now. If we choose all, we’ll choose all.
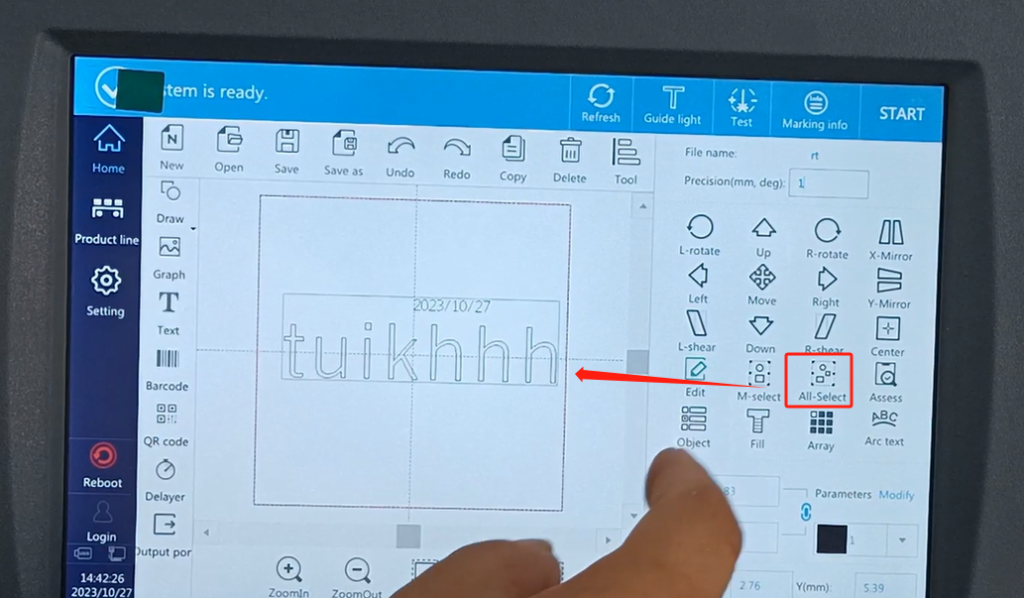
So if you choose more, let’s click on it. Click a message, then click a message he will choose.If we want to choose more, we will choose a few messages to print, and we will just order which message.

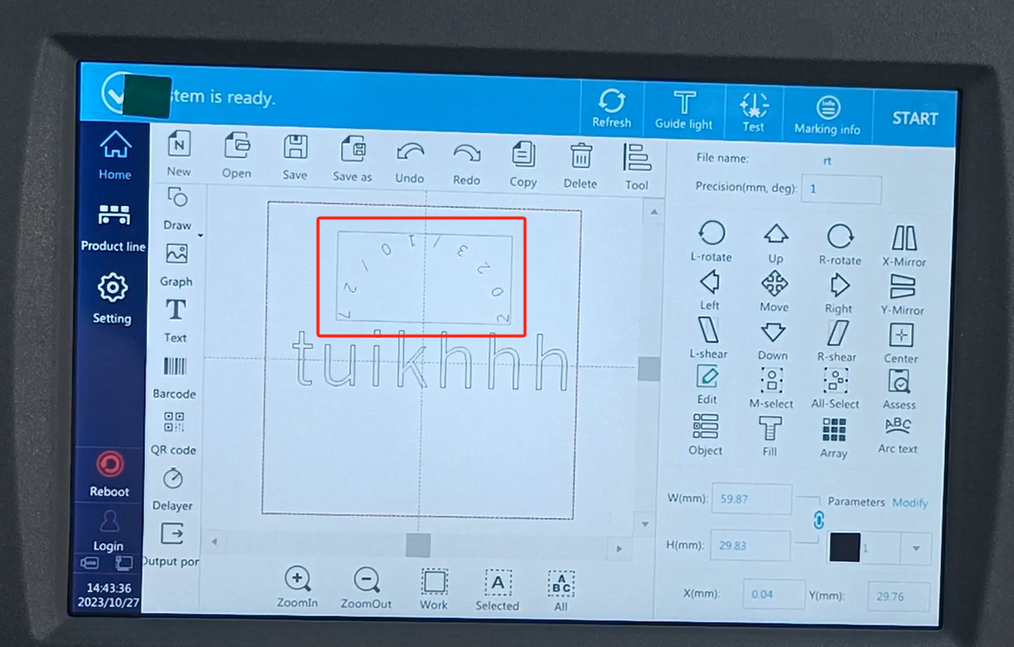
Let’s look at the detail. We want to tune it up. We have this arc, the arc and we need to enable it. After enabling it, we can select this radius. This is also 30, position choose 70 for it, Angle fill in 90. And then we want to make it arc a semicircle. The 180 is a semicircle and let’s choose the 180. Then point OK OK OK.
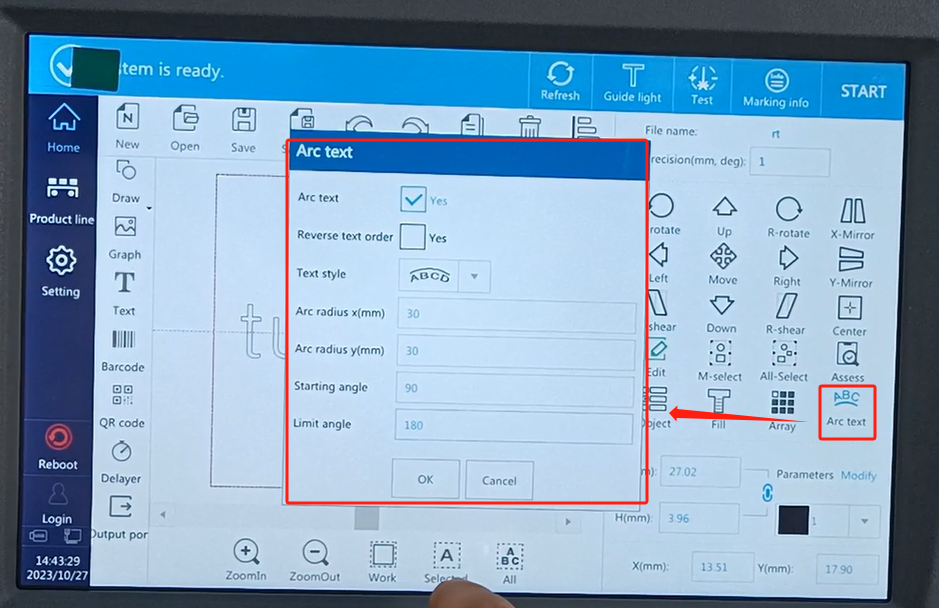
This one becomes a semicircle. An arc is an arc. Print it out in an arc. This is the arc.
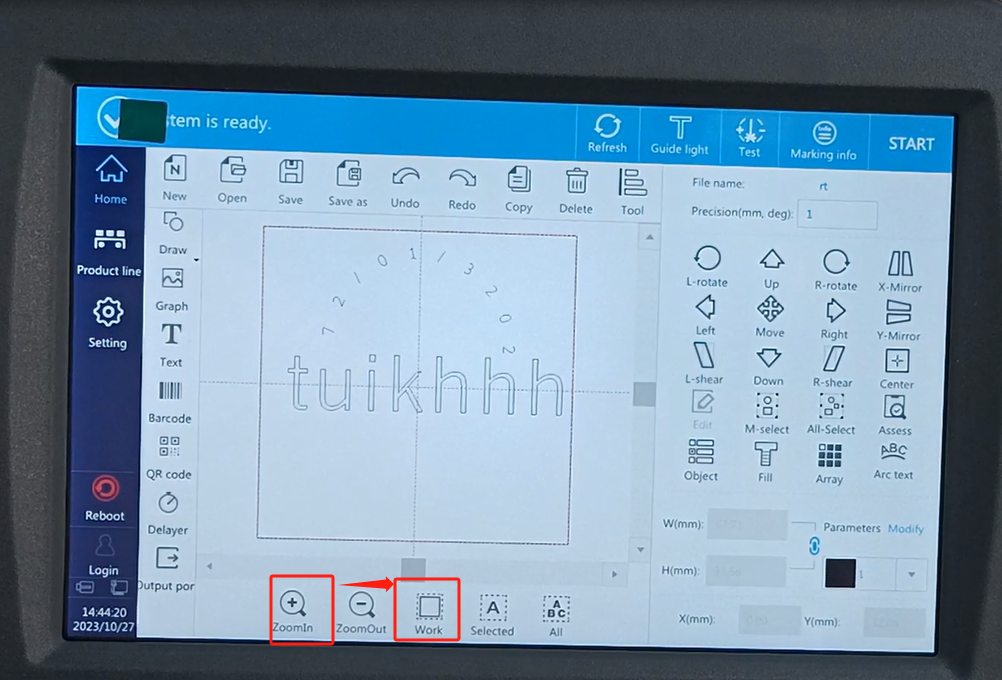
We have a few buttons below it. One is zoom in and one shrinks. If we can enlarge the word, and then click on the work area, it goes back to one of our initial shortcuts.
Another one thing that says is that we also have a reboot machine here. We’ll click on it and restart it. And one more one is a password. If we want to log in, the administrator password is 123. Then click OK to log in. This light becomes green, we can operate all. This is an explanation of the menu.


