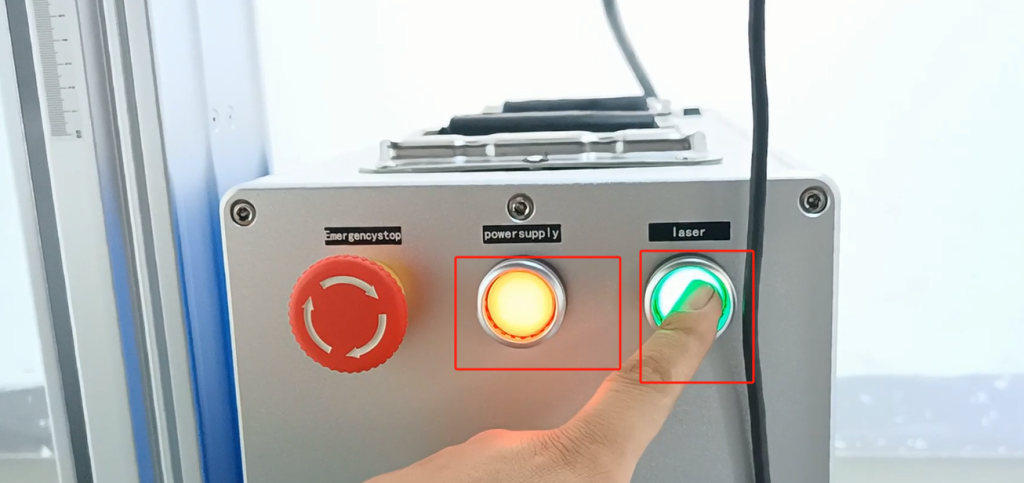
Let’s take a look at the CFB-FL 30W watt laser upgrade.First we turn the power on.
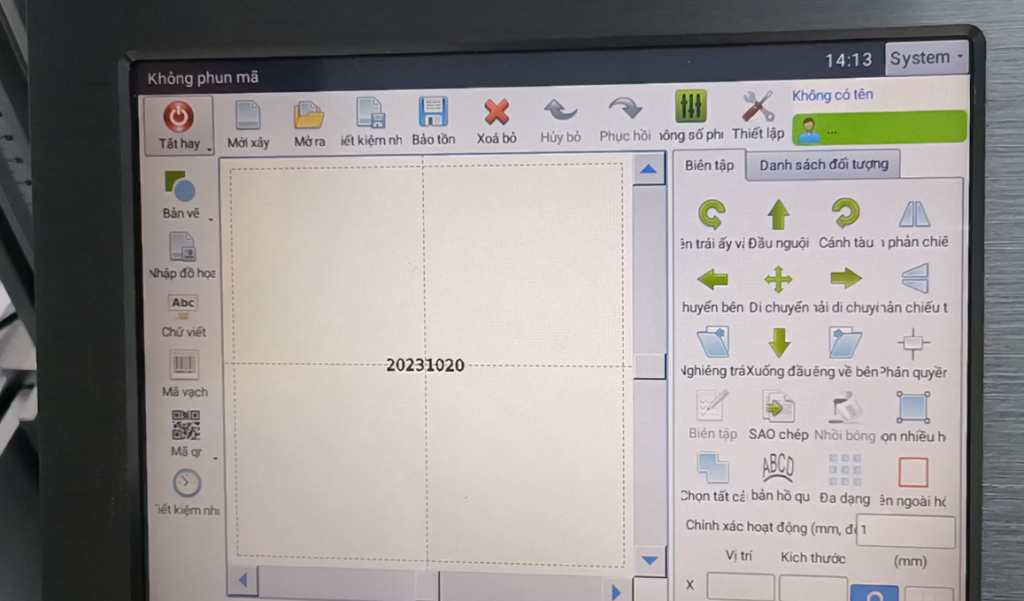
Select a message that we need to print out here.
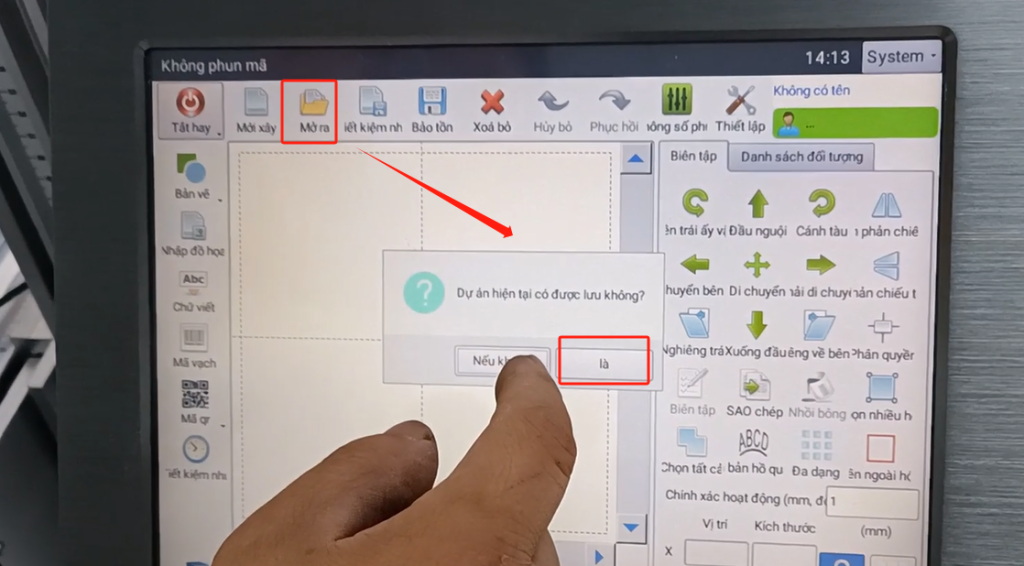
Then bring it up, and we’re going to type this message now.
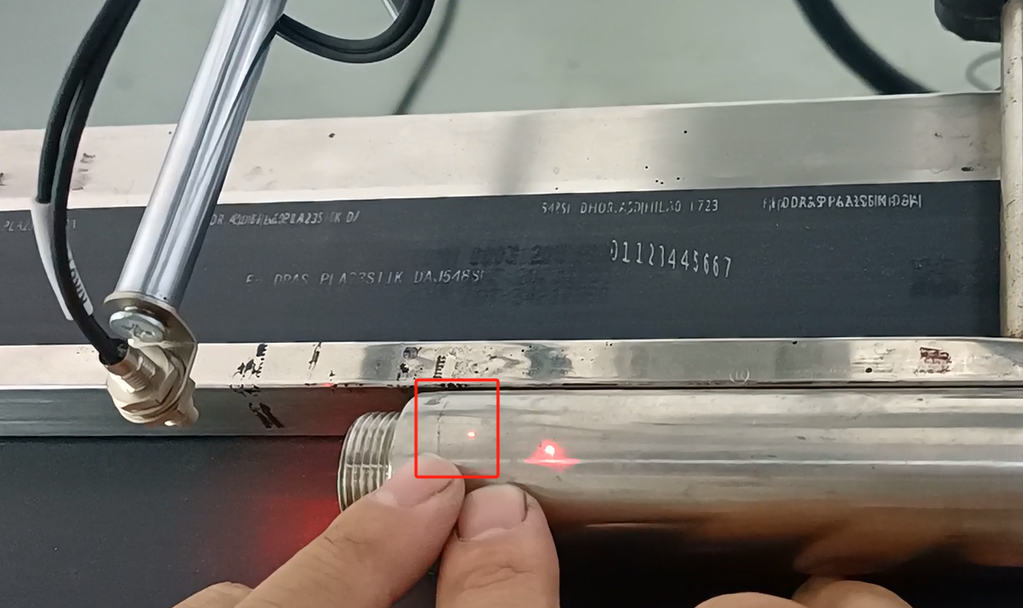
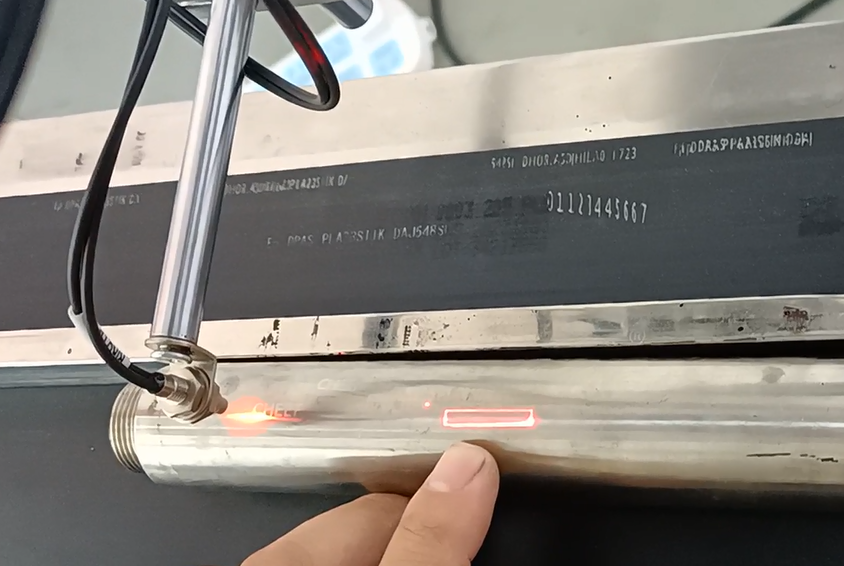
Then the first step is to adjust the focal length. If we hit the pipe, the laser head will be right in the middle of our pipe. And then we now have two points, two points that mean we’re not focusing, the focal length is not correct, and the two points that overlap is our best focal length.

Then we spin up, and then we spin this one.

Then let it two points overlap, so good, this is our best a focal length.
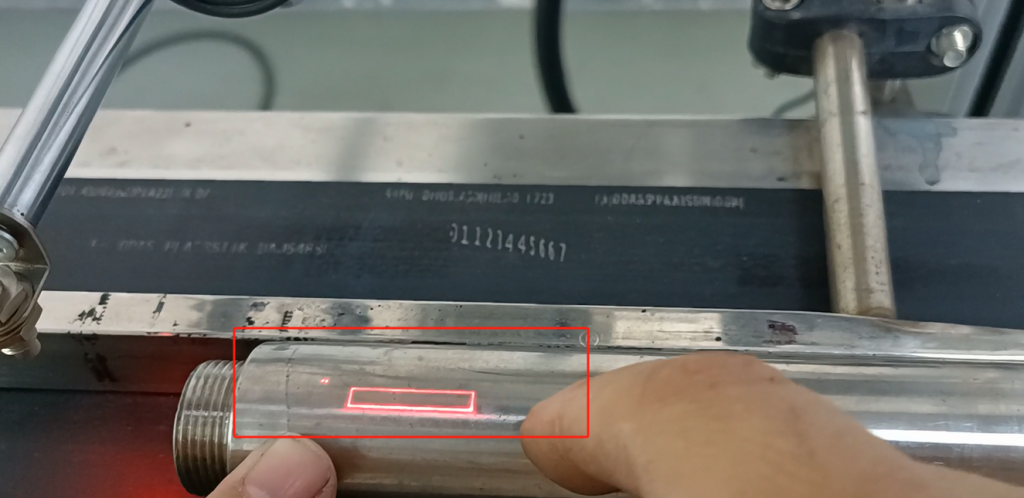
After we adjust the focal length, then we reposition it and see where it hits. Then we are here, and we choose this one.

Then we saw that it hit the line in the middle of our product. Print on our line, and that’s fine. Then after we set this up, we turn it off.
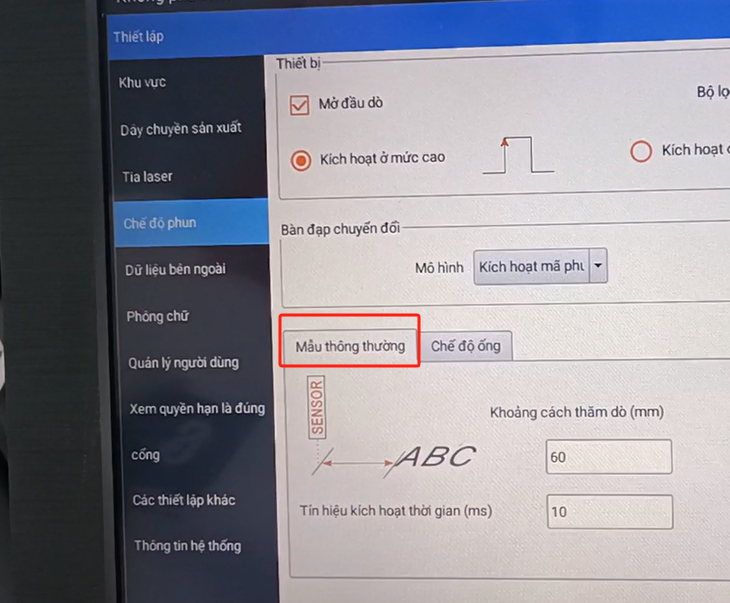
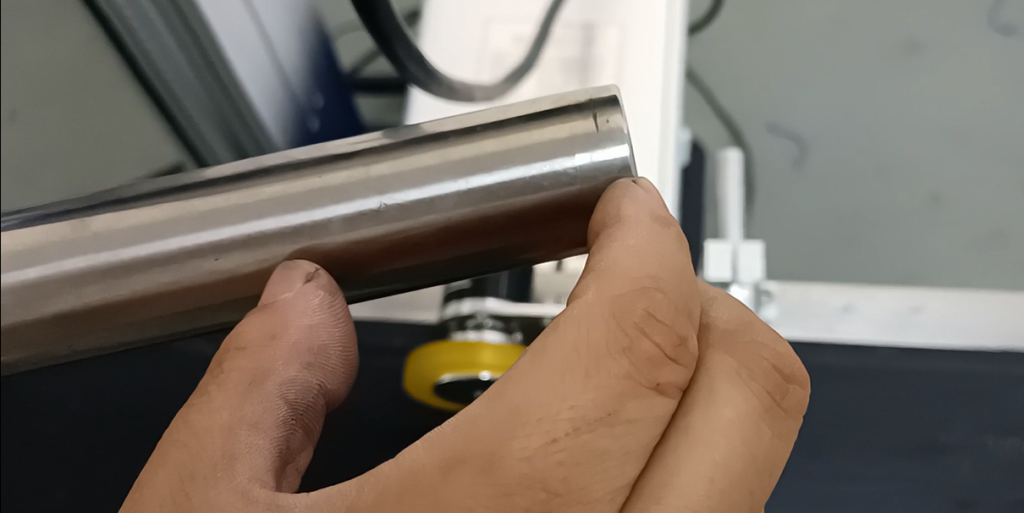
Then we adjust this optical fiber.
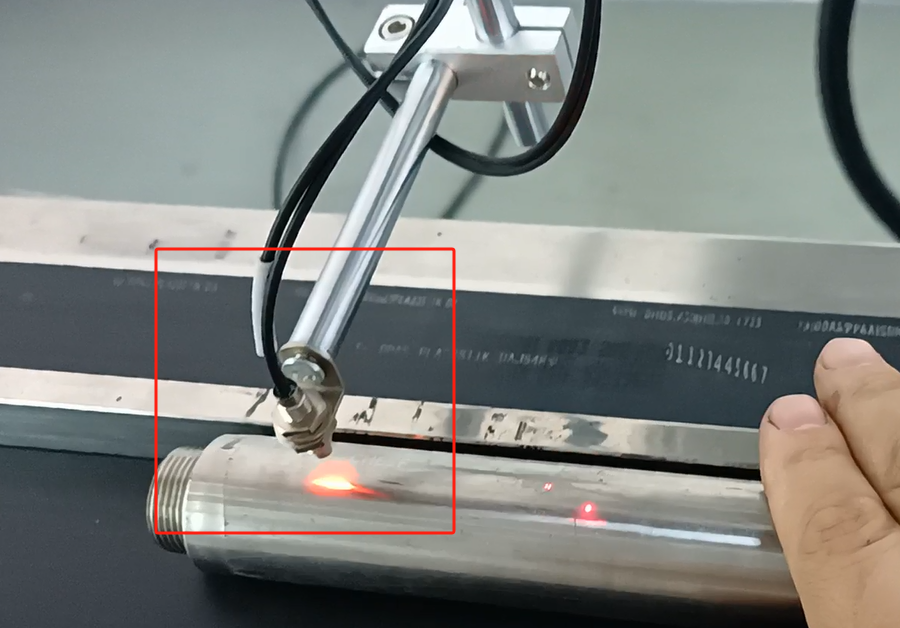
Where does the optical fiber need to fit in? Is needed to sense one in the middle of our product. If we sense the product, we have the amplifier, and then this one is bright; then we don’t have the product, it is out, so it is OK. About below 5cm away from the product, this distance is the most appropriate distance.

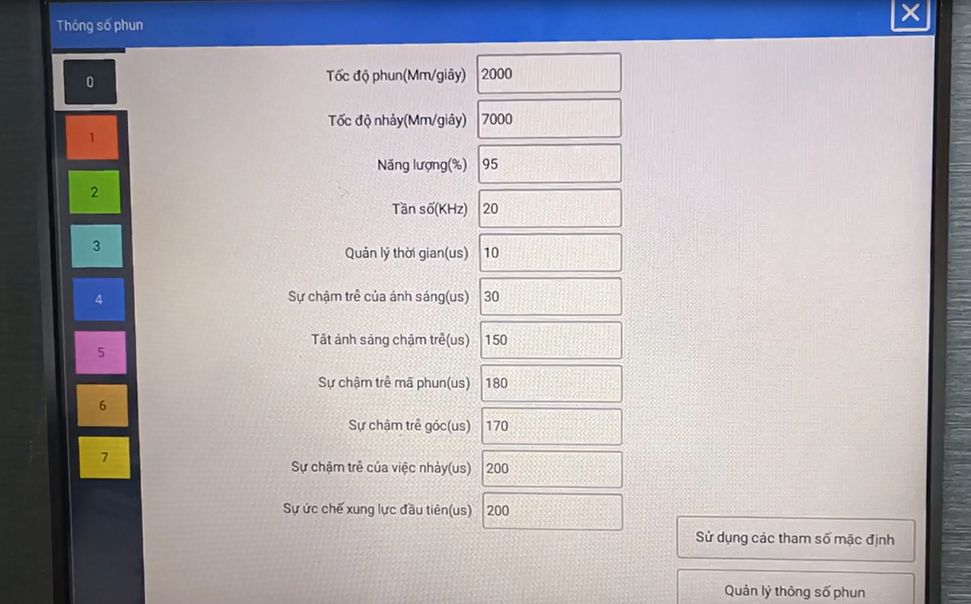
Then after we adjust the two, let’s print it in static first. Our product adjusts this parameter. Let’s play the static first, look at the effect, if the effect can feel, we don’t have to adjust.
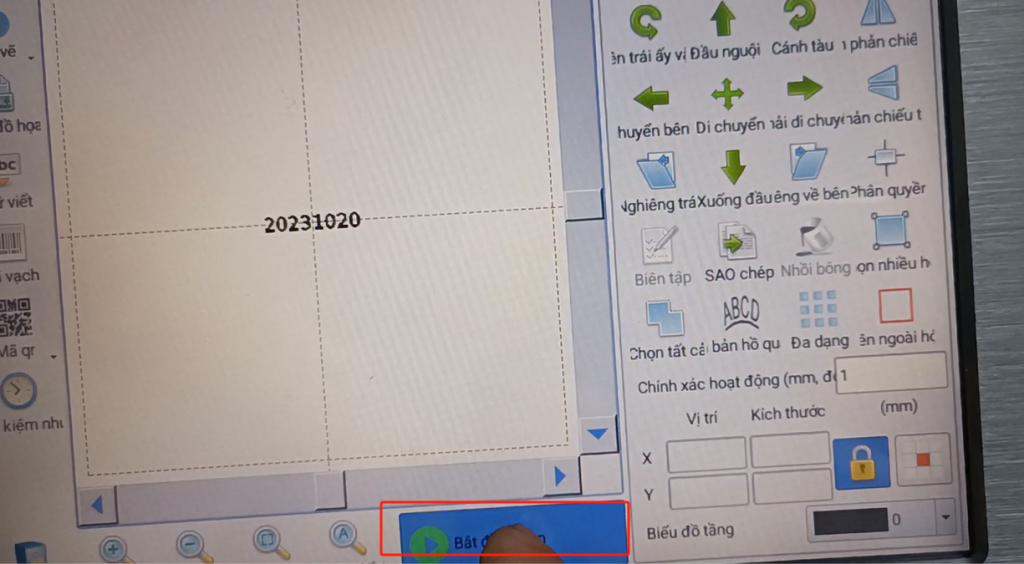
We select the information and click on it.

Select Here for Static Print.
Then print mode, then select normal mode.
Here and then we point on this print. Then give it a location here.
Let’s trigger it manually. Let’s click on this manual trigger.
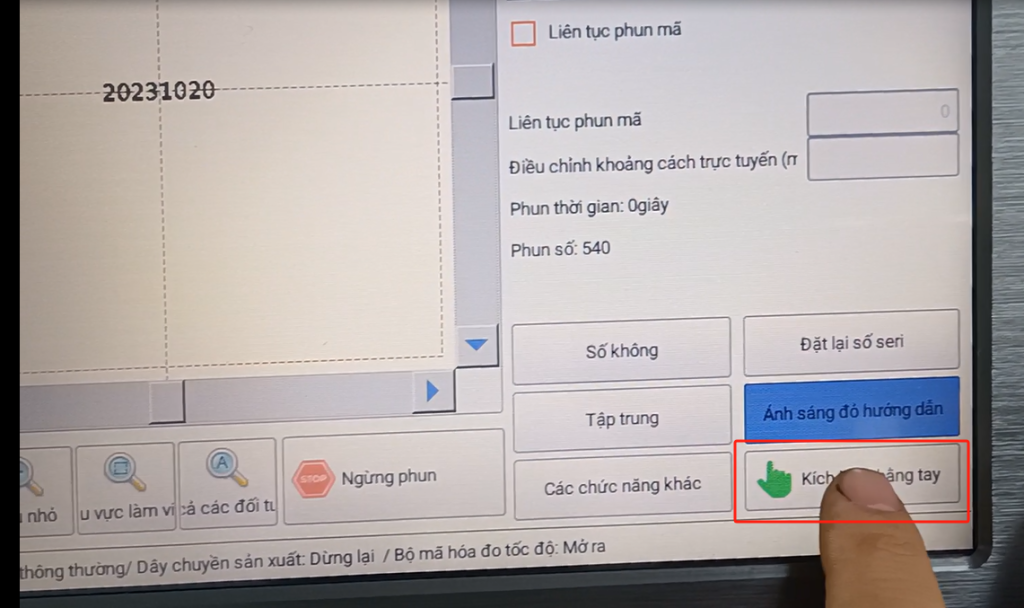
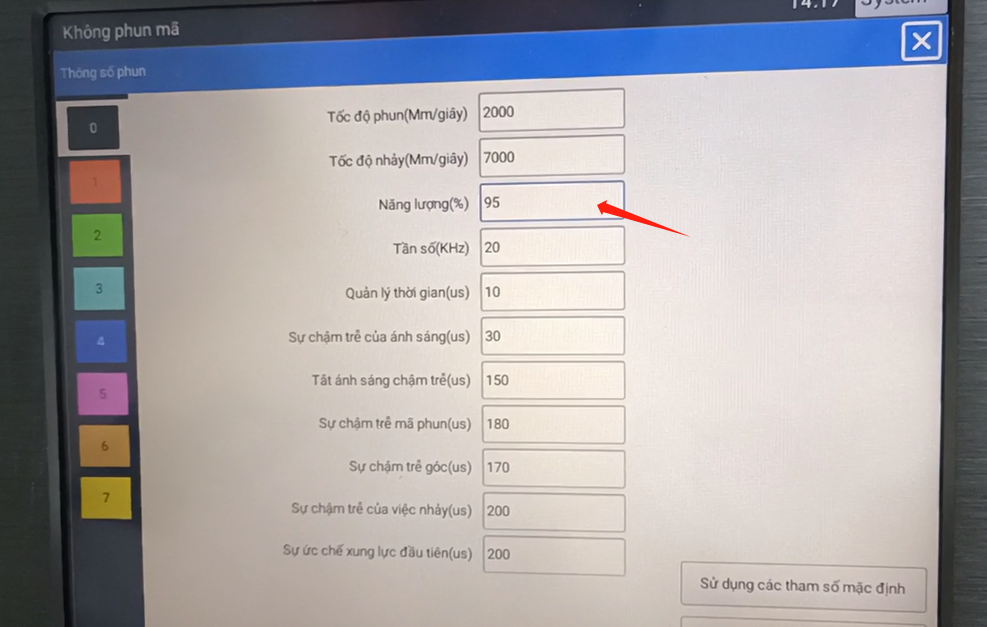
Here we look at an effect of static printing that is like this. So if we had printed, it would have been the effect. If we feel too weak, we lower the speed and increase the power (or we increase the power, or we keep the power down).

If we feel that this effect is ok, then we can fly to print according to this parameter. Of course, my iron pipe, my power has been adjusted very much, if the plastic, the value may be 50 will be enough. This speed can be increased, now I can adjust to 2,000, to 3,000 or 4,000. If we make iron, we can only adjust it to 95, so that the effect is more obvious, hit the words can see clearly, we now print with this parameter.
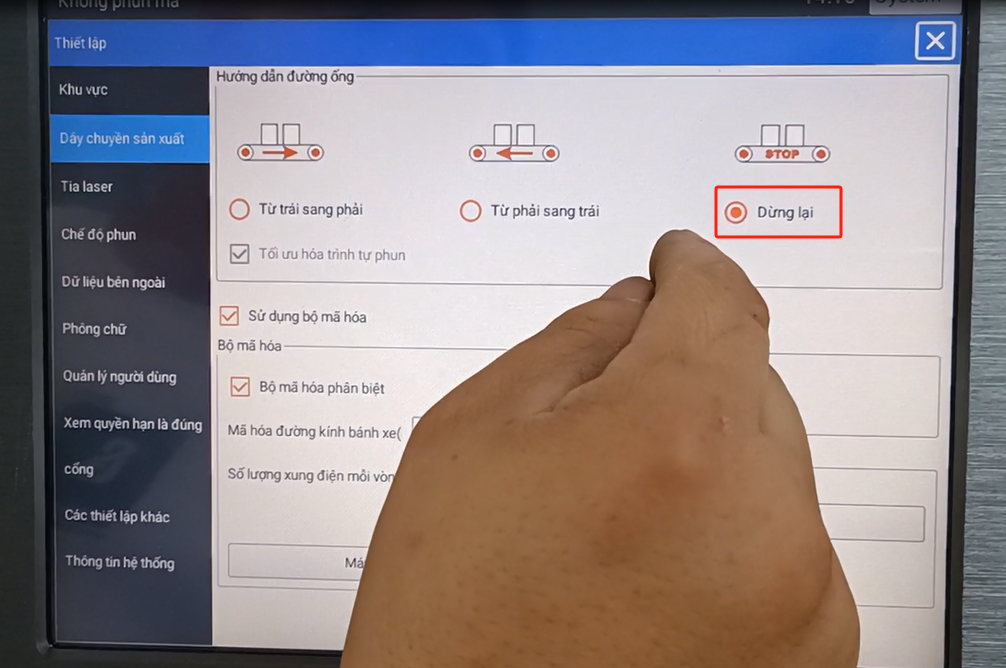
Now we turn it on in flight mode. Because our production line is from left to right, the product is from left to right, so we have to choose it. Then the encoder mode to open, must choose to use the encoder.
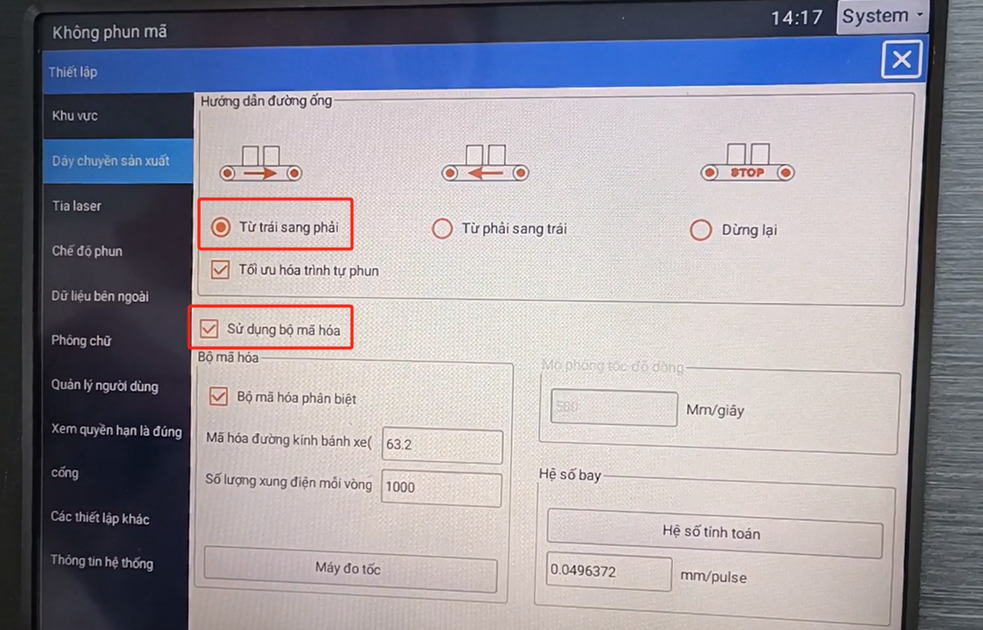
And here, the pipeline mode, and we make the pipes.
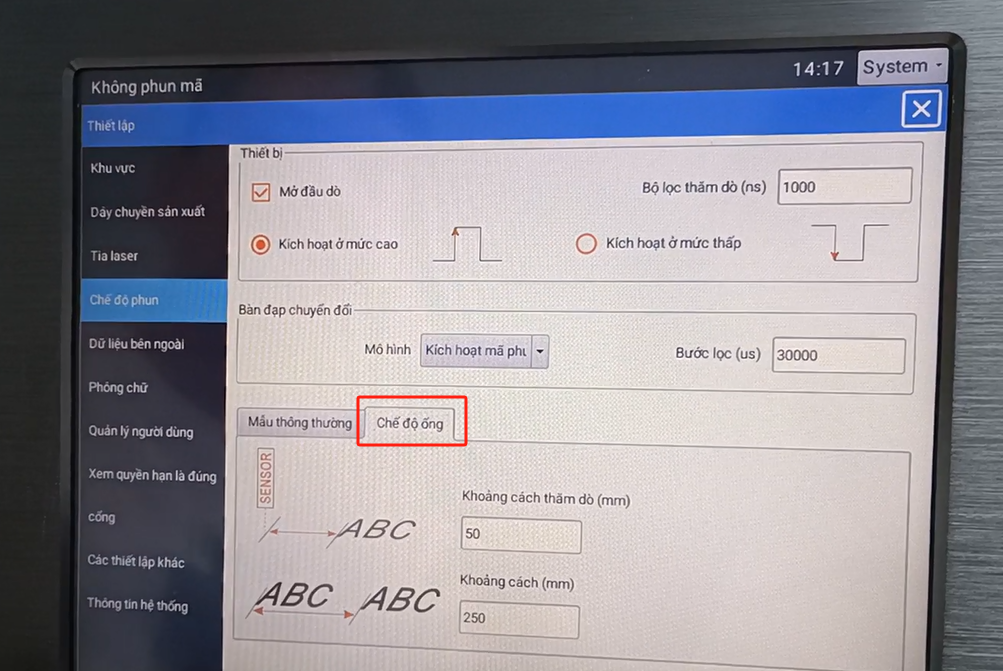
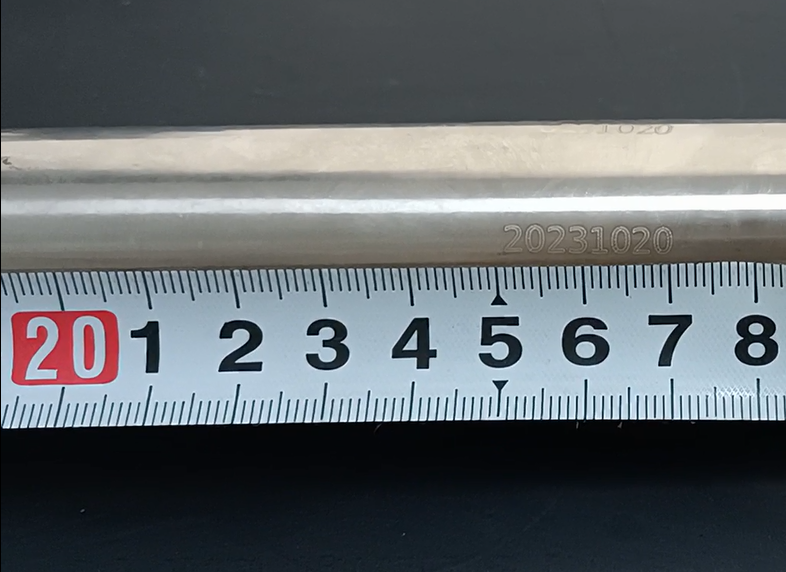
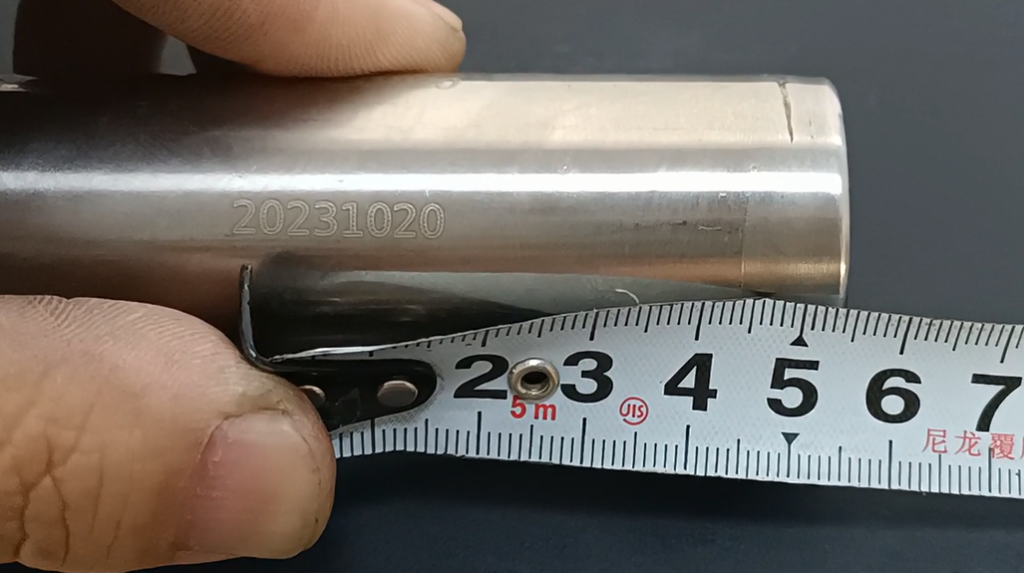
The first type in pipeline mode is 50, which means the distance our product starts from this is 50. After 250 refers to the distance of the two information starting positions. For the first message, the message is “123”. The interval between the first of the first message and the first of the second message is 250mm. After a while we hit the information, we measure the size is right, we set this 250mm.
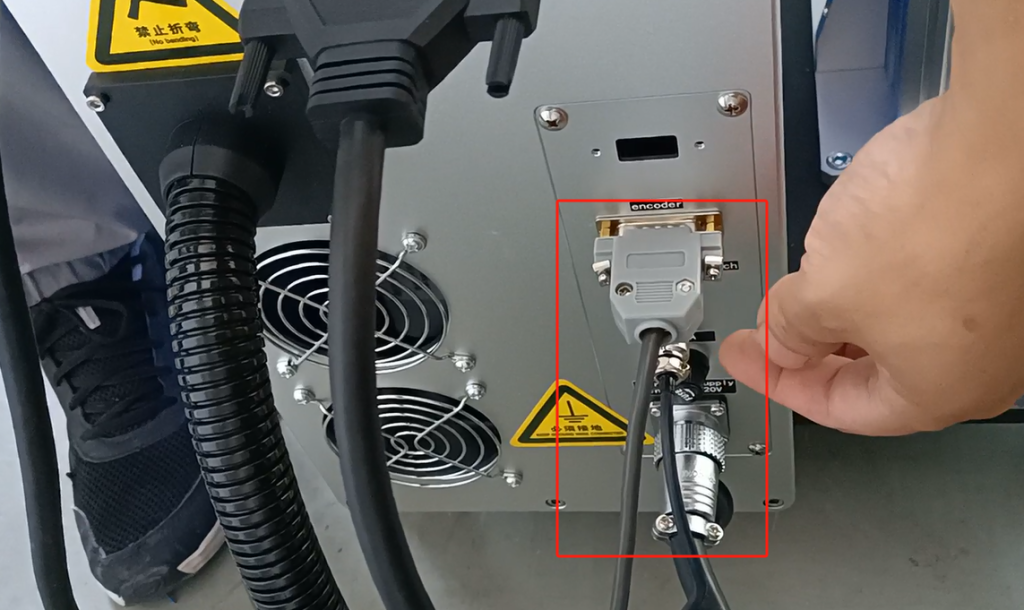
Now we will click on the print. I talk about this flight encoder must have resistance, not idling.

We must connect this line, must plug in the encoder; and optical fiber, must insert it.
Let’s start to print out the information “2023”. Then look at this “2023”, I measure the size, the size is 250mm. Let’s measure this one again to 250mm. It’s also 250mm from here. The front one is about 50mm. This is a basic operation of our flight tube mode, the fiber-optic 30-watt flight tube mode.