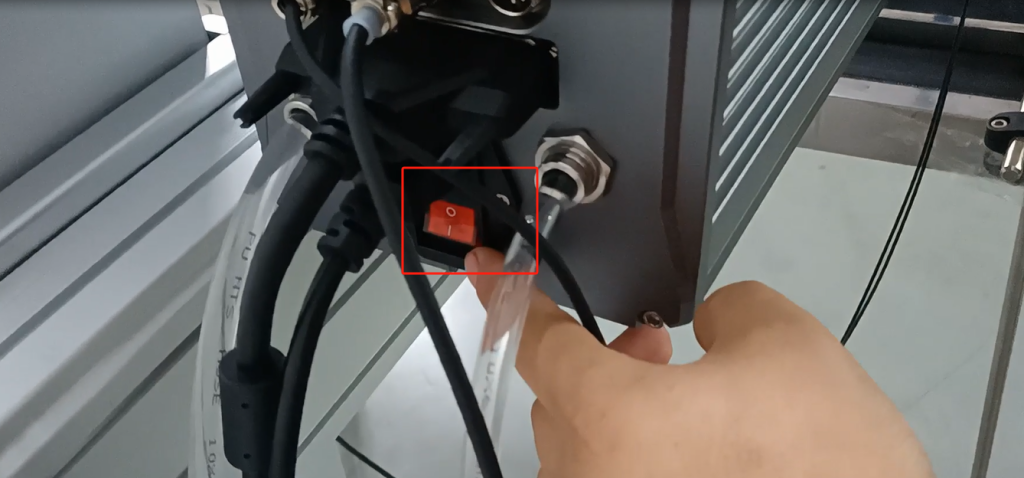
Let’s take a look at one of the startup steps of the CFB2 UV laser machine. First, open our water tank first, and open it first. We connected all the lines behind the power cord. After connecting it, then we can turn on the water-cooling switch.
Note that we must not fold the tube.
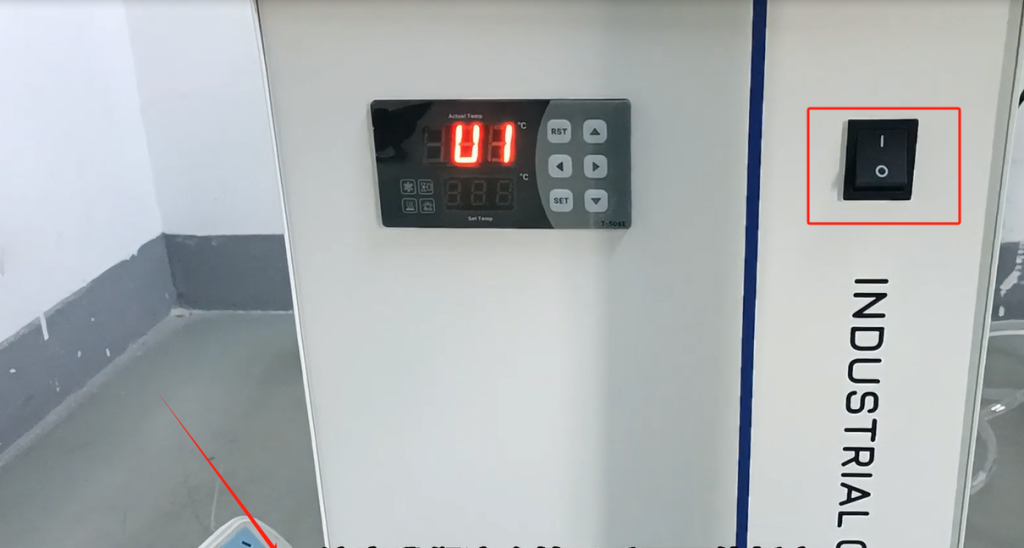
After we switch on and off the machine, we must turn it off if there is a leak. Turn it off and solve it again to solve the missing problem. We wait for the water temperature to reach the water temperature we set. Now because we’ve just used it before, the water temperature is good. If you first time, when the water is put in, it’s not 25 degrees. It’s going up. This will take a few minutes. We are already well by now.

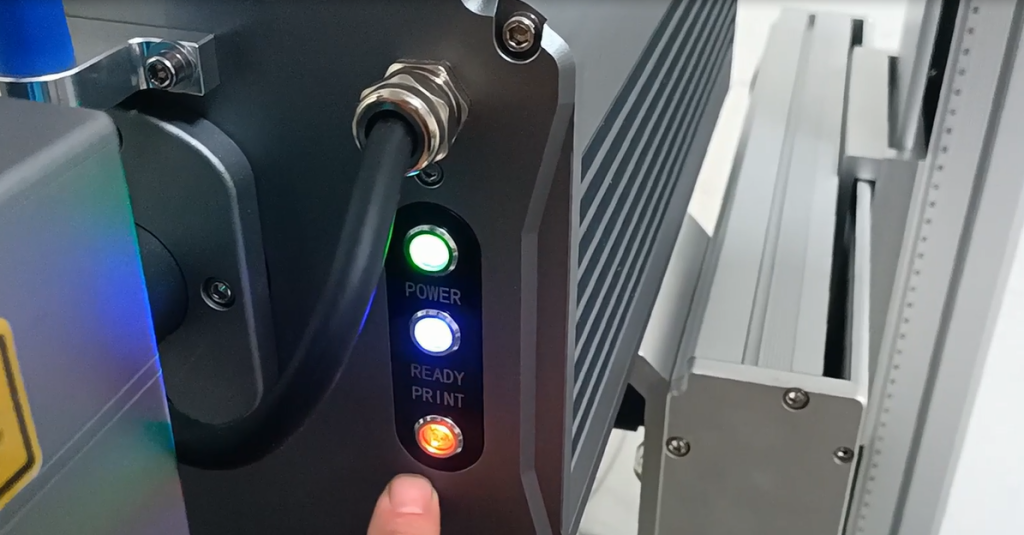
Already in good circumstances, we can turn on a power supply of the machine. The power supply of the machine is right behind us. There’s a switch on this back side. We can turn its power on. Power power on, then wait.
After our machine starts up, we have a main interface here. Let’s see the lights on our side. The lights on our side are on, and all three lights are on, indicating that our machine is ready. The power light, the print light are all green. We can print it out again.
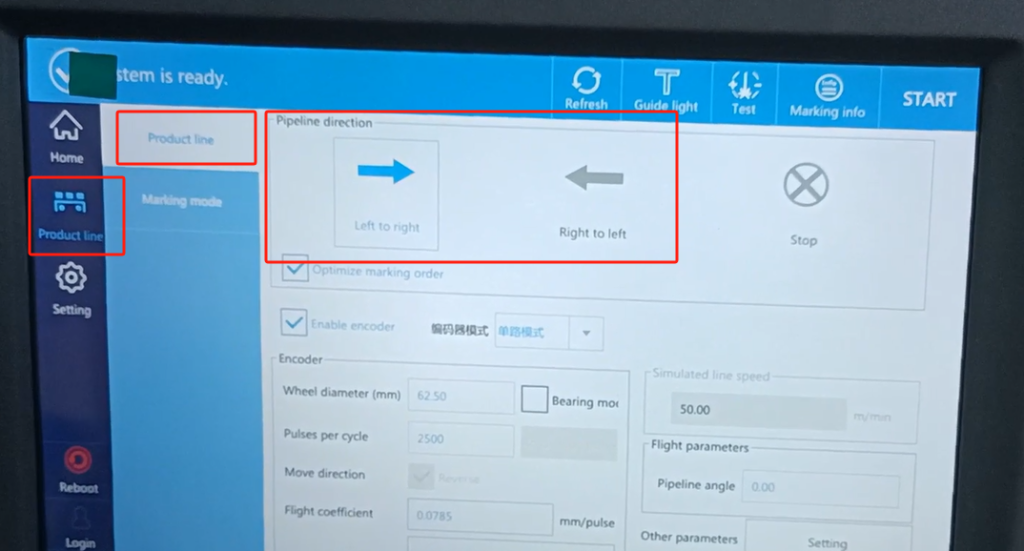
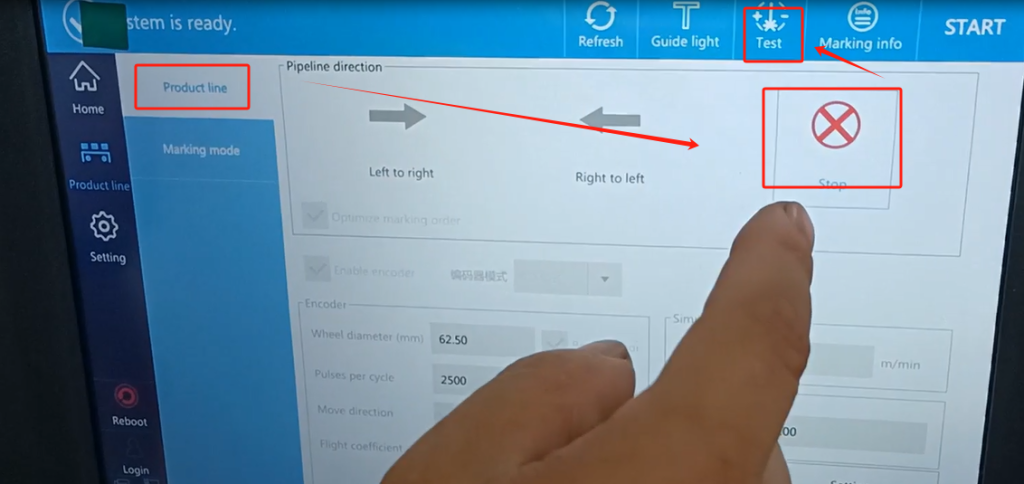
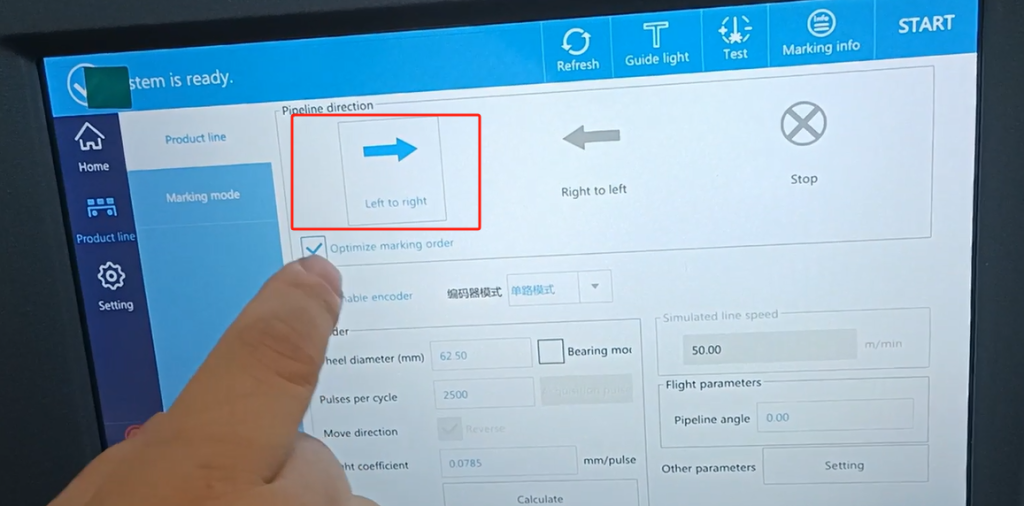
For printing, let’s look at how the flight printing marks. First, we need to create a message. How to create it? We’ve already talked about it before, and we’ve already said it on the video, so we don’t care. And then we say how to fly. We have a production line here for the flight mark. If we look at the production line, we have a model that puts the product down to print. That means a single product is printed once. What direction do we use in this case? That is to see the direction of our product movement, whether it moves from left to right or from right to left. If we move from left to right, we choose this; if we choose this from right to left, this is according to one of our field needs.
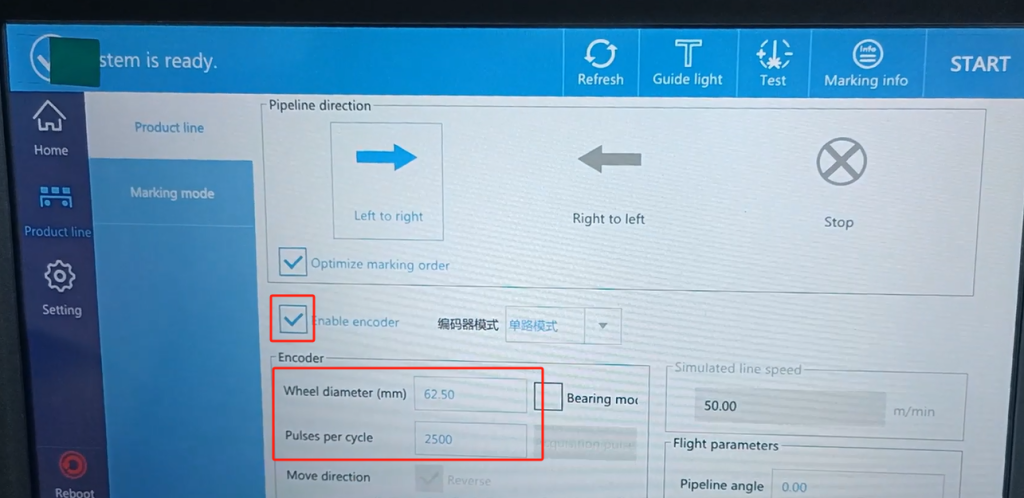
Then there is our encoder. We have the encoder installed. It must have resistance, can not idling it, and must be our input belt to close fit, must have a certain resistance, so that it does not slip.

And that means we adjust this, and then we have to adjust the parameters. Then if we want the flight mode, we have to enable the encoder. Then we have this wheel in diameter. We want to measure the wheel diameter of the encoder, the value of the quantity is in. This, of course, we all set the factory. If we use the original encoder, we have all set it up, so we don’t need to move. And then the pulse 2,500, which is the pulse 2,500 of our encoder. After we set it here, we don’t move it after setting it. Of course, if we receive the machine, and then it is set, we don’t move it.
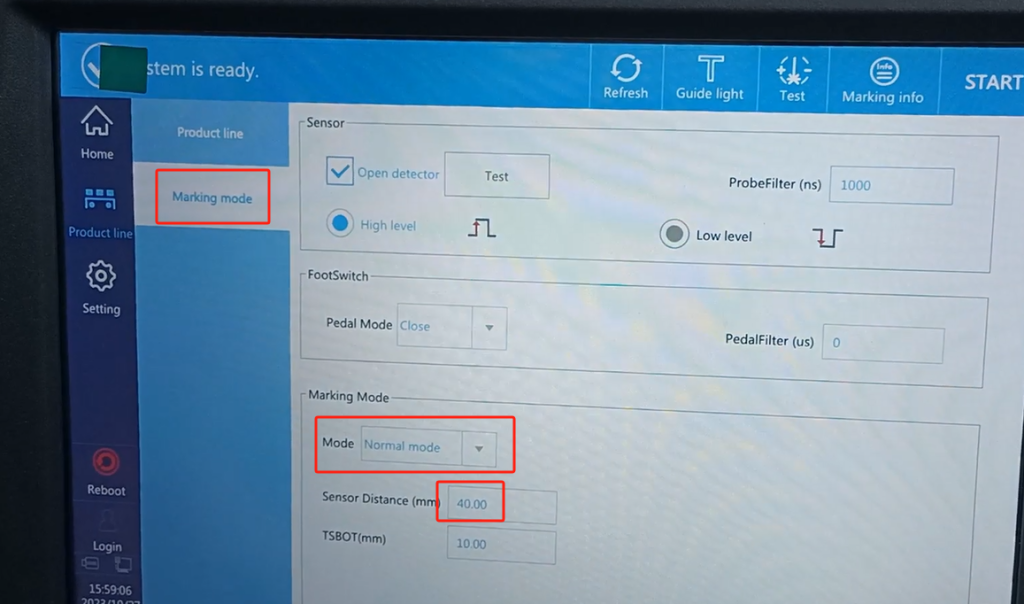
Then we look this way. What we can see is that one is a level, a high level. Then here is the pattern. We are single, just say one by one, the product one by one, then we have to use the ordinary mode can be. There is a value on the normal mode side, which is equivalent to a delay. That is to print to the right of the product, we can adjust one of its sizes, equivalent to a delay in its flight mode. And then this is his printing delay. Once we set it up, we can adjust the size according to the scene. We can change this, we can set it to 60, set it to be bigger. We can adjust it later and teach you how to adjust it.
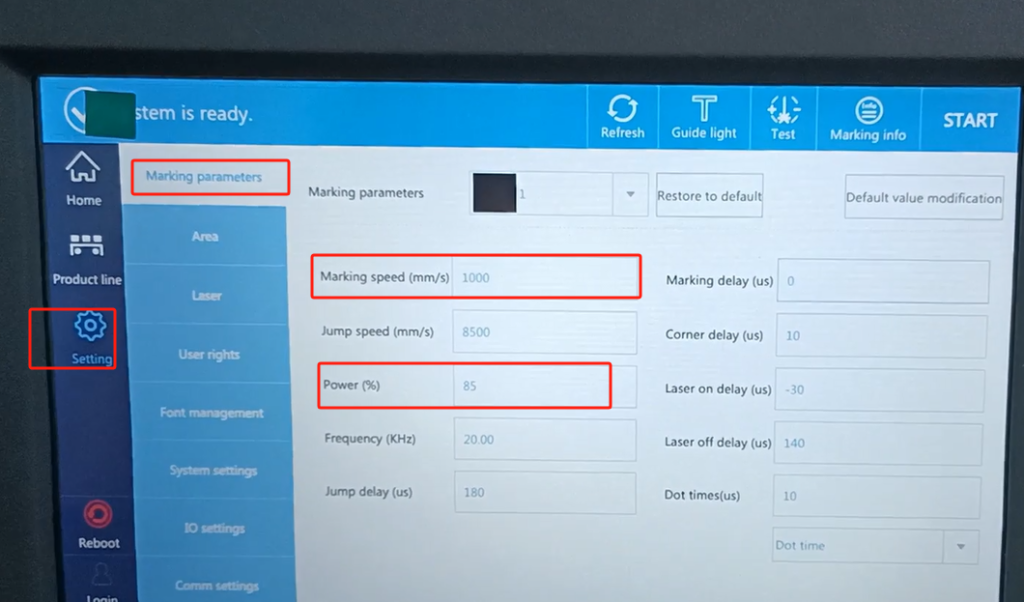
Then this side is set up. Let’s not move the setting here. The here is this speed and power.
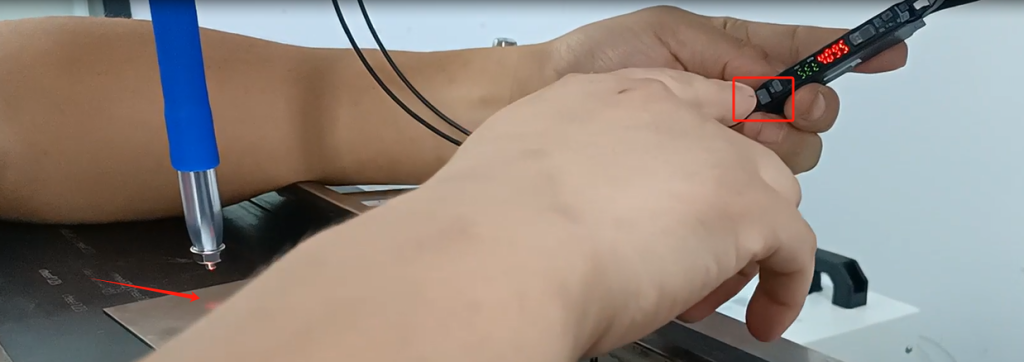
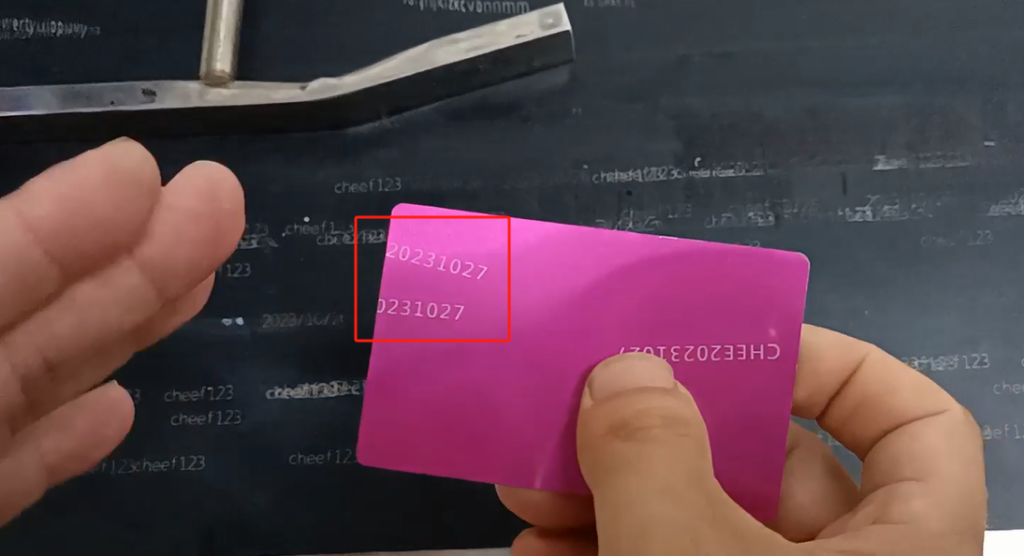
Let’s try out a product now. For example, if we want to print this iron piece, if we print this iron, we put it under our red light, and there are two points under this light. Two points indicate that he did not reach our best focal length.
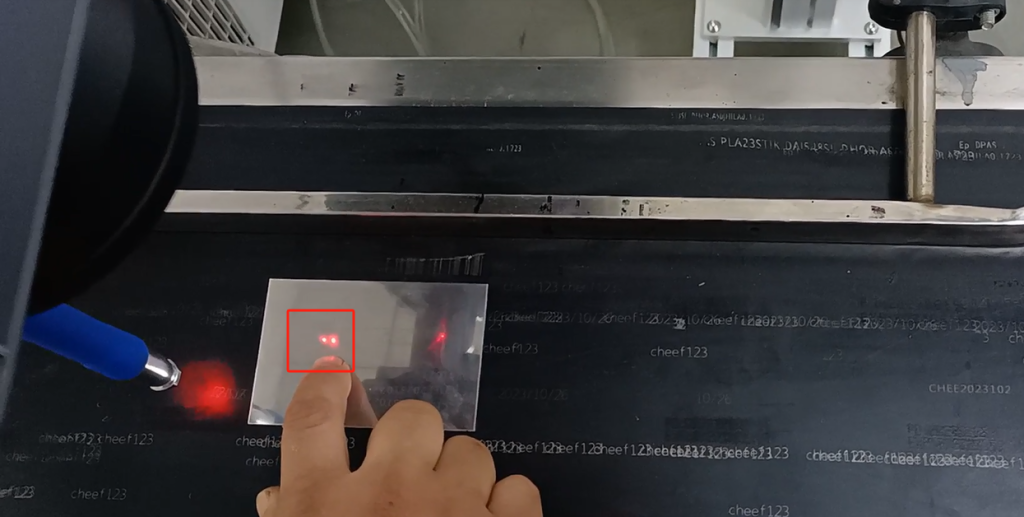
The best focal length we changed by moving our slide. It’s the column, and then the two points overlap, to our best focal length. These two points overlap is our best focal length. We set it in the focal position.
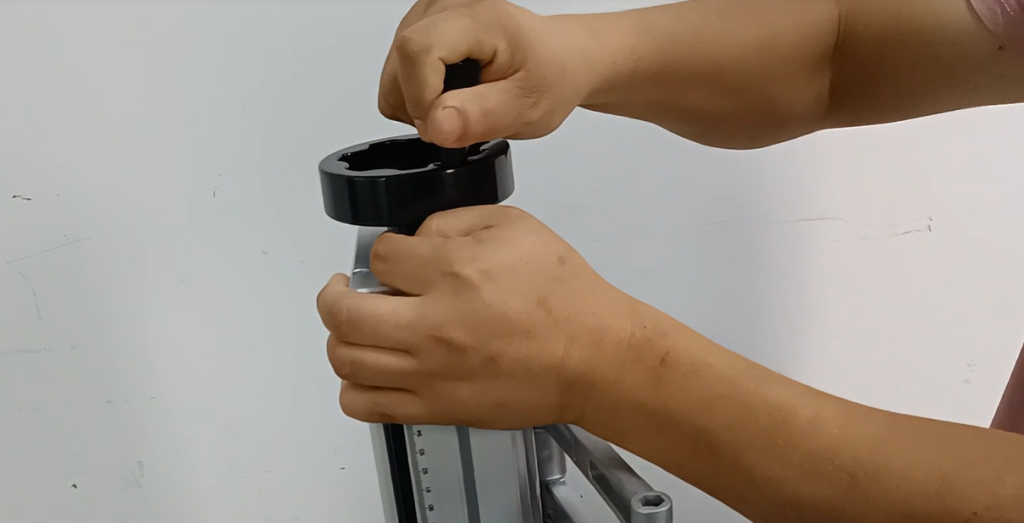
Then we can tune the optical fiber. This fiber starts out if we are this fiber, we have to adjust it. Say that our products hit each product is also different.
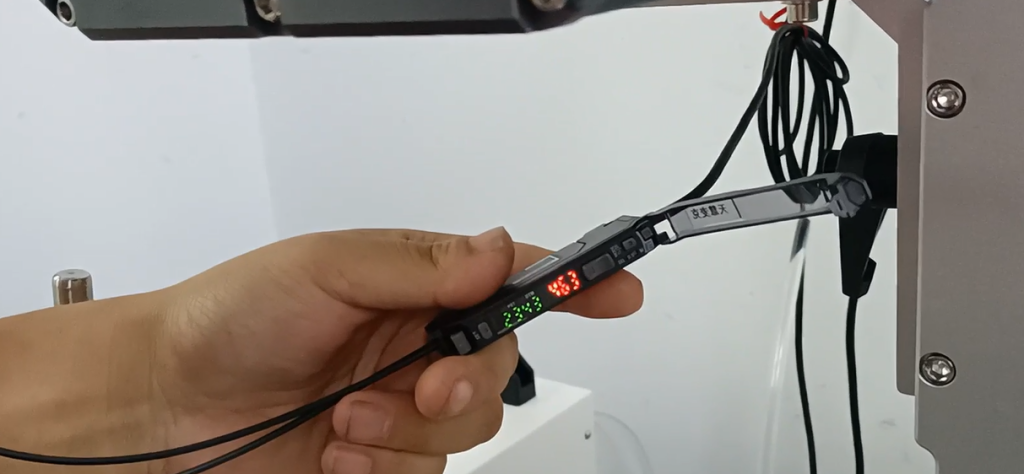
And then when we put the product, let’s press this setting. We put the product we want to hit below, and make it sense the product. And then press, that is our fiber memory. That way we can fight.
We can now put it down below. Then let’s play the static, to see if its power needs to be adjusted. Let’s start by making a static play. Change it to static. Then we manually trigger the test and take a look at the following.
Let’s look at one of the prints, and if we feel like it works, then we can use this parameter. Because of that speed printing speed we have to adjust the speed of the machine, and then adjust its optimal speed. Our current printing speed can keep up with the movement of our products. We can do it without an adjustment.
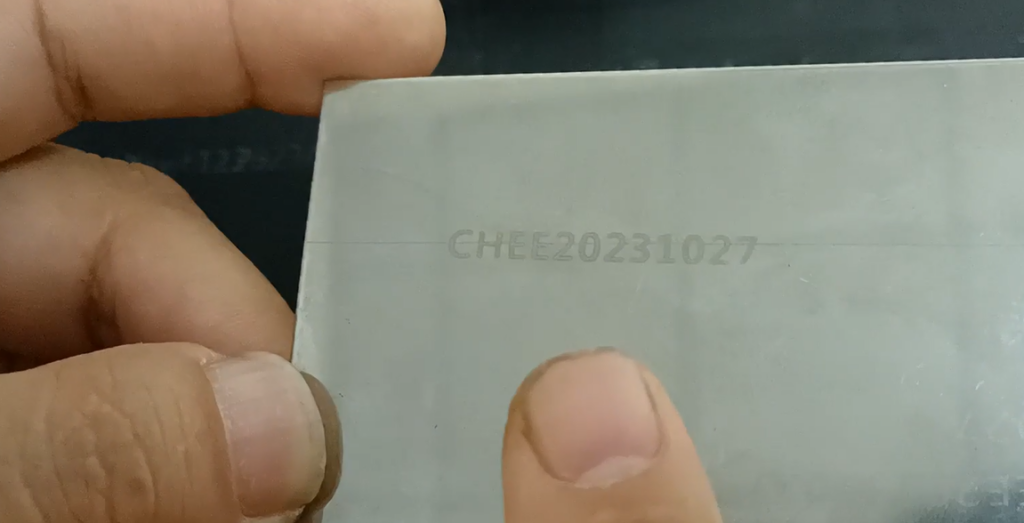
So now we can print, try flight mode and print, and we switch it to ours from left to right because we have to go from left to right. Now let’s click to print and type this product. Because this product is very easy to fight, we put him below. Then we hit it.
I found that the position was too close to the left, meaning that we delayed too much and the distance was too far. We need to tune it down a little bit.
We’re going to stop it, and then look at the next one on the line speed side and reduce this 60 a little bit and turn it to 40. And then let’s print it out again. We’ll turn the machine on again, and then we put the product below.

Then look at where we print is here. So if we want to continue to the right, let it print in this position. So let’s change that value a little smaller, 40 to 30, we can continue to play, and this is in the middle. If you want to continue to rely here, that value will continue to be small. This is one of the adjustments that the flight marks it for.