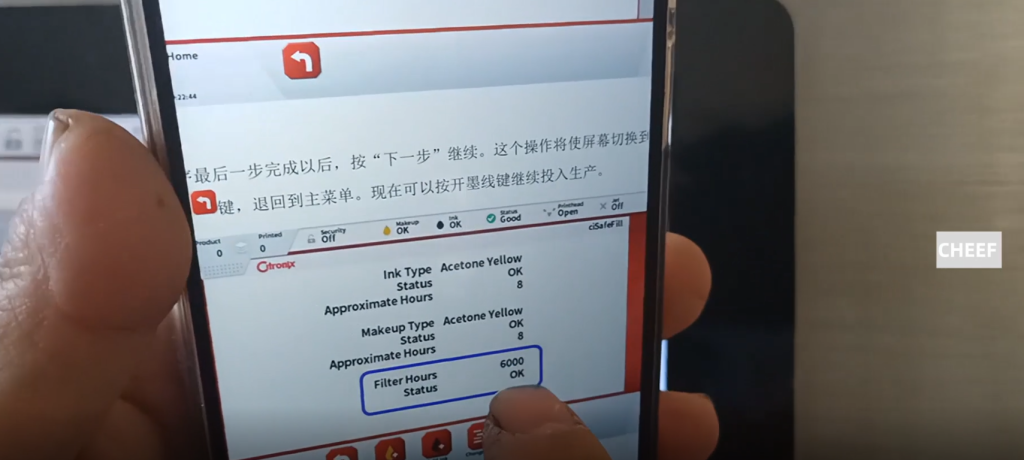
Let’s look at the Citronix CI5300, the 5000 series machine, and how to replace its main filter. First of all, we click the menu, there is a state here or there is a state here, click the state.

There is a filter in the state, click on the filter.

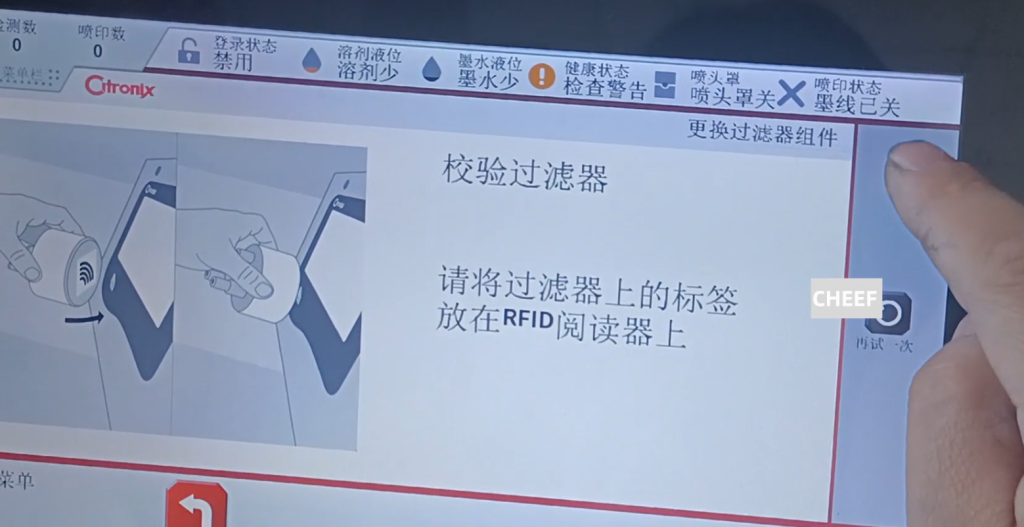
Then there is a picture of the main filter replacement here. Then he said please put the filter tag in this card area.
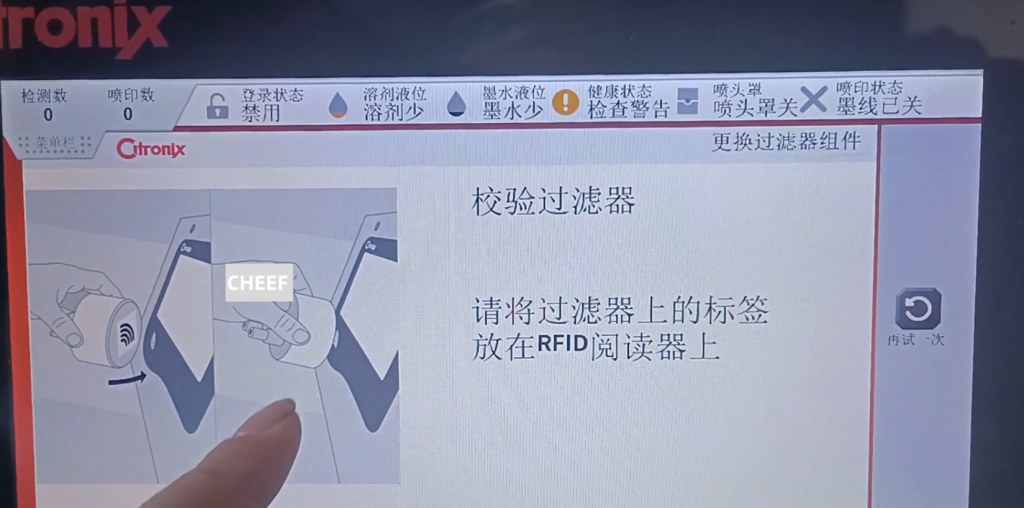
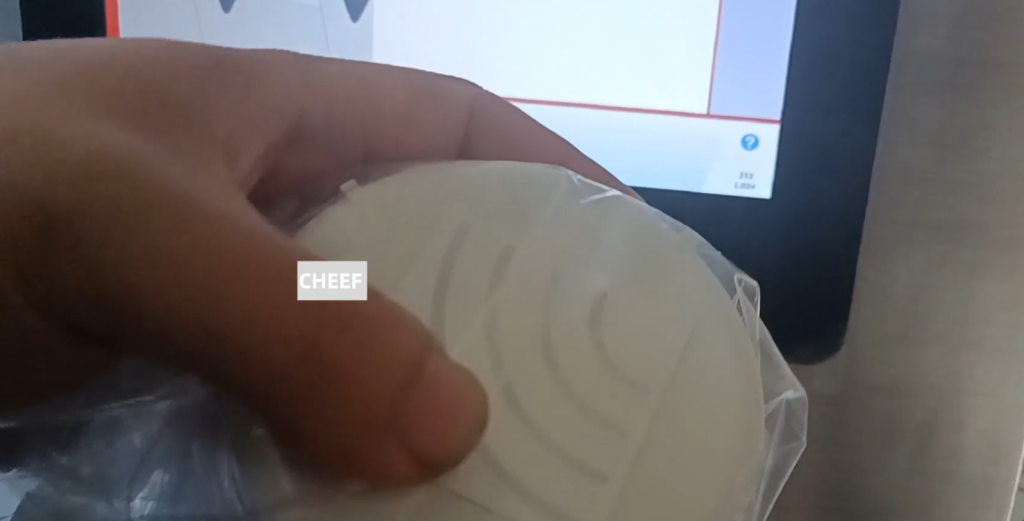
This is our label, and this is our main filter.
This label should be brushed against this position. After a swipe, it prompts you for the next step. According to our next step, and then to replace our filter. According to how the above prompts, how do we operate.

Now let’s look at how the main filter is removed. Then we remove the machine, remove the filter, our machine ink line must stop, the ink pump must stop turning, that is, the ink line state is closed. There is a push button here:
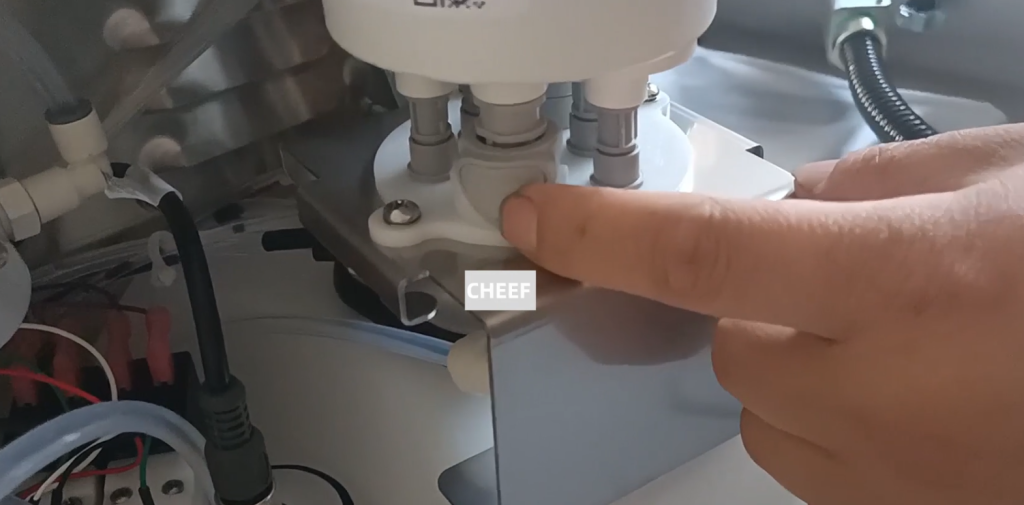
There is also a button here:
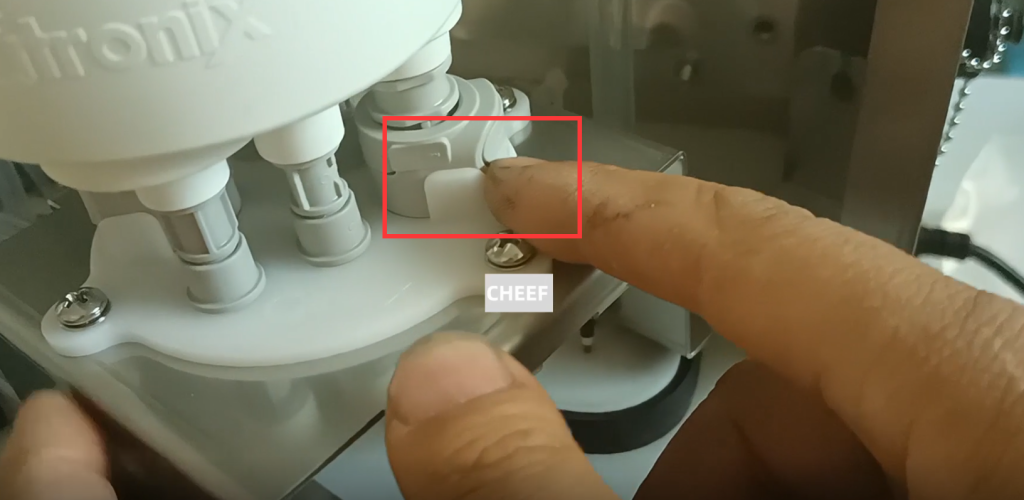
Two buttons and we have to press it at the same time. After pressing it, then we pull up.

This was removed.
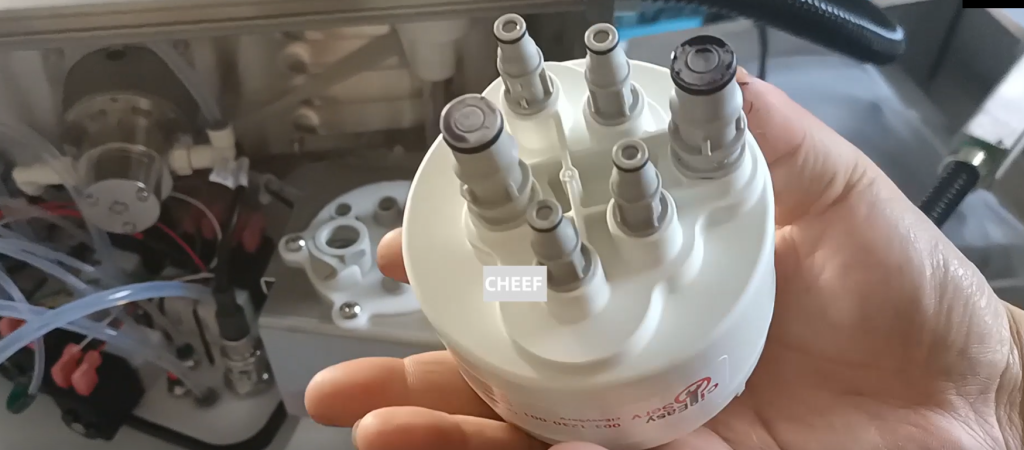
Take it out and we take the new one and card it in. When we get the card, we just press it.
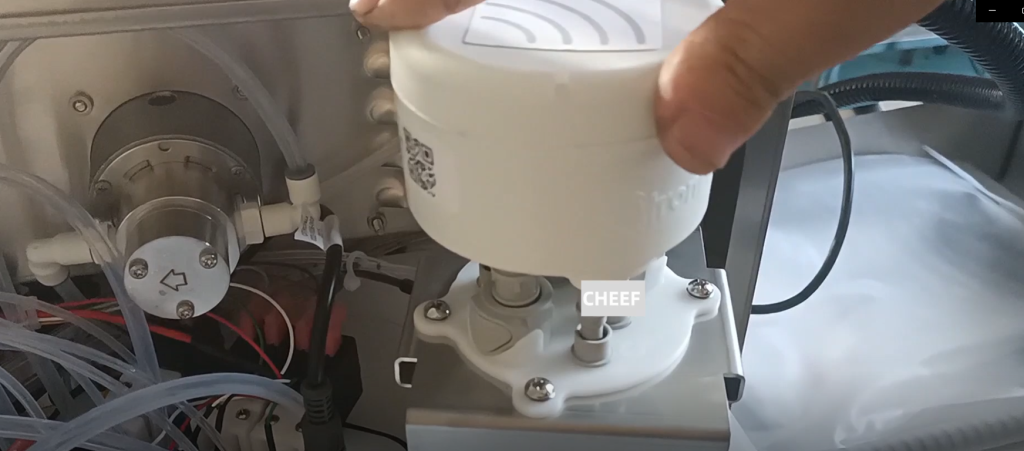
Don’t break this up, just press it down.

You hear a click and it’s installed in place.

We heard a snap, and then it was installed, and then we went to the next step according to the previous prompts. To fill the ink, the ink has to fill into the inside. Let’s say there’s a next step here, let’s click on the next step.
Click on the next step and it has a prompt box, like this interface on the phone. It has a hint to fill it up. Fill the filters, and we just click OK.
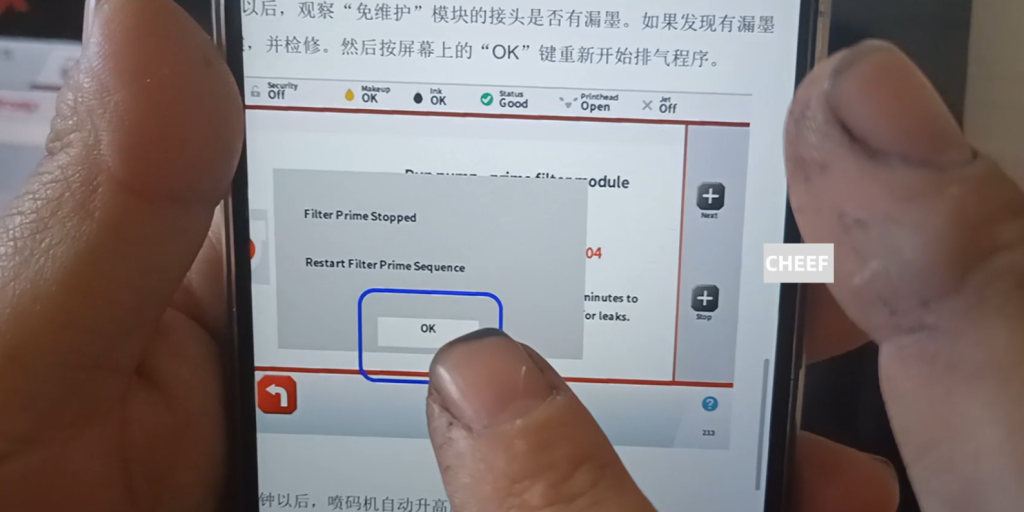
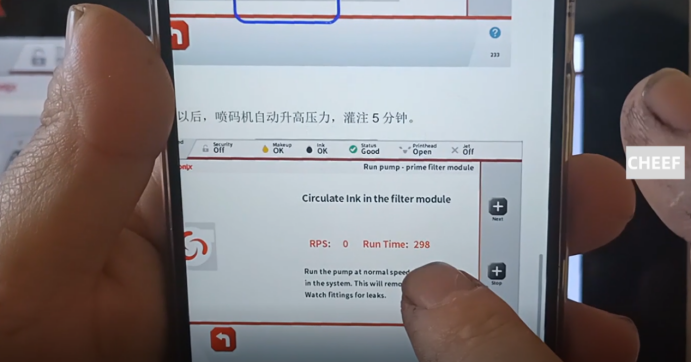
It drops ok for 300 seconds. For 300 seconds, it fills the main filter up. When it’s all full, our machine will work. Because this is the exhaust, which is the main filter to the exhaust. After the finish, we installed the filter. Then we can clean, we can reboot, re-supply the ink.
And then this time, it shows how many hours. Then our machine can put out the ink line, is to open the ink line for normal use.