
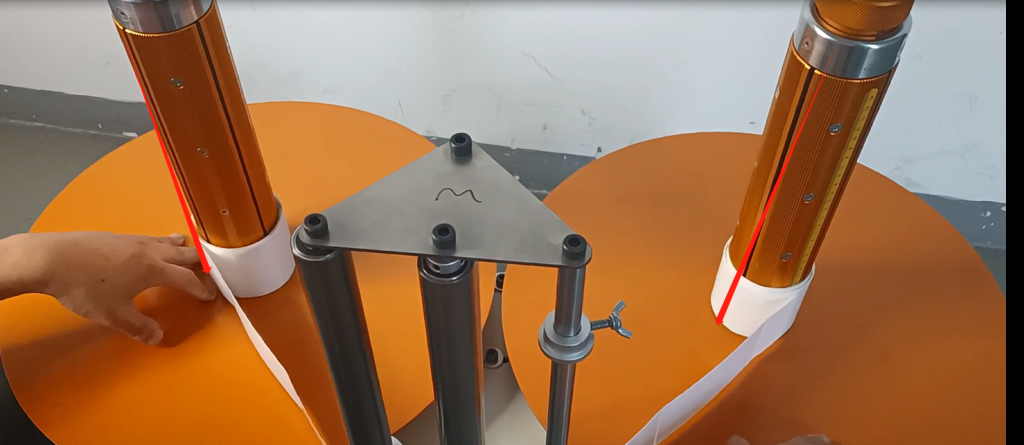
Let’s take a look at the winding method and setup of the winder.First look at one of the wraps of its label.Let’s look at this side, this is called the steering wheel, and this side is called the watch dial.Its diameter is about 76mm cylinder.

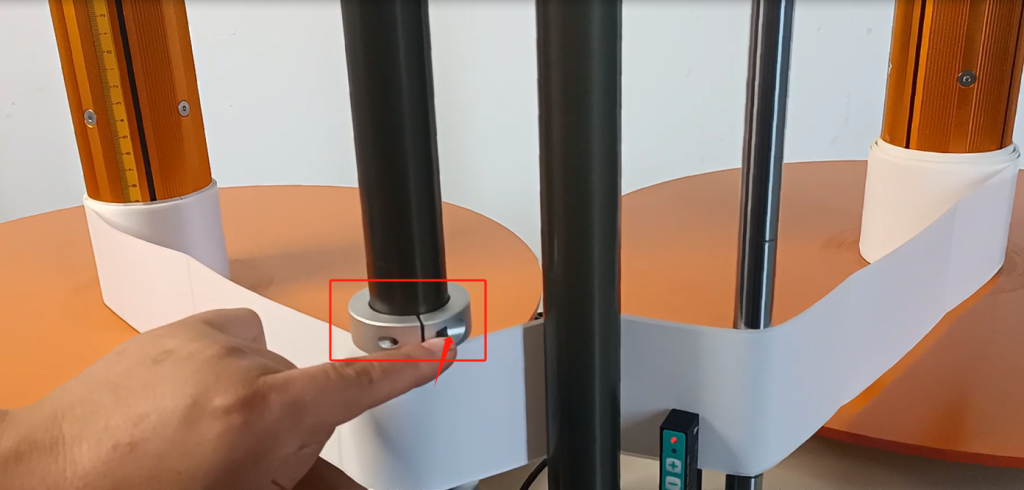
And then we can put the tag on this steering wheel, wrap it around like this, follow your finger.We have a locator block here.If we have a big TAB, we can loosen the screw and move it up.Until it’s the same size and height as our label.
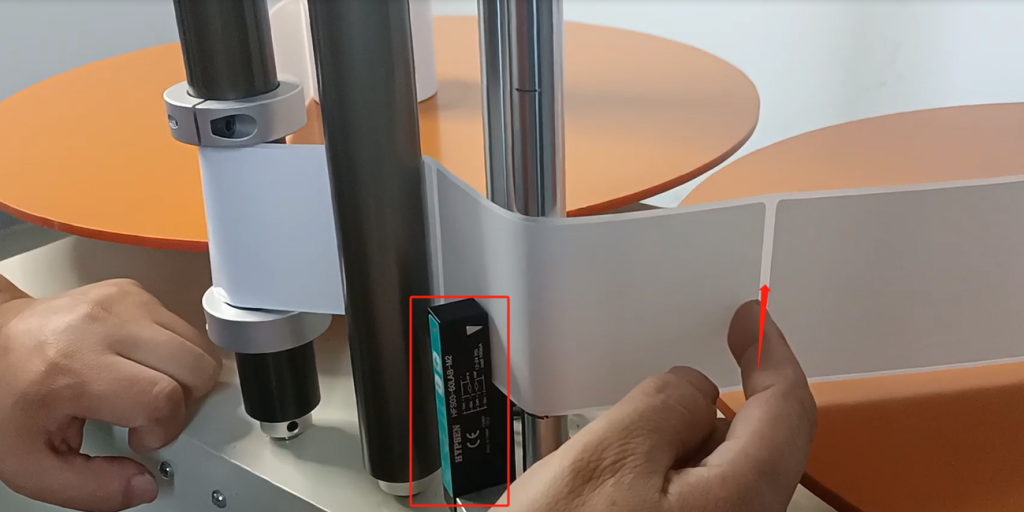
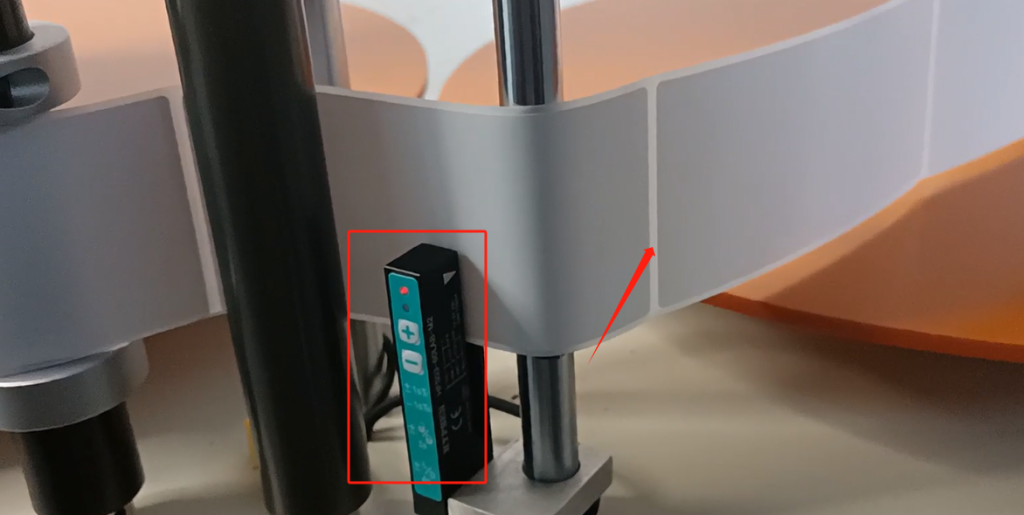
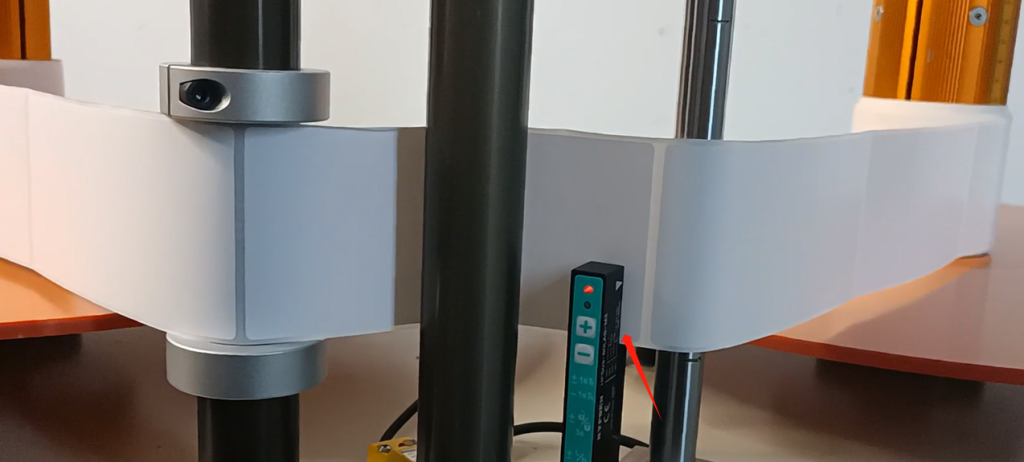
And then our tag goes through our sensor.This sensor can sense a gap in the middle of each of our tags.
And then through here, then to our receiving tray, winding is very simple.
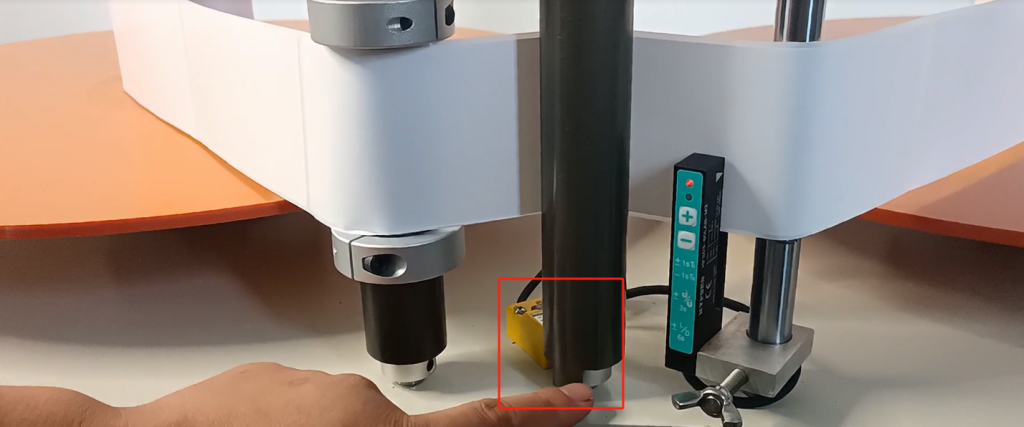
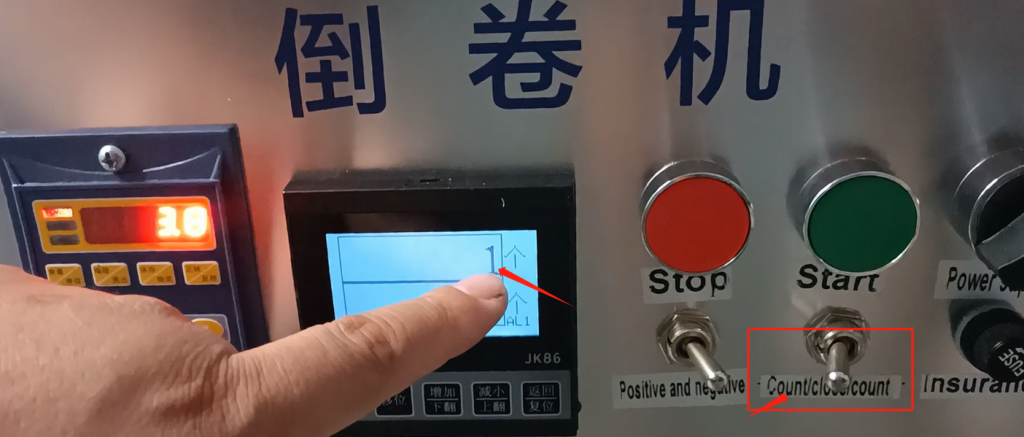
We have another sensor on this side.The sensors are primarily on our axis.If we change the selection mode to meter count.And what we’re saying here is that it’s going to rotate once around this axis, which is 10 centimeters.This sensor can sense our gap, and here it’s 10 centimeters when it turns around, and we’ll talk about that in a minute.That’s how easy it is for us to wrap.
And then after we wrap it up, we do the following setup.First of all, let’s look at the knob on our side, which can adjust the speed.Velocity is the speed at which it spins.

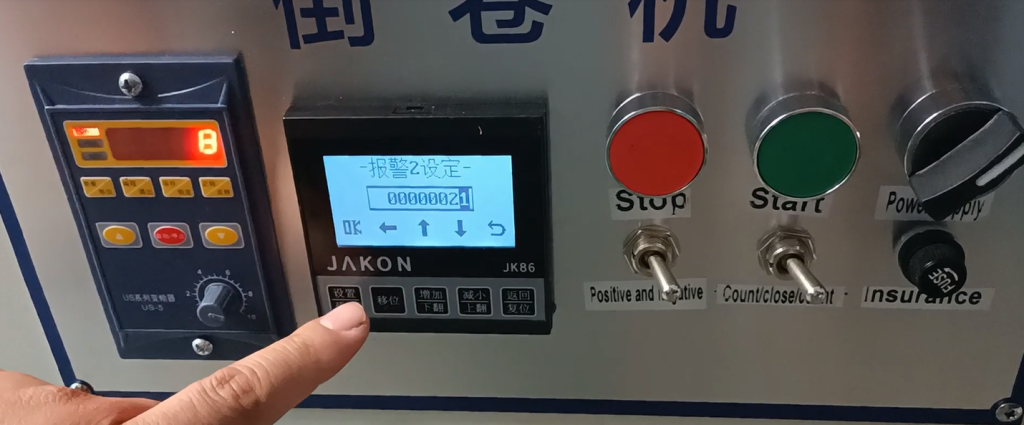
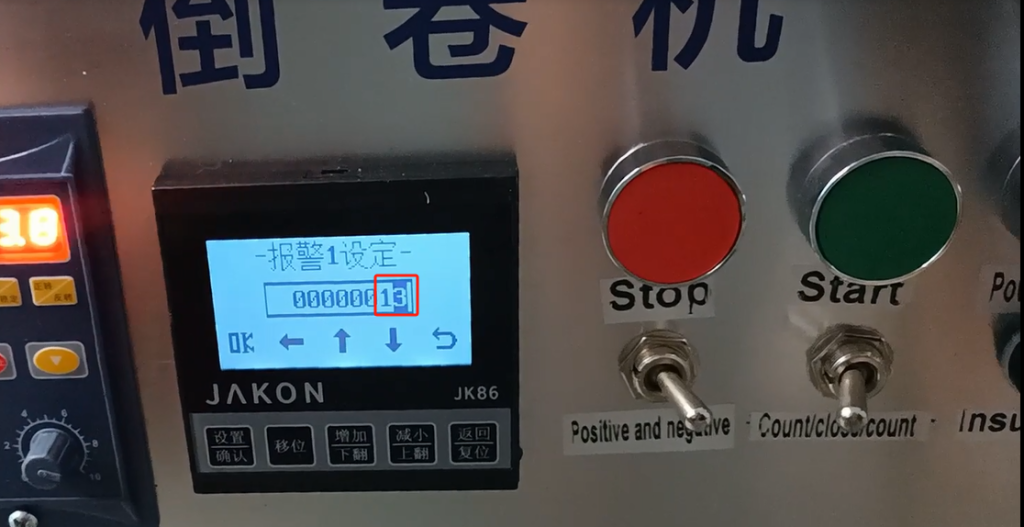
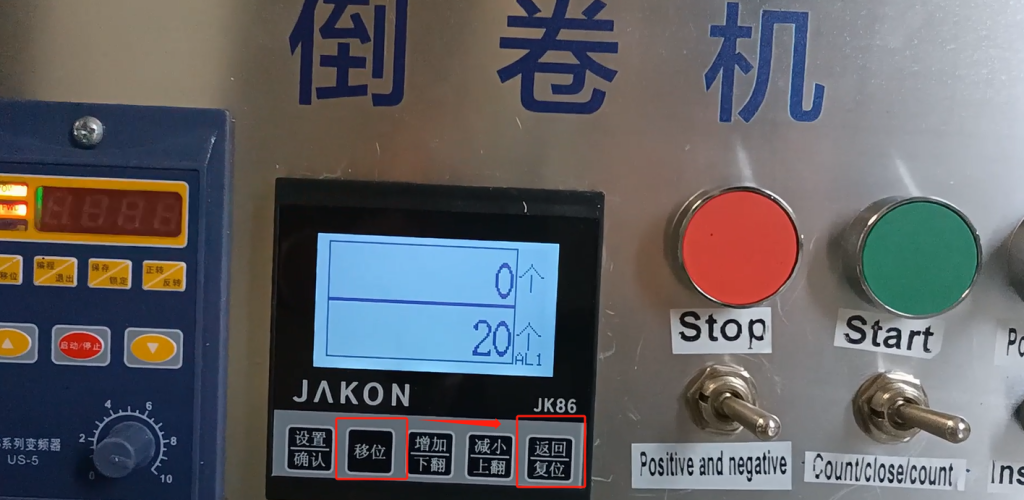
We have meter and count down here, so we’re going to go up here, which means we’re going to press this shift.Now we’re setting alarm 1. What does that mean.For example, if we want to set 20 to stop, we set the alarm 1 to 15 or 12, the two values are close, not greater than the number of alarm 2.Alarm 2 is the value we set 20 to stop, we need to change alarm 2 to he 20.If the alarm 1 value is set to 13, the machine will start to slow down at 13, and stop until the machine turns to 20 after slowing down.Then alarm 1 is less than 20.And once we set it up, we can press this down arrow key and this up arrow key, and we can go up or down.You can also move it by this shift, move it this way or move it this way.

After we set it, we hit OK, and then this is the setting for alarm 2, and the value is set to 21 and we stop, we save OK.
So now we have 8 labels, and then we set 21 to stop, let’s see the effect, press the start button.
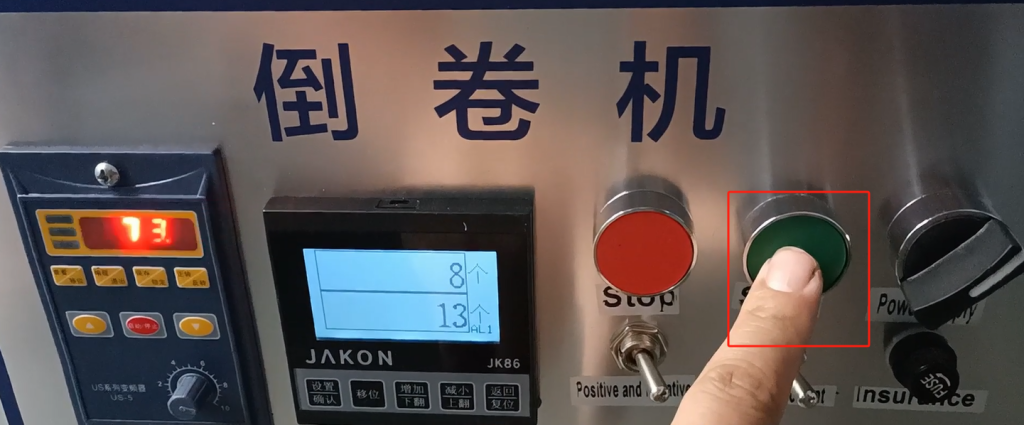
You see it slows down at 13 now, and it stops at 21, which is what we just said.
Alarm 1 is a value at which it begins to slow down, and alarm 2 is a value we set, set to 20, that is, 20 stops.How do we get the number, which is detected by our detection switch, which is a number from gap to gap.
If we were to change this switch to this meter.So our one is going to represent 10 centimeters.
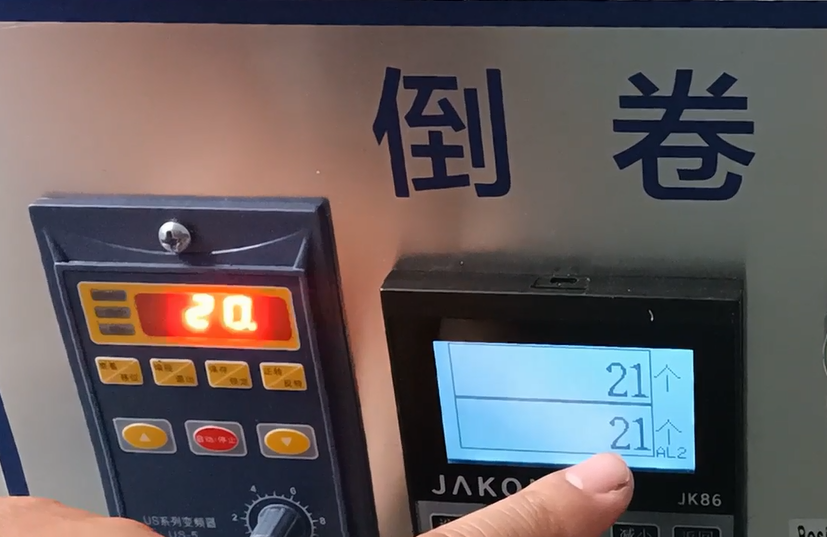
We’re going to shift it again and build it again.This 13 represents 13 10 centimeters, which is 130 centimeters in total.But if we alarm 1 and alarm 2 set the same value, there is no process in which its speed will slow down, and it will stop immediately to the specified value.We choose 13, alarm 1 and alarm 2 both choose 13, then it will stop immediately at 13.If the value of alarm 1 and alarm 2 is the same, there is no slowing down process in between.
Let’s say for example, now let’s reset the values of alarm 1 and alarm 2, let’s change 13 to 20, and OK save.Let’s see if we get to 20 and it stops right away, it doesn’t have a slowing down process in the middle, because alarm 1 and alarm 2 are the same, let’s click Start.We’re just counting the meters right now, and when we hit start, he’s gonna stop at 20.It goes back to 1, it goes back to 1 at 20, and then we’ve stopped here. That’s the setting.

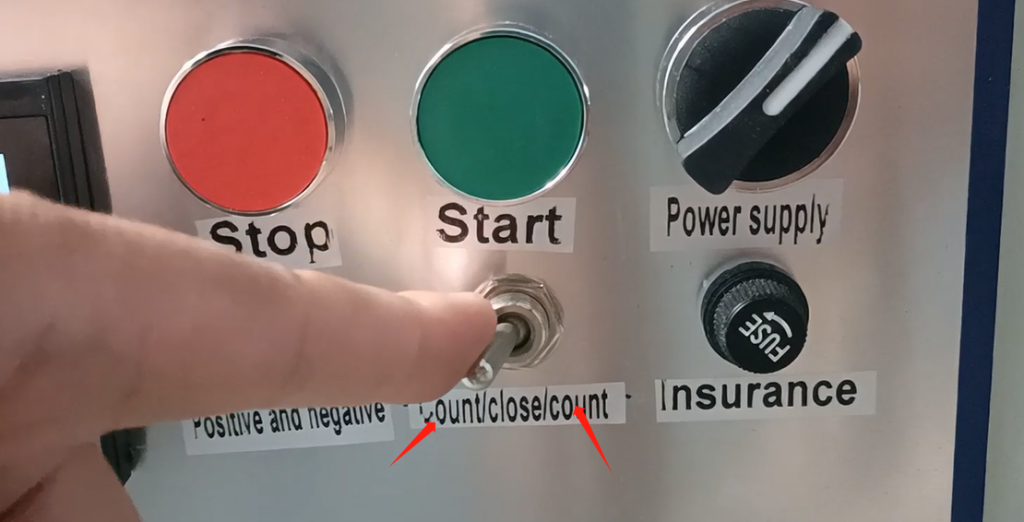
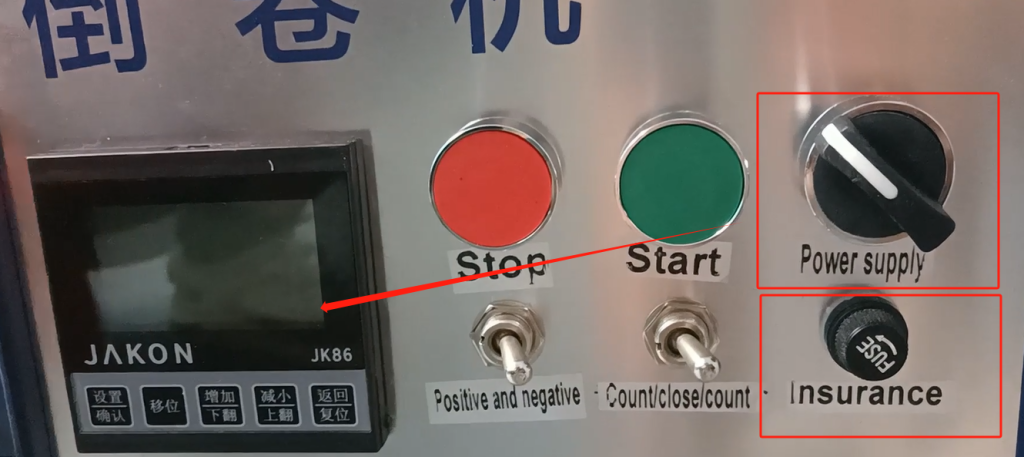
This is the setting button definition, and this is the stop.And then we can start or stop, or we can select this count, which is very simple, and a normal one is about that much.
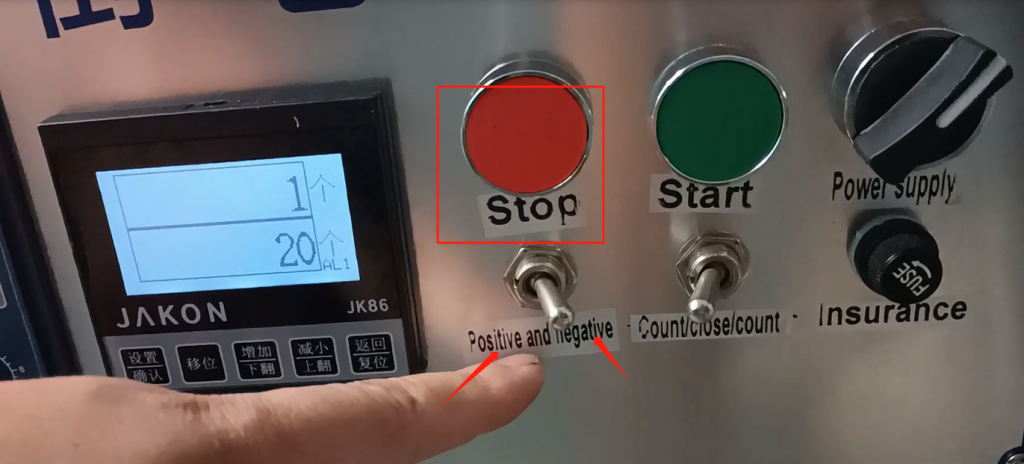
We’re counting here. We’re counting meters by turning left and counting meters by turning right.
And then this is the insurance, which is the fuse, and this side of the insurance is on and off, and if I turn it off, our side will go out.If we want to turn it on, first of all, we have to unscrew this switch button for it, after unscrew.And then we can start or stop, or we can select this count, which is very simple, and a normal one is about that much.
And then this watch dial we’re going to push it down from here, and the same thing on the other side, left and right.And then we put it in, and then we put it in.
And then if we go through this sensor, we have to go through the middle of our sensor, and then go through to the receiving tray.
We have a tightness and a looseness up here, so if we go to the right we’re loose, and if we go to the left we’re tight.It’s going to expand our cylinder, and it’s going to compress and expand, and it’s going to fix our label.

After the label is connected, we can operate, and we turn on the operation, which was originally turned off, and then we need to turn it on.After the boot, then we see whether to count or meter, after the choice.Then select a value for alarm 1 and alarm 2 according to our alarm meter here.According to our arrow, you can increase and decrease, adjust it well, and then you can run the machine.We also have a reset, if you want to reset, press the shift, press the reset, it will reset.This is a simple operation to explain.
Another thing to note is that when we install this disk, we need to screw it to the tightest.That way we can put it down easily, and then we can put it down.
The other one is that we have a loose and a tight here, and this is a loose and a tight here on our axis.If we want to tighten it, turn the knob to the right; We can loosen it very easily, turn the knob to the left, which loosens or tightens it as needed.


