
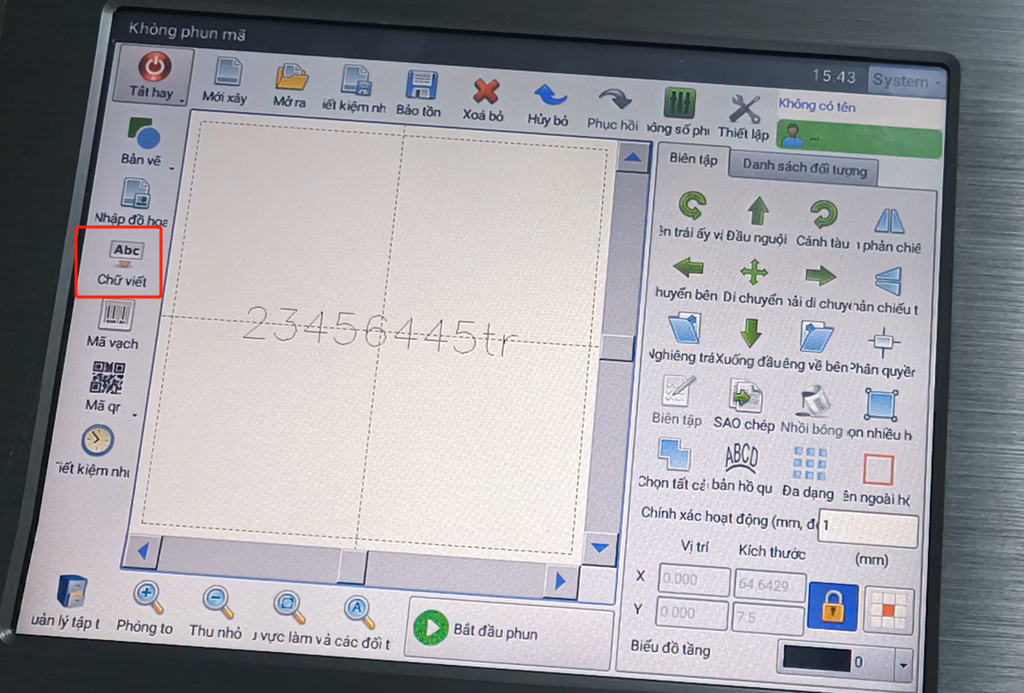
Let’s take a look at the upgraded fiber-optic laser machine. This is a Vietnamese interface with one of its messages and a menu. Then we look at the information creation. Let’s point the text.
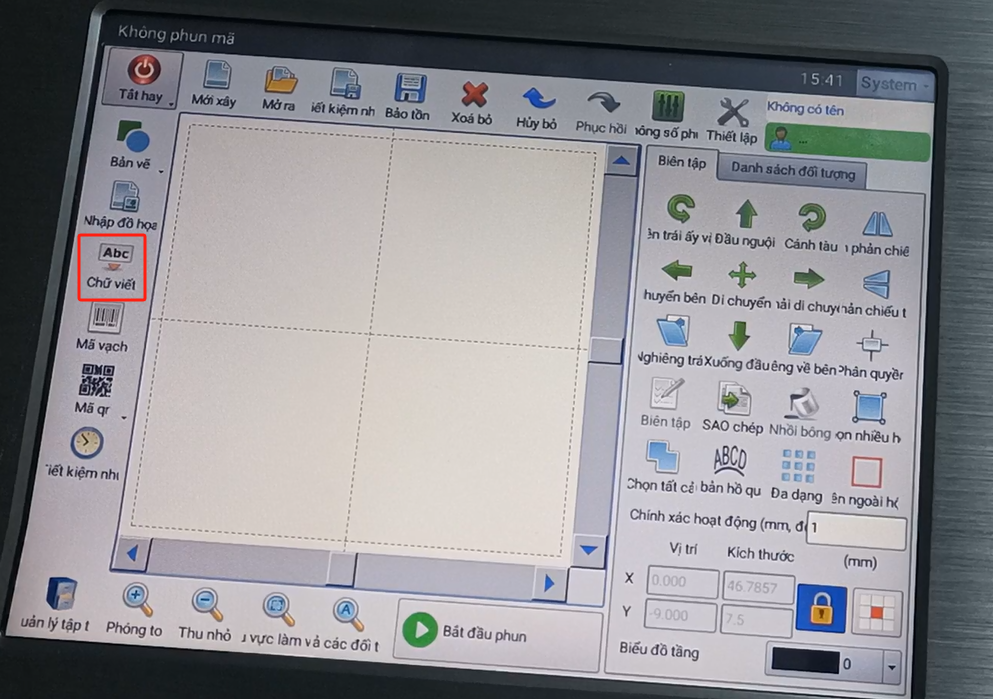
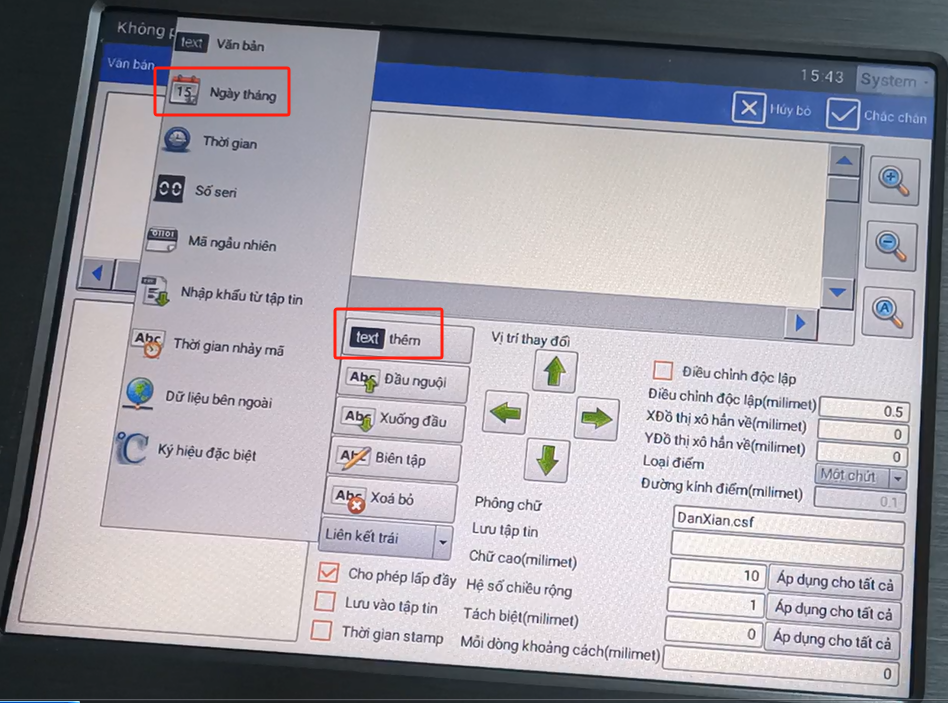
Then click on the fixed text and add it. There are text, date, and time. Point fixed text.
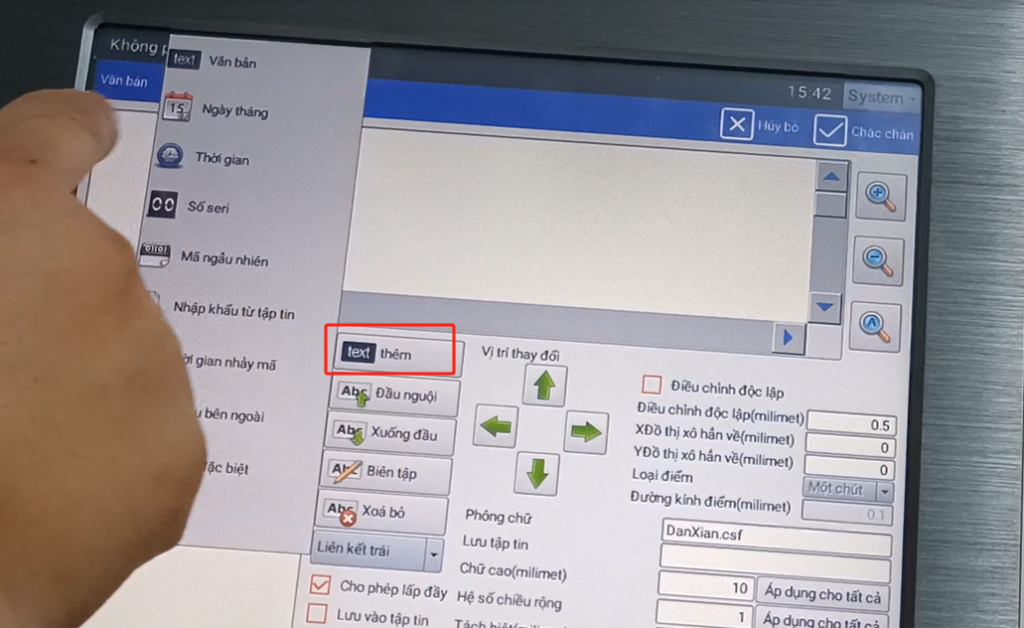
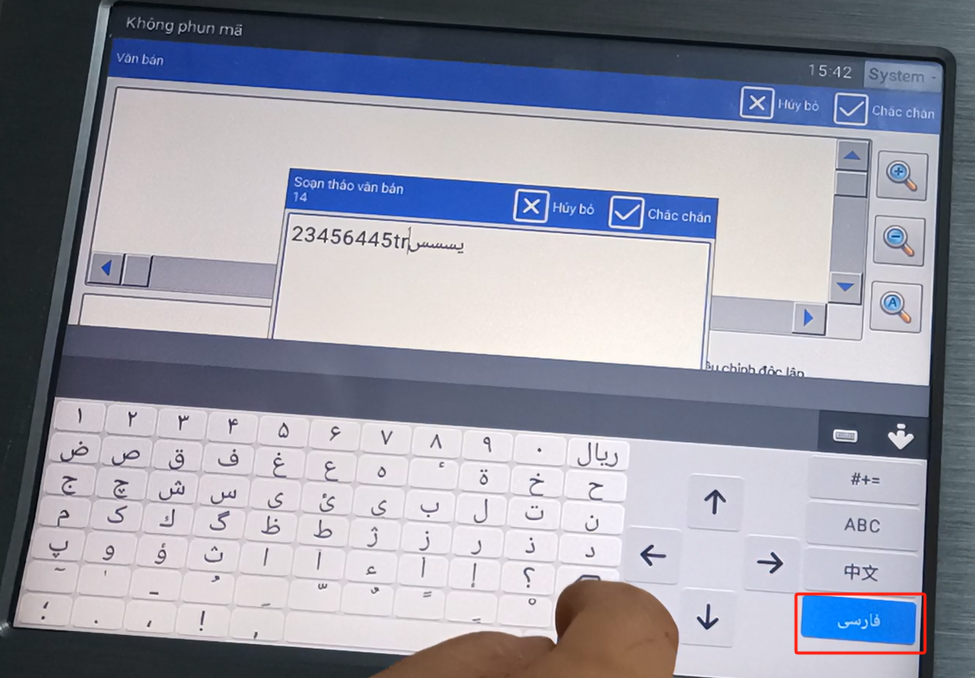
Here we can enter one of the text we want. Of course, if we want to choose another language, we can add other languages here.
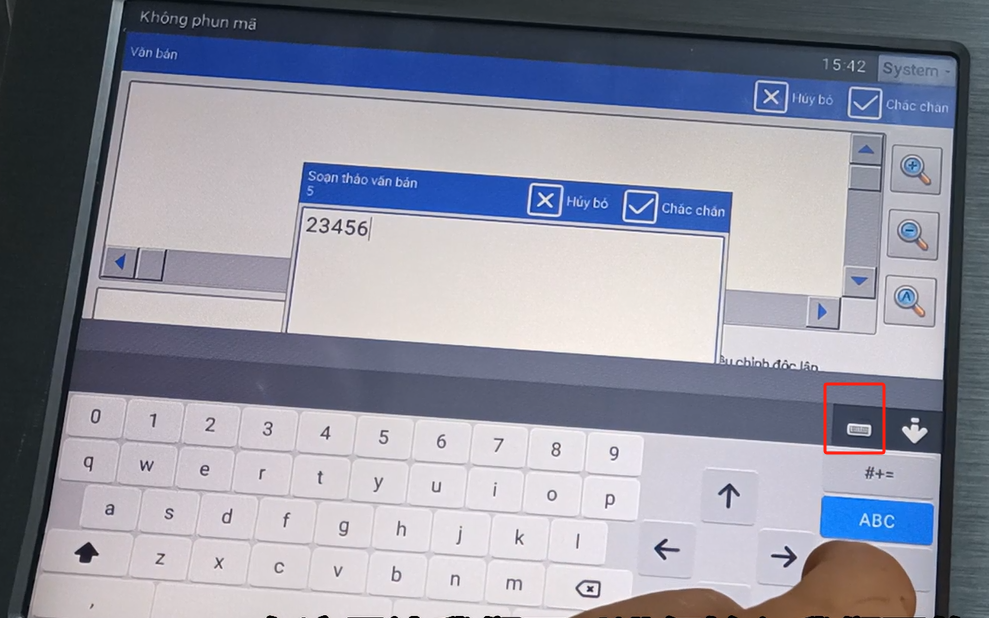
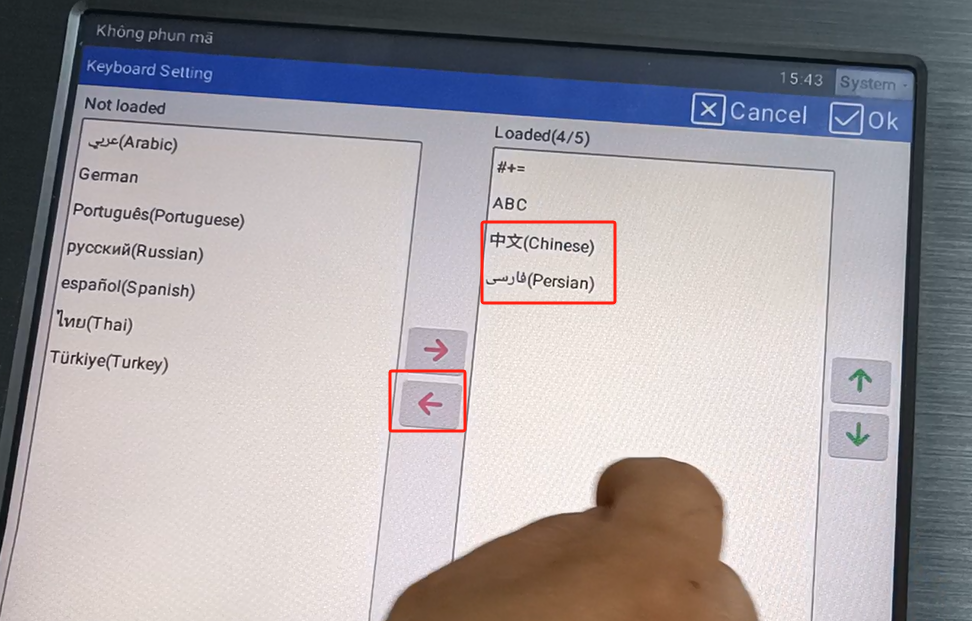
Add it in, let’s click OK.
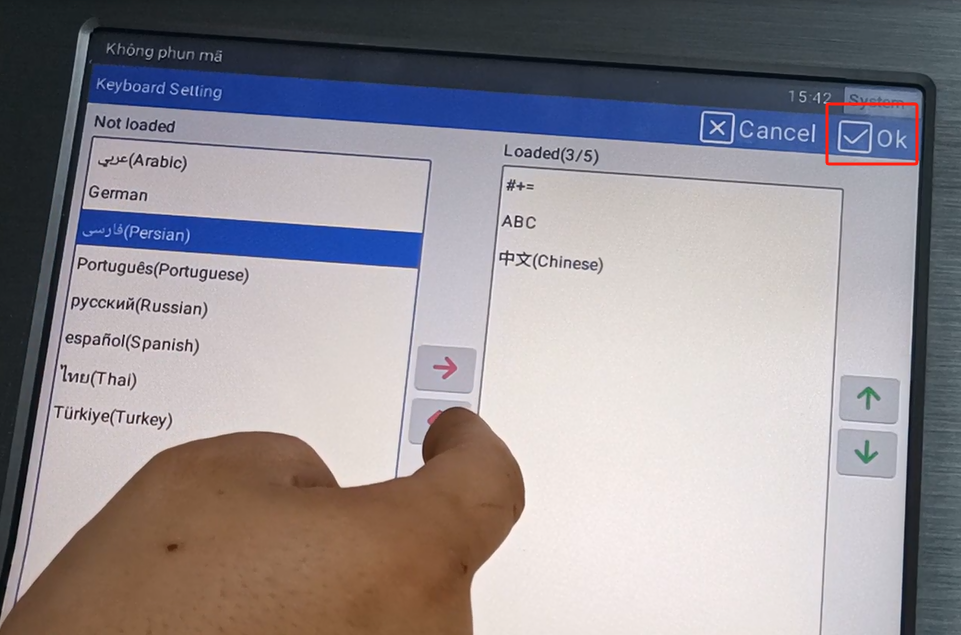
We double click, and there will be other national languages. We will just choose it.
We’ll delete it now, and we will delete the Chinese language.
Let’s say that’s all, and then we know. We have added up this information. If we want to build a second message, let’s click add.
Add the date, time, serial number, etc.
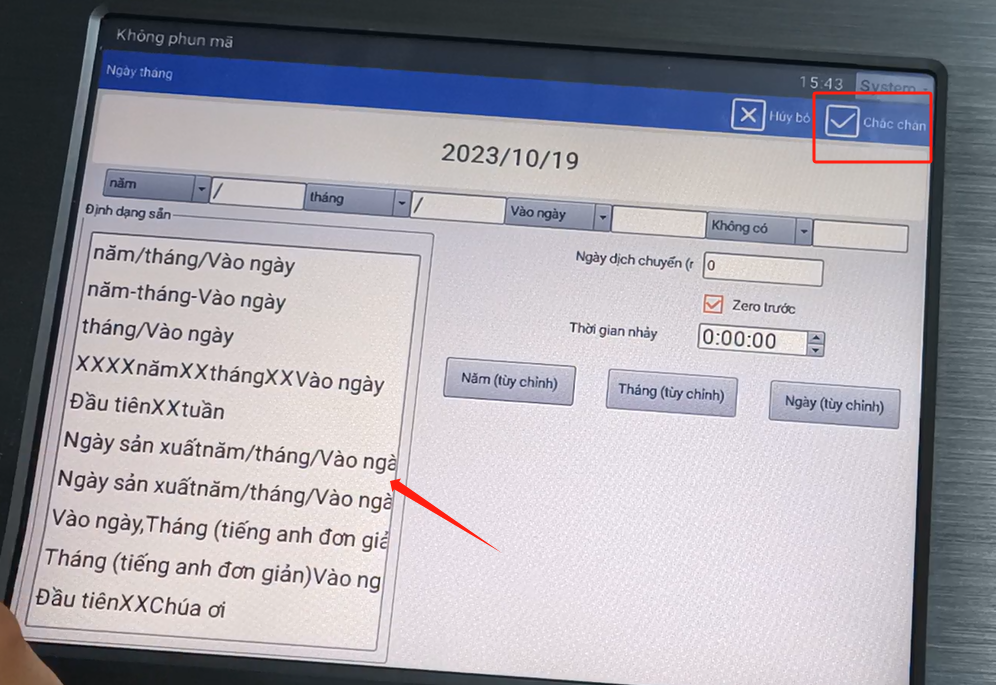
Choose the date, we have the format here, and we choose the format we need. Point to determine.
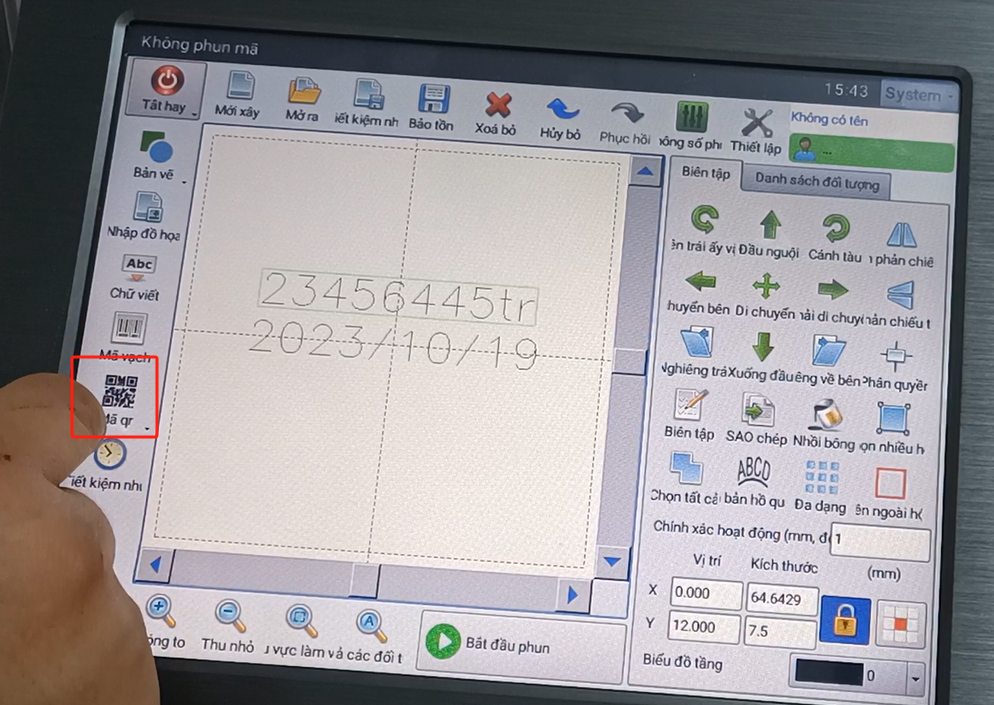
And then so, you can see the second message from here. If we want to add a QR code, this bar code QR code has. Click on the QR code.
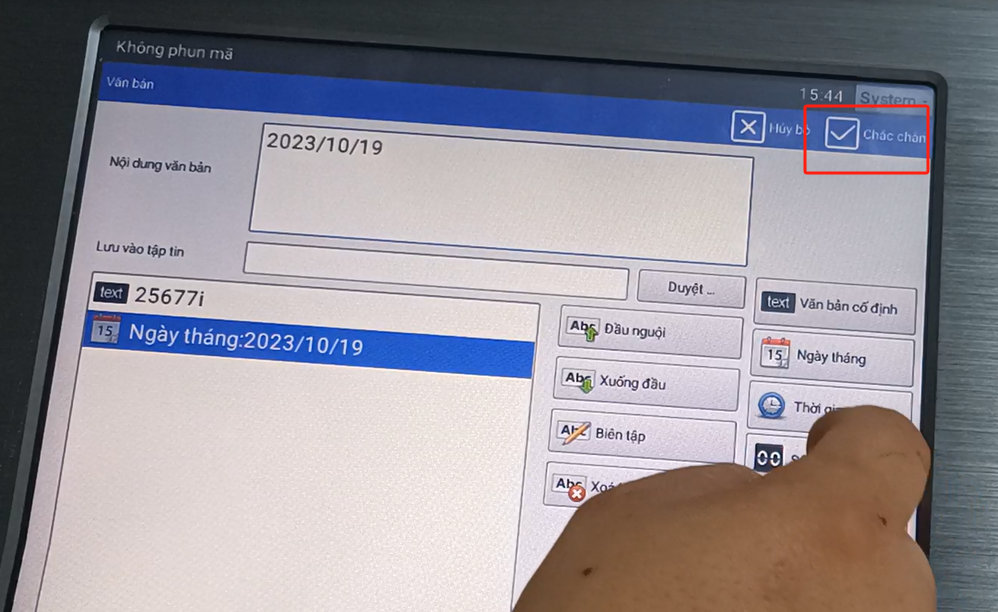
Then you select one of its contents. There are fixed text, date, time, etc. You add a fixed text, date, time, add time here. Then point OK.
We this again click OK, our code will come out.
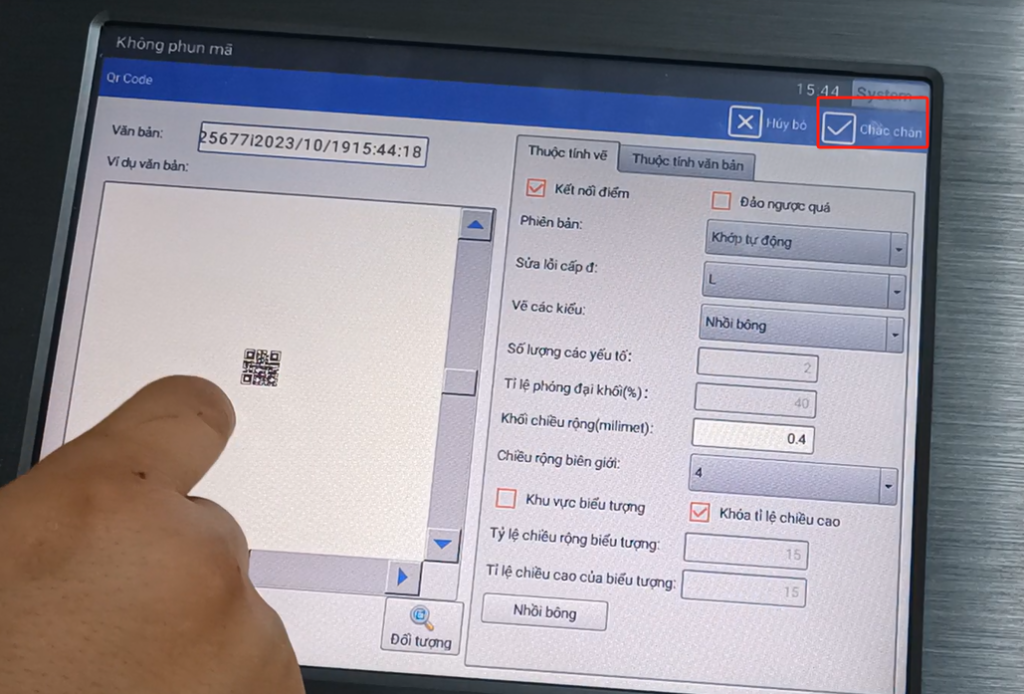
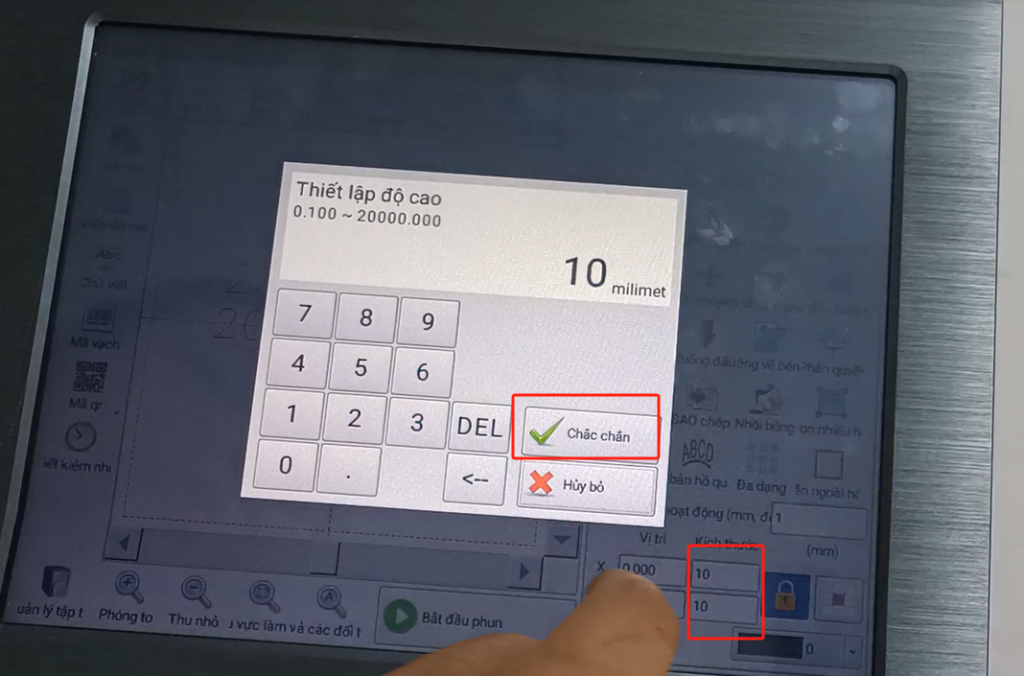
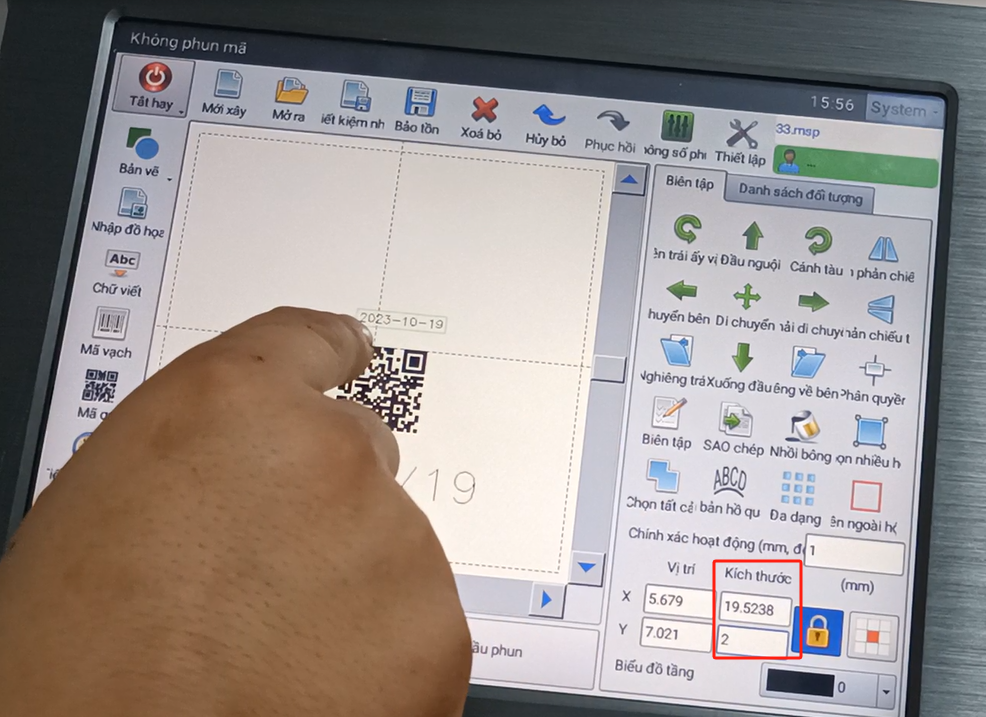
Once the information is built, then we can adjust its size. Now it’s 10 * 10, and we can make it either 20 * 20 or 30 * 30.
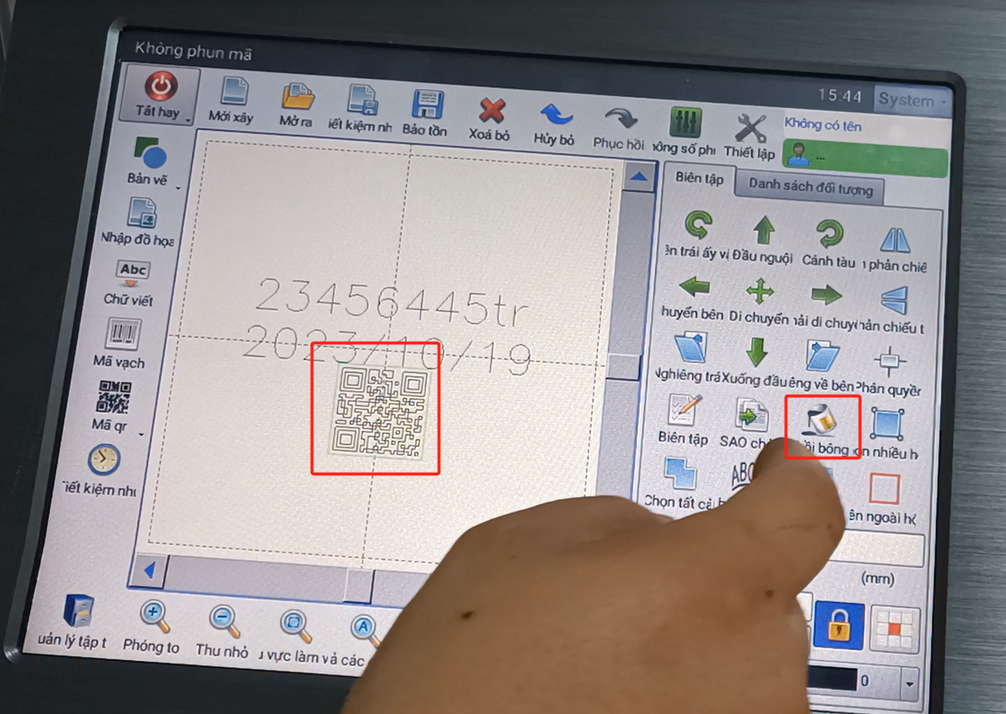
Select it, then we select it and dot fill.
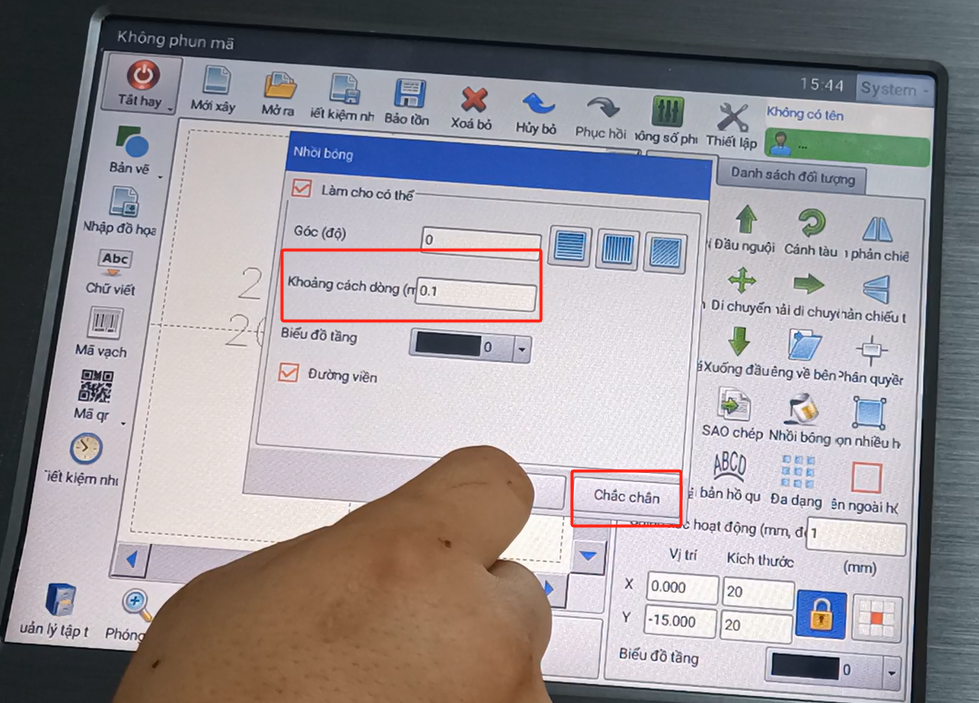
We can adjust the line spacing, the default is 0.1, we can adjust it bigger or a little smaller. After click OK, this is already created.
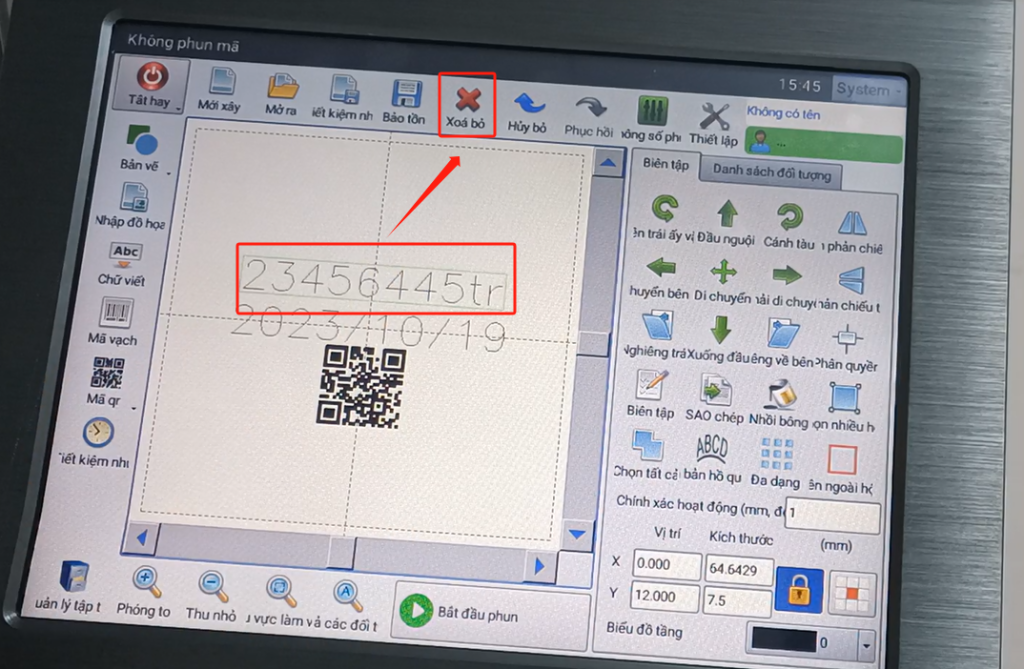
If we want to delete a message, we can select it. Then click on this key to delete it.
If you want to move it up or down, we can press it up and down. This move, we can move by 1 mm each time.
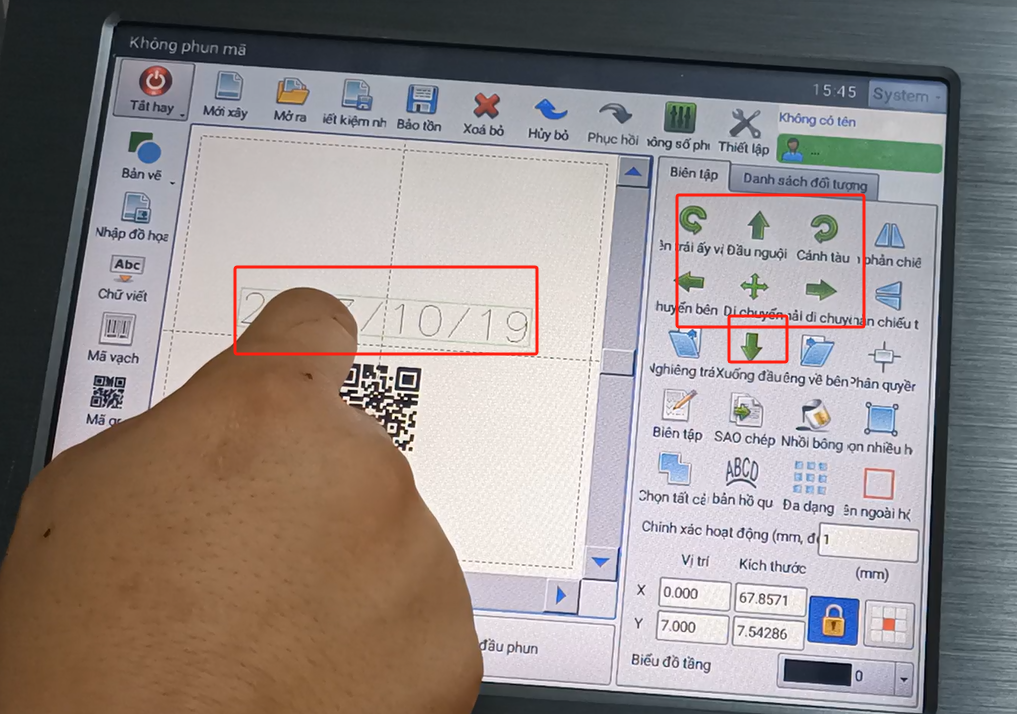
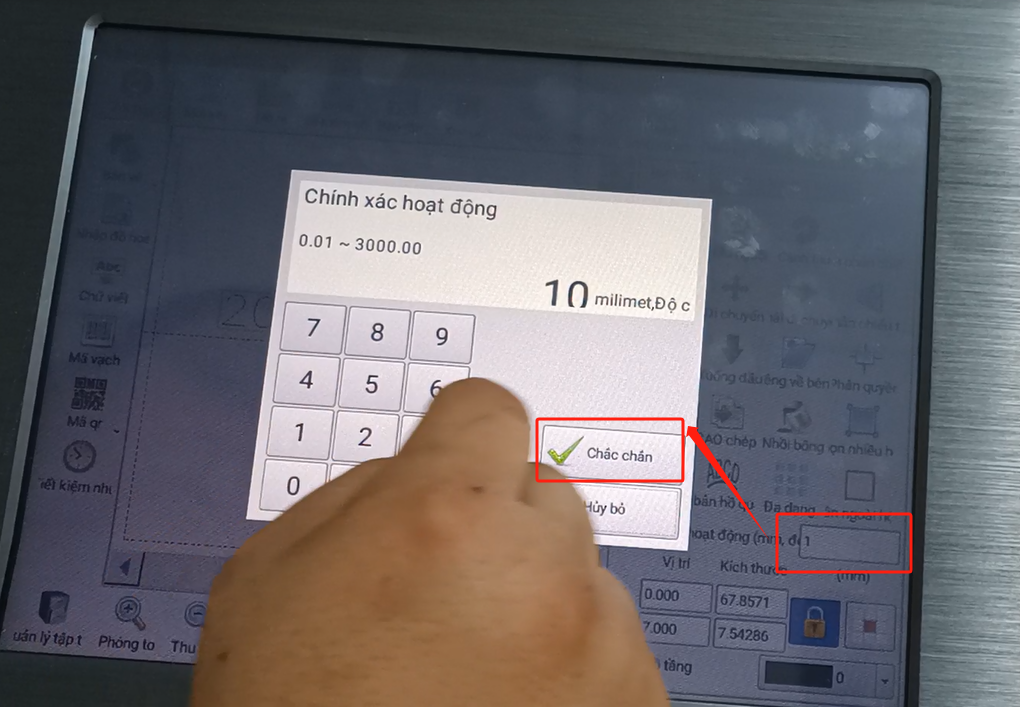
We then chose 10 mm and let it move just 10 mm each time.
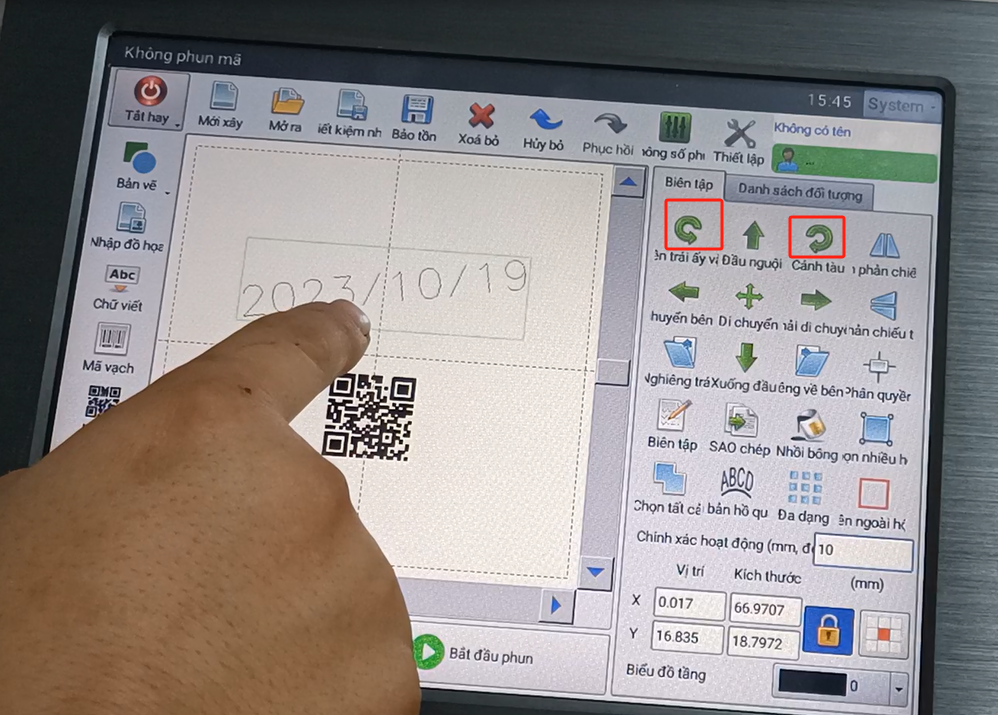
It can also be rotated, rotated now 10 or angle if we do this, it rotates 10, left and right.
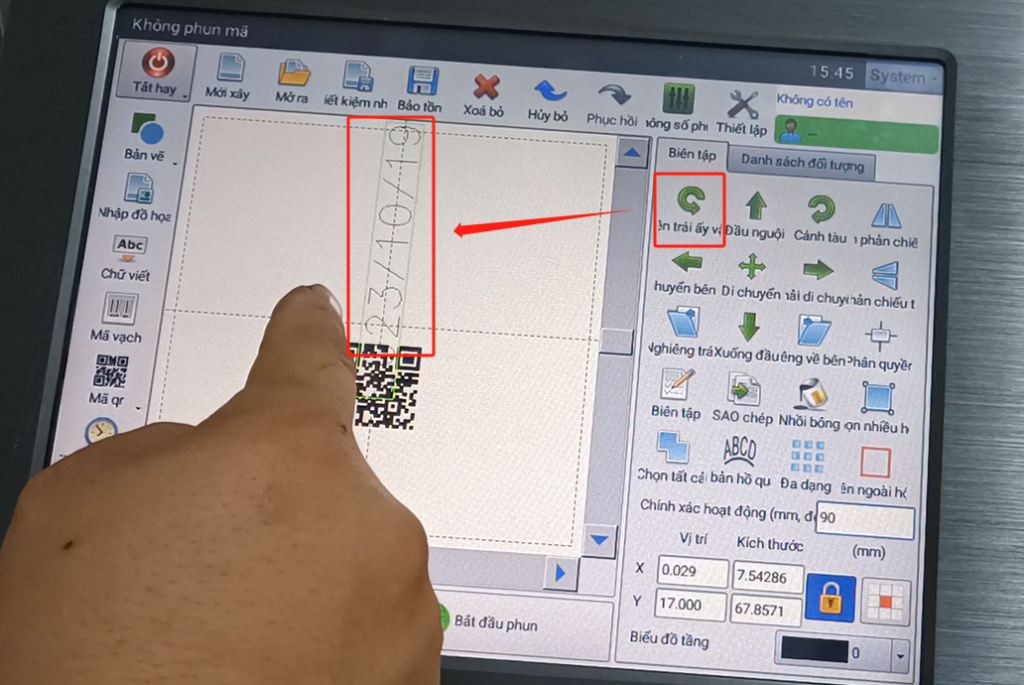
If we choose the 90. And then you go left, right, if you press left and right, this value represents the degree. If you move up, down, left and right, it represents a position distance moved, each time the movement distance, the default is 1. Also give it a sure 1.
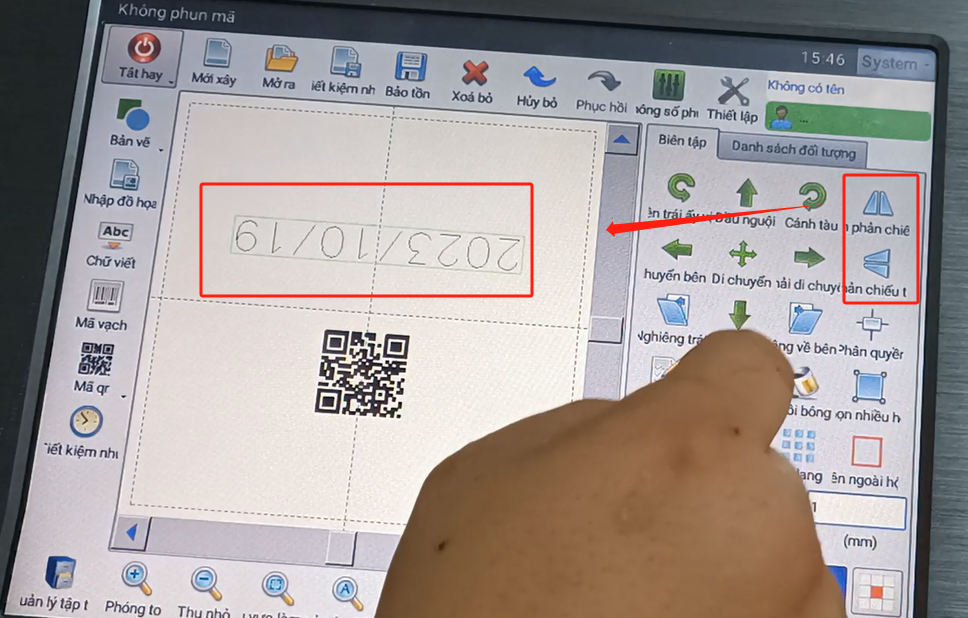
And then the mirror image here is the same, so let’s pick it. You can choose a direction of the mirror, which can be flipped here.
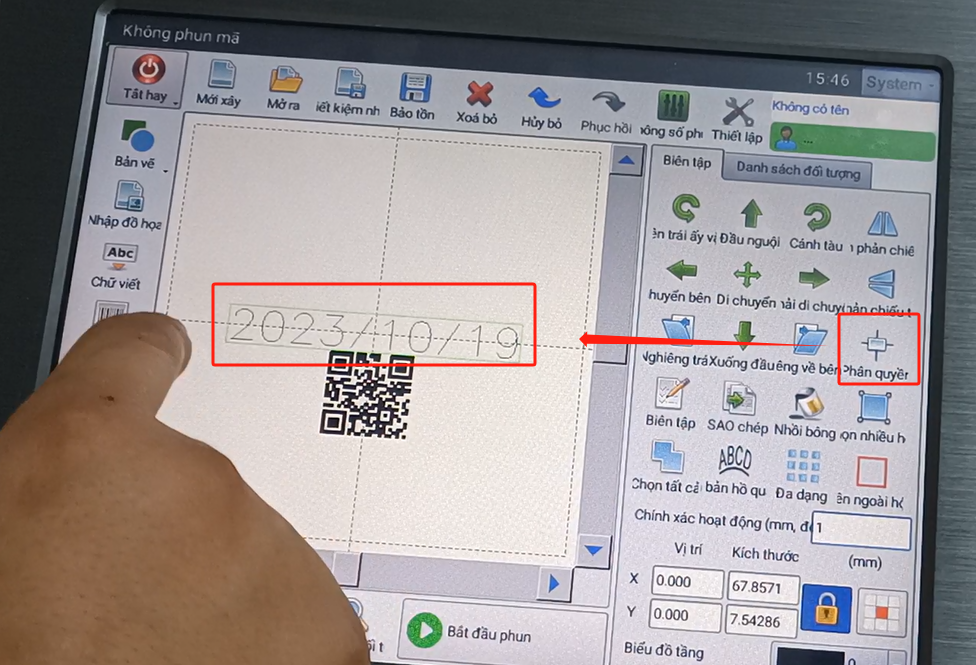
We have a center, and you pick it, and it’s back in the middle of our text.
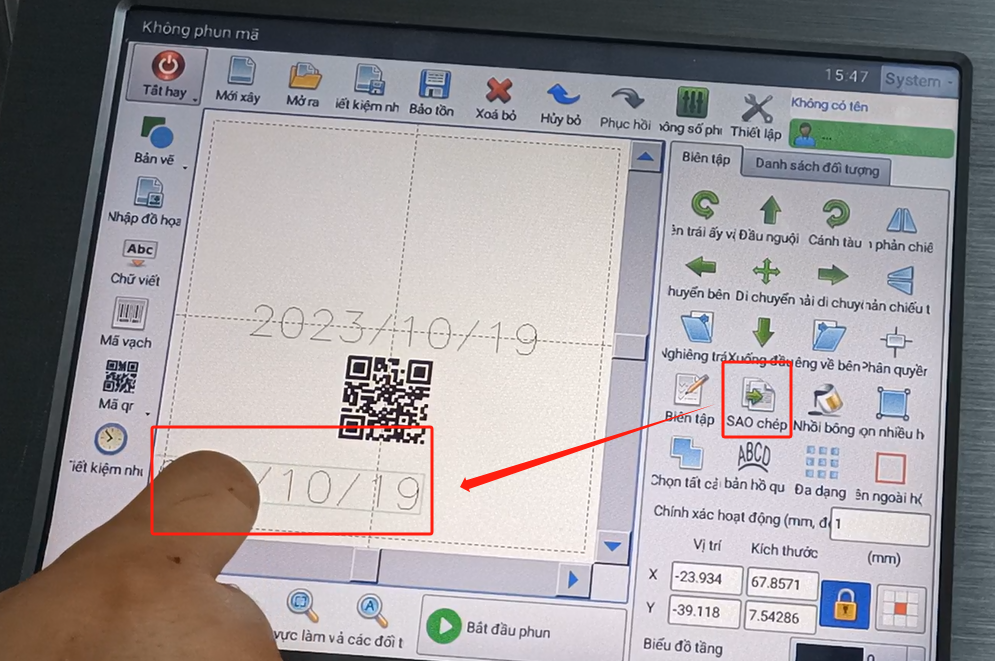
And there is replication, let’s click it, we select the information, and then click this replication, insert it in a position, it will copy it here, and let’s move it again. This one can’t touch the screen to move. This is a copy.
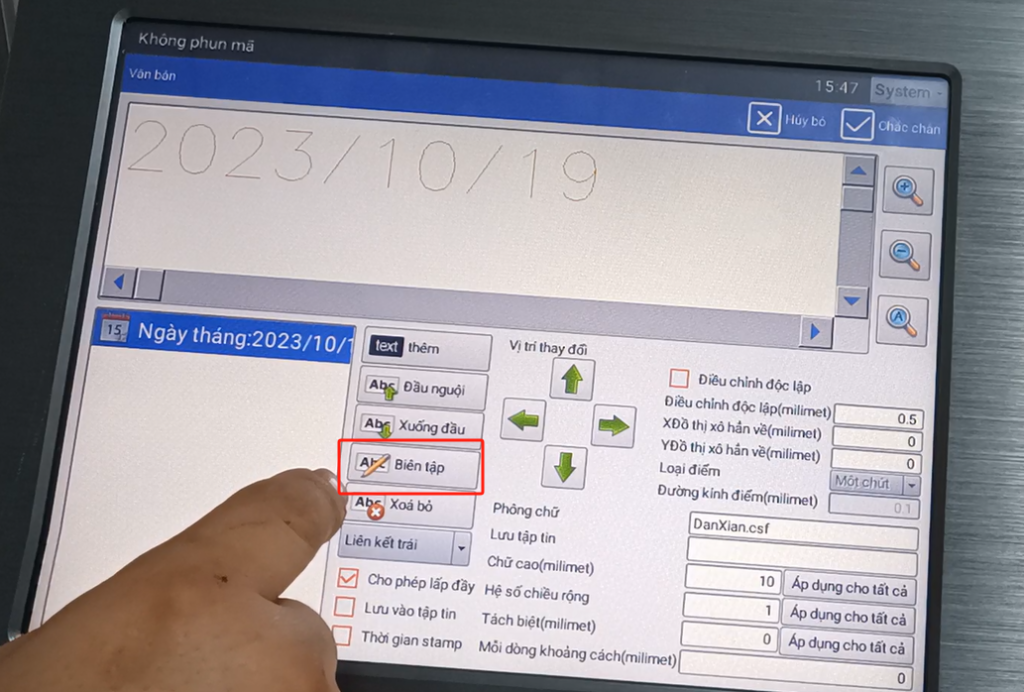
There is also editing here, if I edit the current information. I select it and then click on this edit.
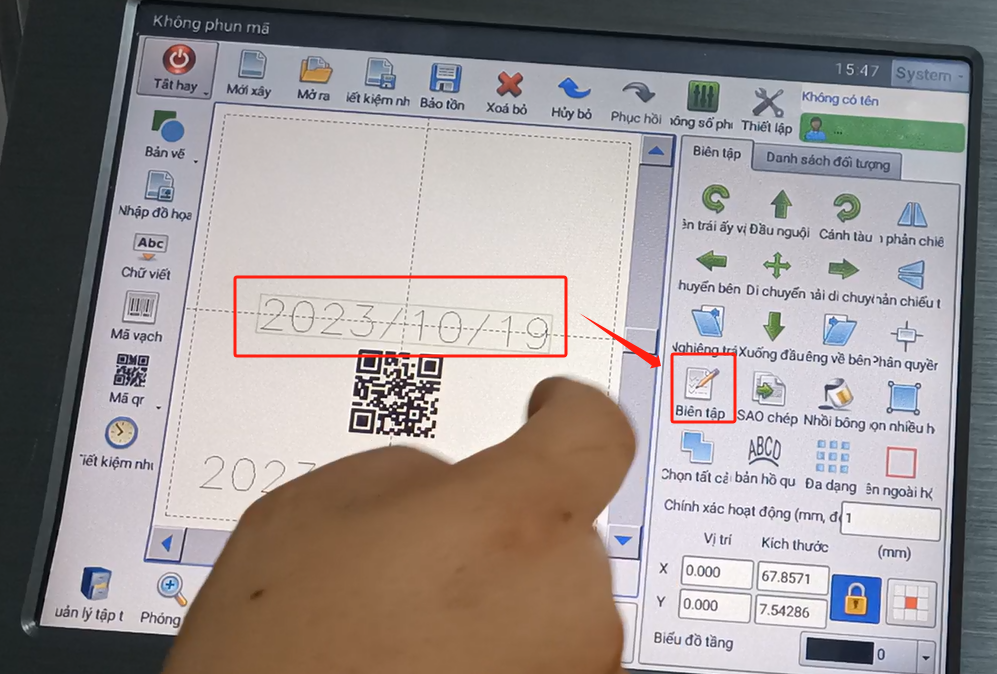
Then we click on one of the editors here, and we can edit it.
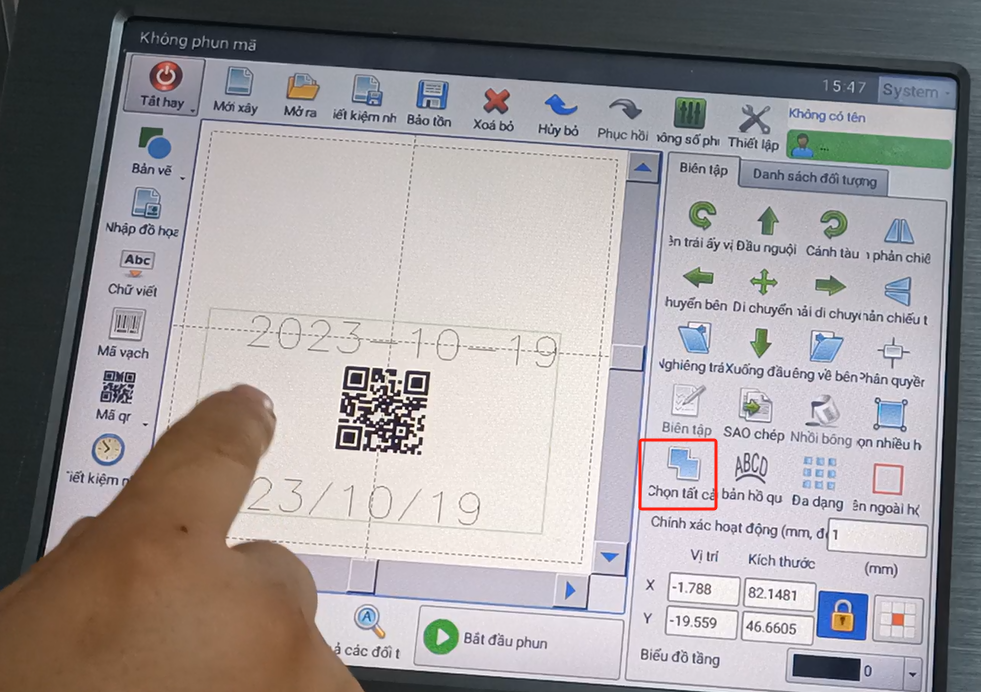
There is an full selection here. We want to move it as a whole or delete it as a whole, etc., and let’s choose it all.If all, it selects all the range of information. Then we can move up and down, up and down.
We need to store this information after it’s built. If you save it, then we click on this save.
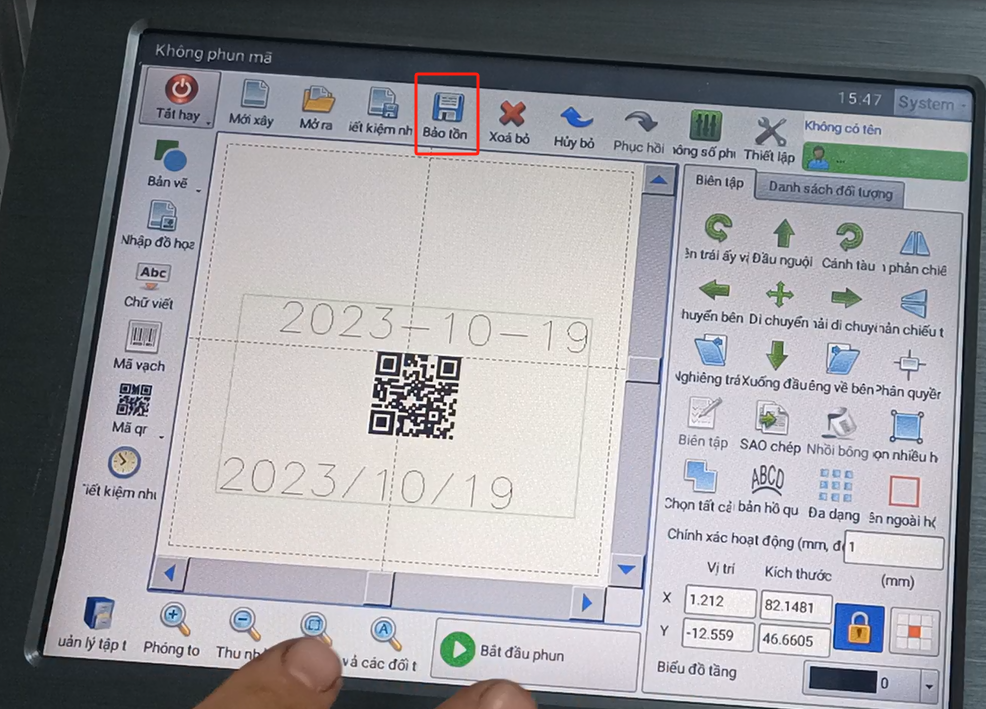
Then give this information another name. Then click save, save information we save it, this is a message.

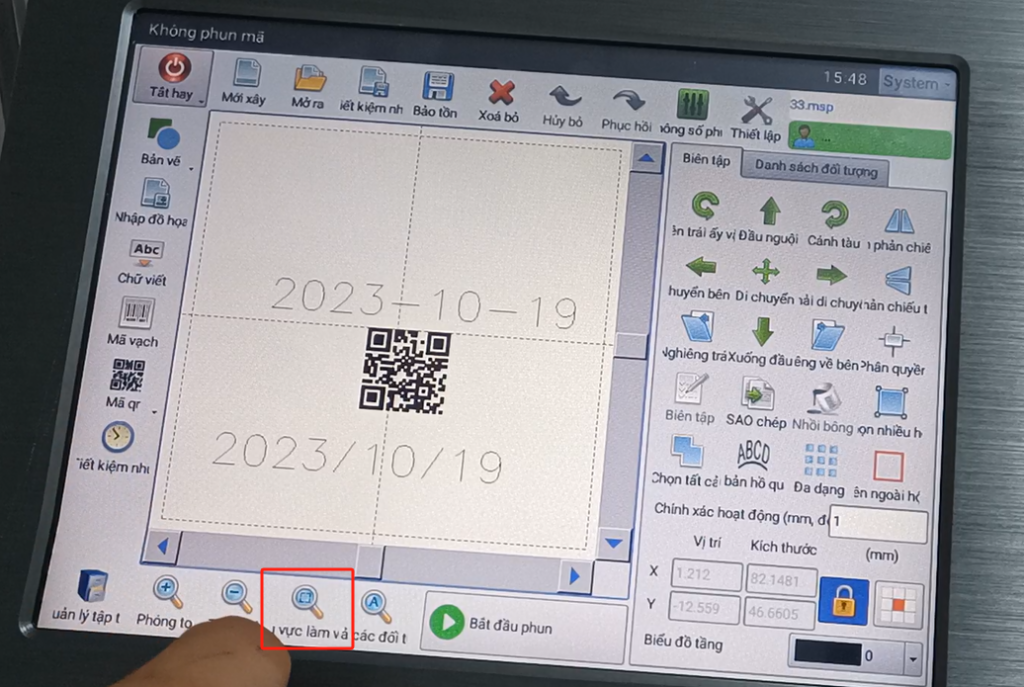
Then you can zoom it up, you can reduce it. And its working area, which is an interface where after we put it too big, too big and we want to restore its original initial value. Then we point to the work area and it goes back to this place again.
And here is a parameter setting for it.
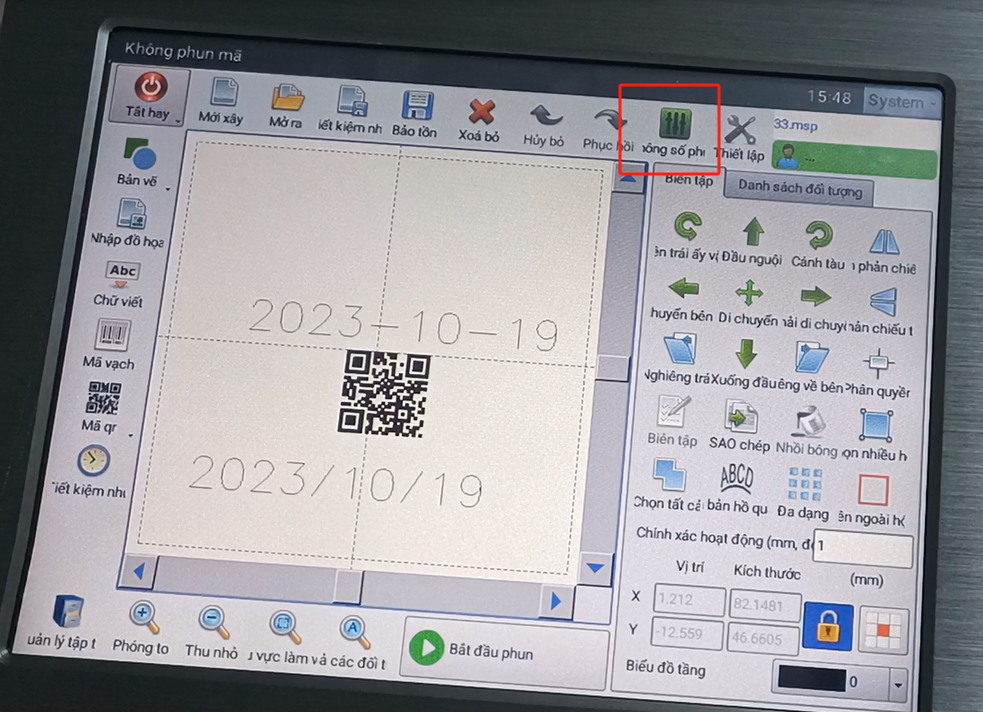
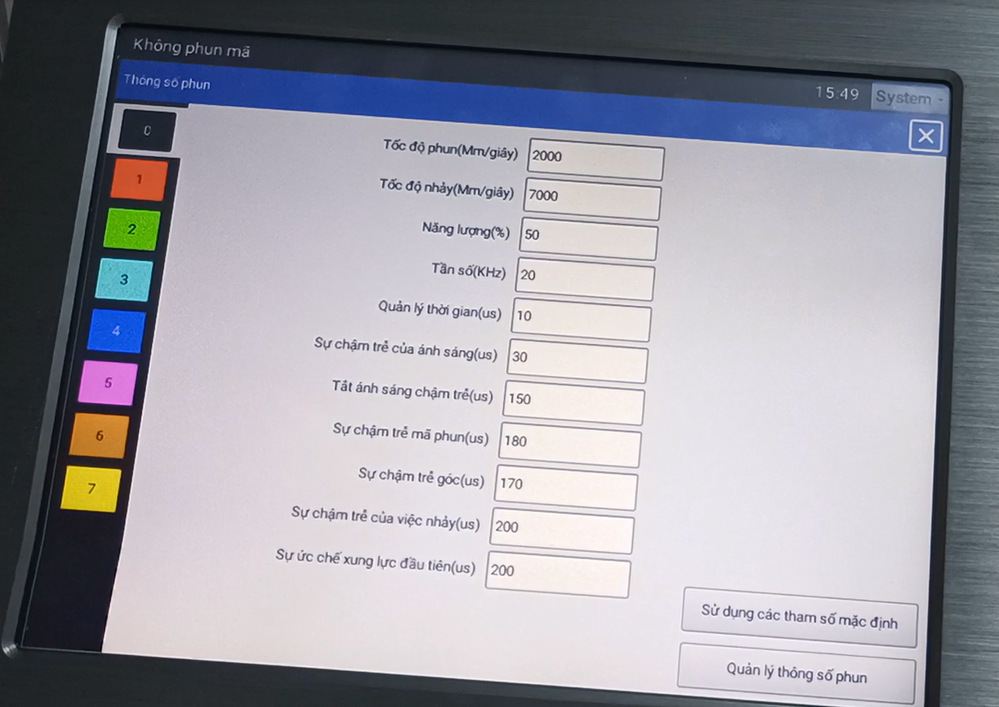
There’s a speed reaction here, a speed of the jet. Jump speed, power, frequency. Here we need to know is a jump speed, power, frequency of these three can we can move, the rest is with the factory adjustment, do not move it. We can increase or decrease the speed, and that speed is said .When the speed of our production line remains the same, the smaller the speed, the slower the printing speed, the more energy. This energy is the power. With the same printing speed, the greater the power, the greater the energy we print. The color of the information on the printed product, the darker it is. This is according to the needs of this product. And then we say hit a line, hit a situation on the product and then we adjust its power. The default of this frequency is 20 most often and 20. Of course, according to the different product, this value is a little bigger or a little smaller. The rest of us don’t get bigger or bigger.
And in our setup.
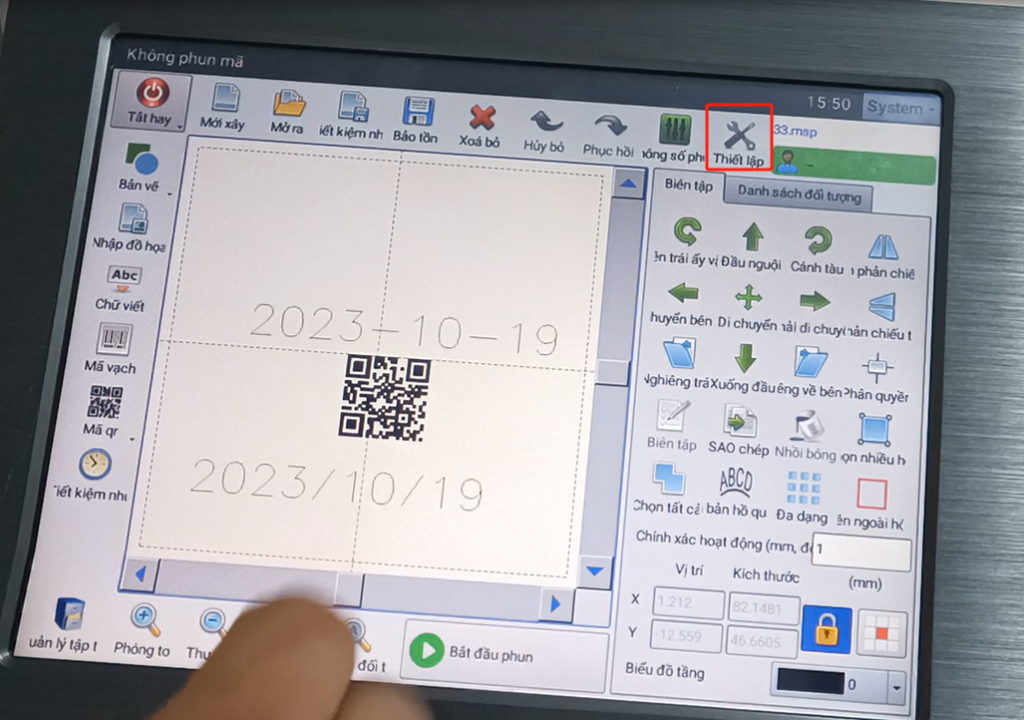
We are set and we don’t move.
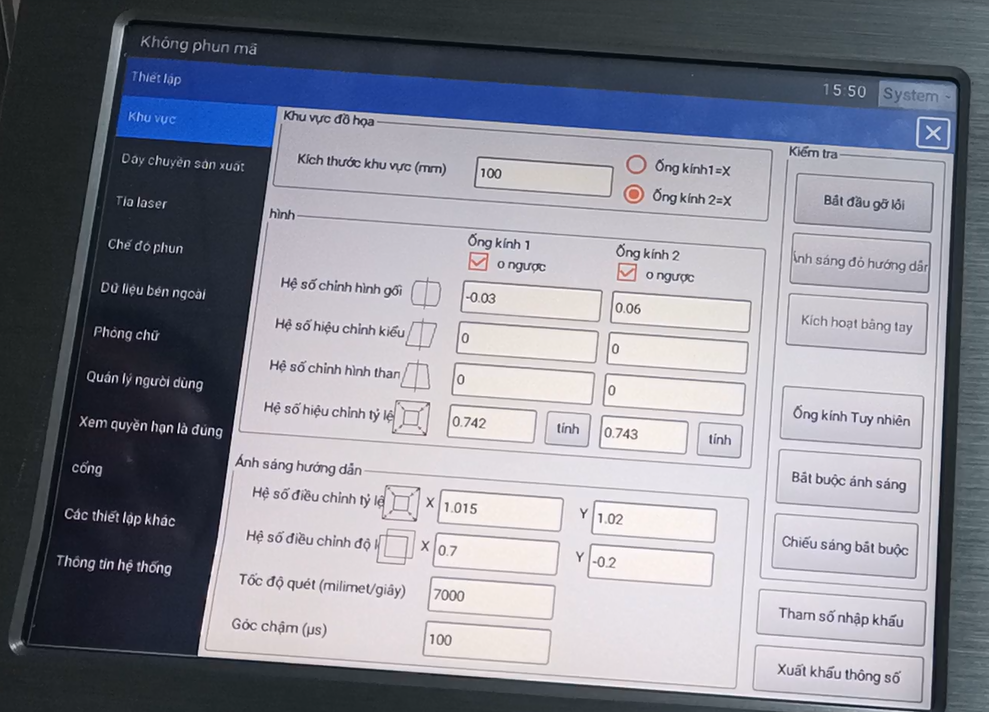
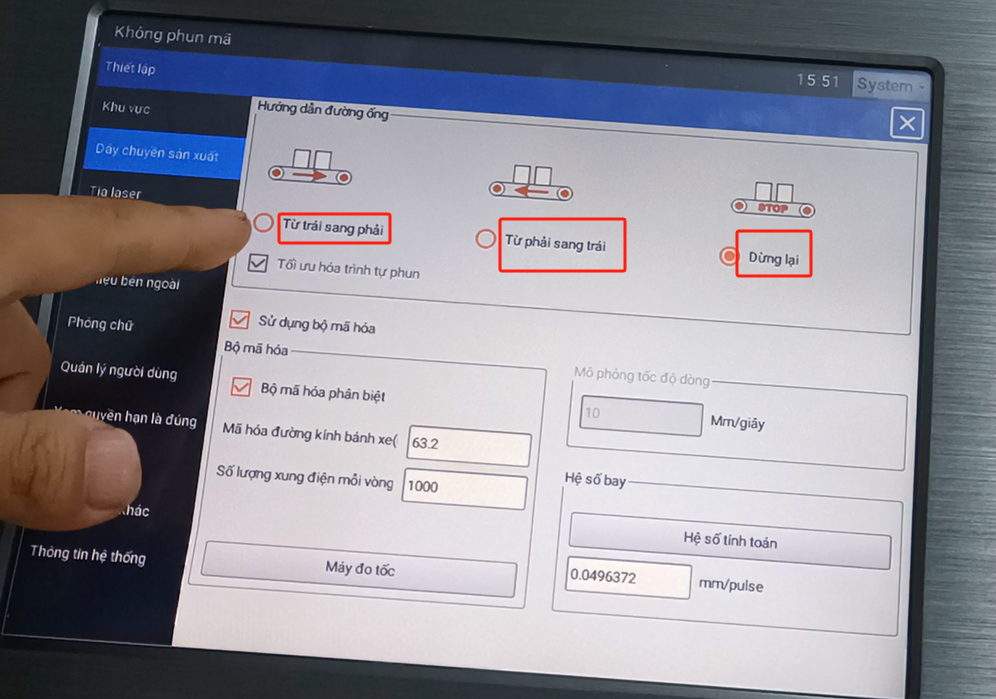
In here, we just have the flight mode. From left to right or right to left, or static printing, there are three choices. If our product is mobile printing, we have these two options. If we are still, we will press this one. When we stand still, no encoder is needed.
There’s a little inkjet mode on here. There is a trigger level, a high level or a low level, which we can choose between.
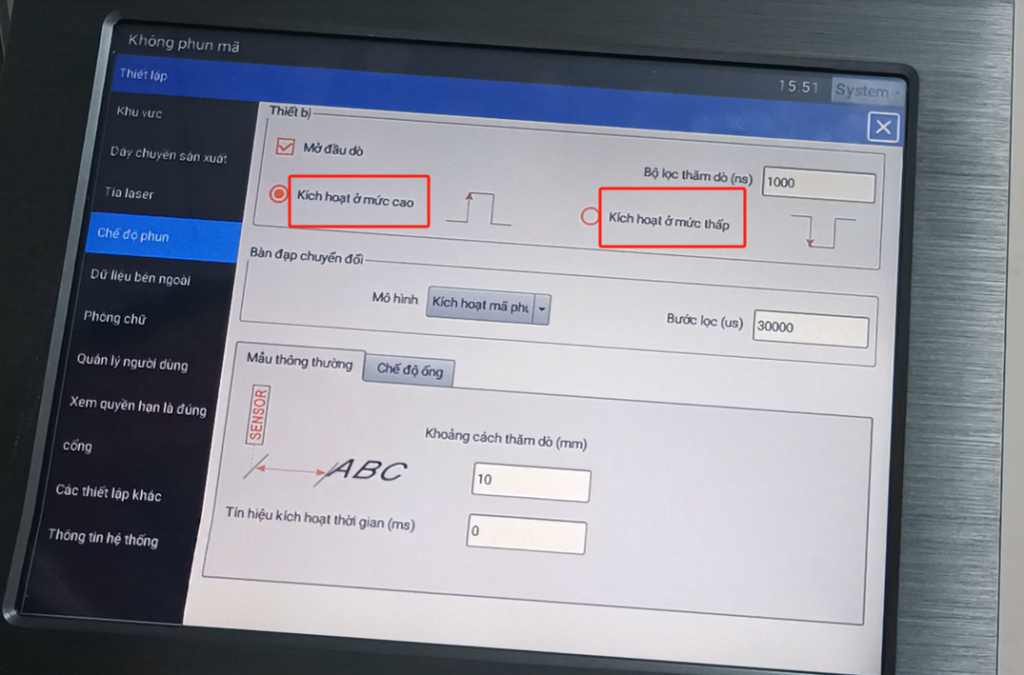
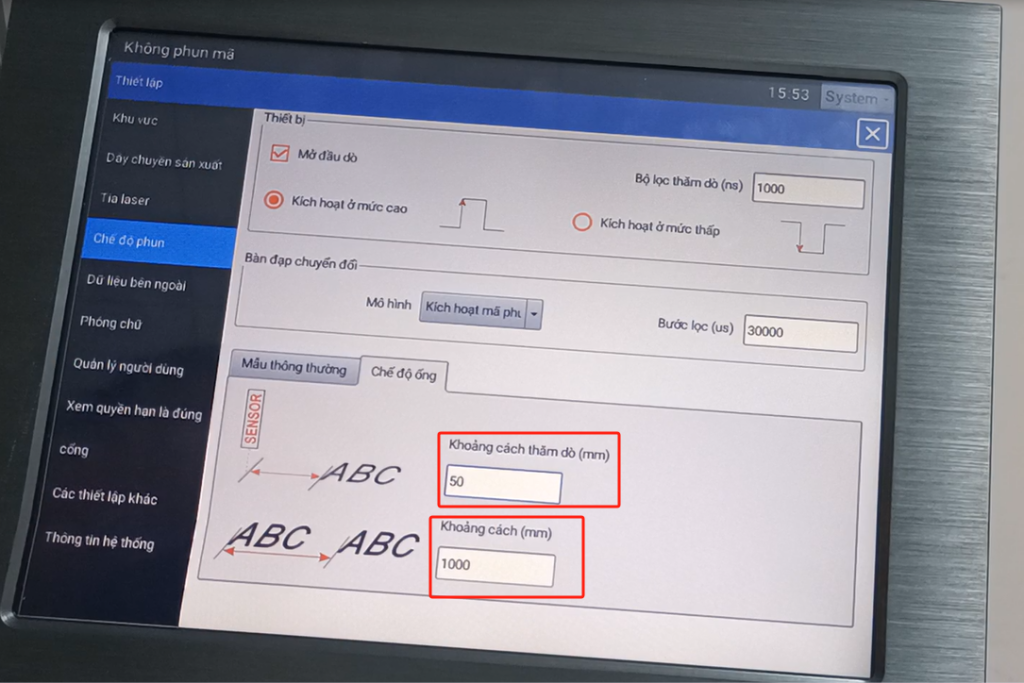
And below, there is a pipeline mode for normal mode. Normal mode has a value that we need to fill in. This value means that sensing the product, sensor senses the delay between the product and it starts to print. This distance can also be said to be a delay, and then we can adjust it here. Is the position on the product we can adjust according to this.
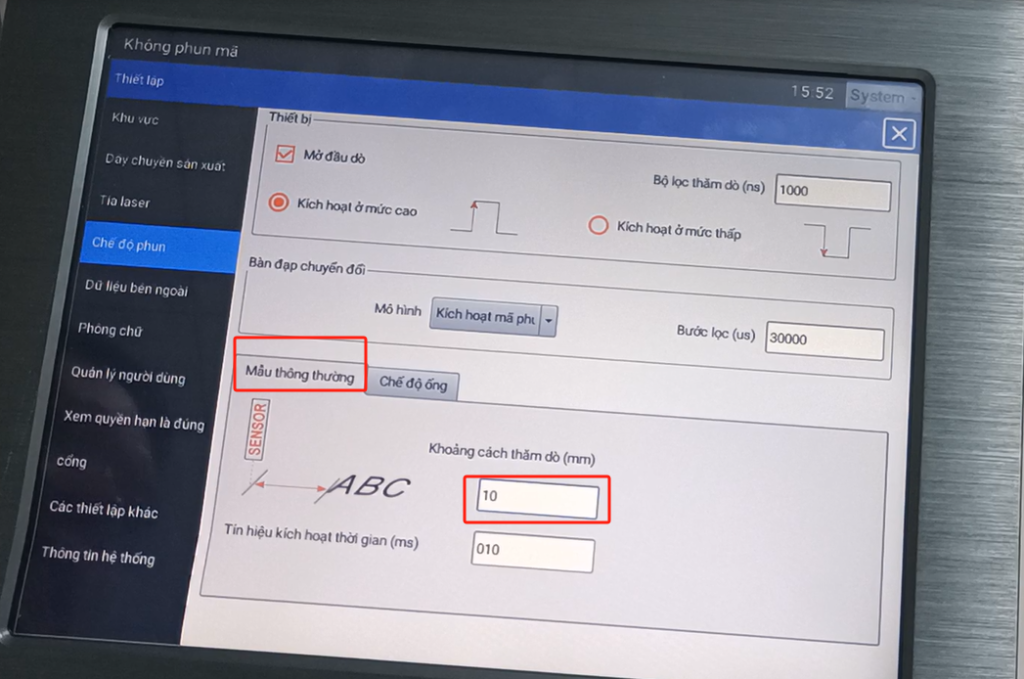
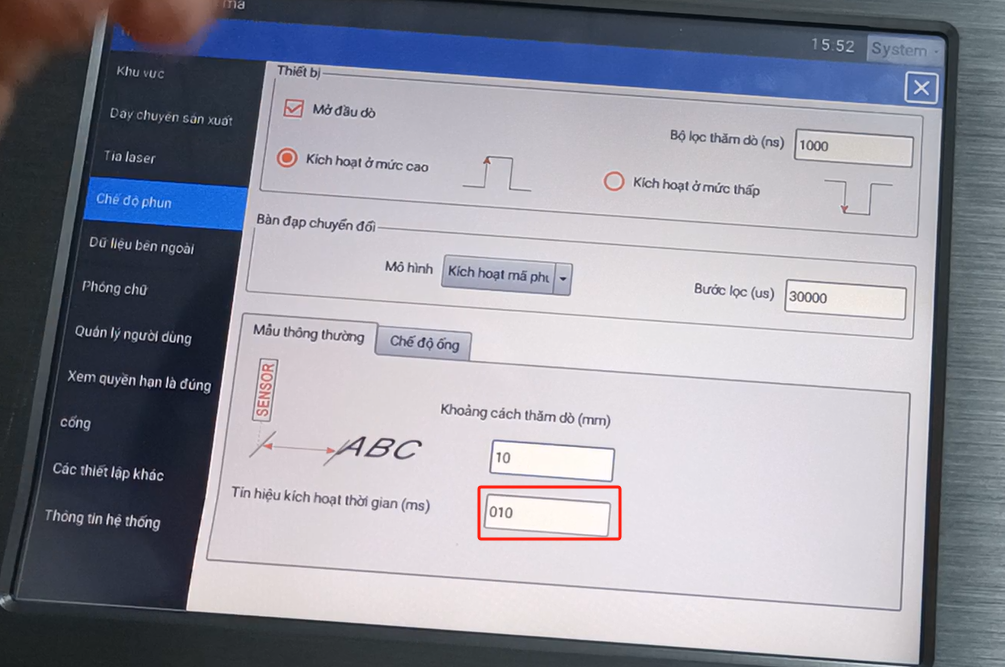
Here we can also adjust this value. We printed the induction in it, until it started to play. This area is a delay if we sense multiple signals. At this time, and this is the closed time.
There’s a pipeline mode here. Let me talk about the pipeline mode. That’s where we use pipes and cables, and we can use this model. With our model, the editing information characters is infinite, the length can be infinite, without regulations. Another is that our value is 50, which is a delay message at the beginning of the normal mode, and the sensor senses it, until it starts to spray to the position of the product, use this decision, and then we use the interval between each message. One thousand millimeter is one meter. What is a meter for? Referring to the information that we start from the first product to the other product, the total length is 1,000mm. I can’t say this 1,000mm is the interval between two messages, not that. Not mean the interval from the end of the first information to the beginning of the second information. It refers to the first information, printed from the beginning of it to the beginning of the second information, referring to a distance from them. So if we call this back, the first message is a meter long, if we have to be 200 apart and the second message, at least it has to be 1,200. Because the information itself has a length. I can’t say I have 1,000, that’s between two messages, the interval is 1,000, not so, it depends on the situation. This is one of its parameters, which is a simple explanation of this menu.
If we want to size it, we can adjust it here. This message I want to make it smaller, we can change it to 5, it becomes smaller, smaller overall. So if you want to be smaller, we change it to 2, and it’s even smaller.
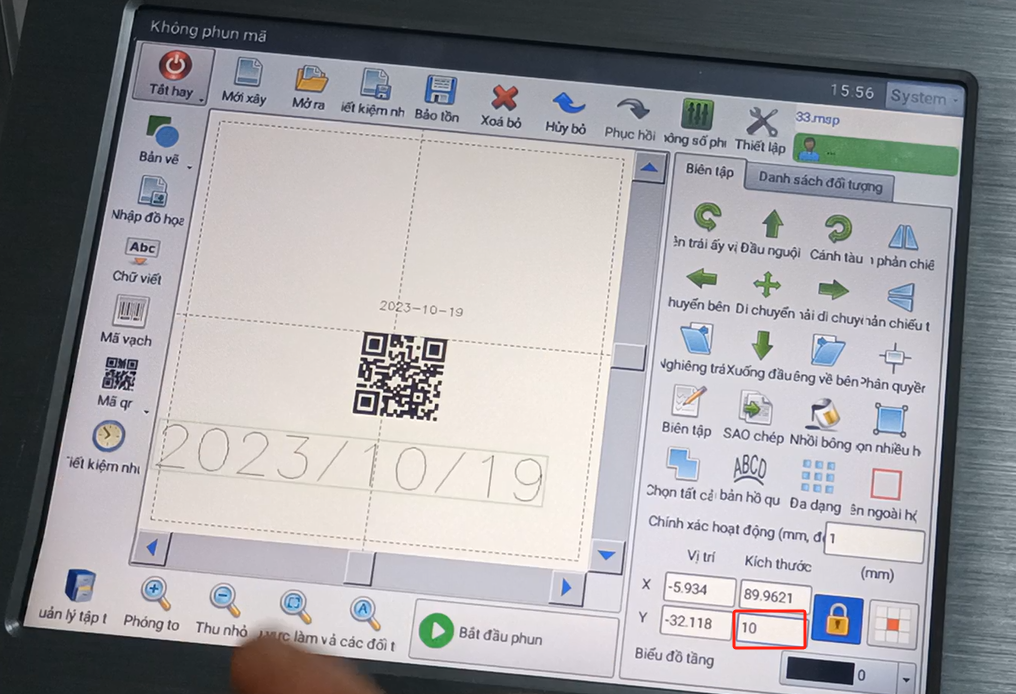
Instead, then I want to make it bigger, then after I choose it, we will change the y value to 10, and it will be bigger.
There is a button here, which is the print button. We select it and we can print, but we are over the boundary, and we move to the right.
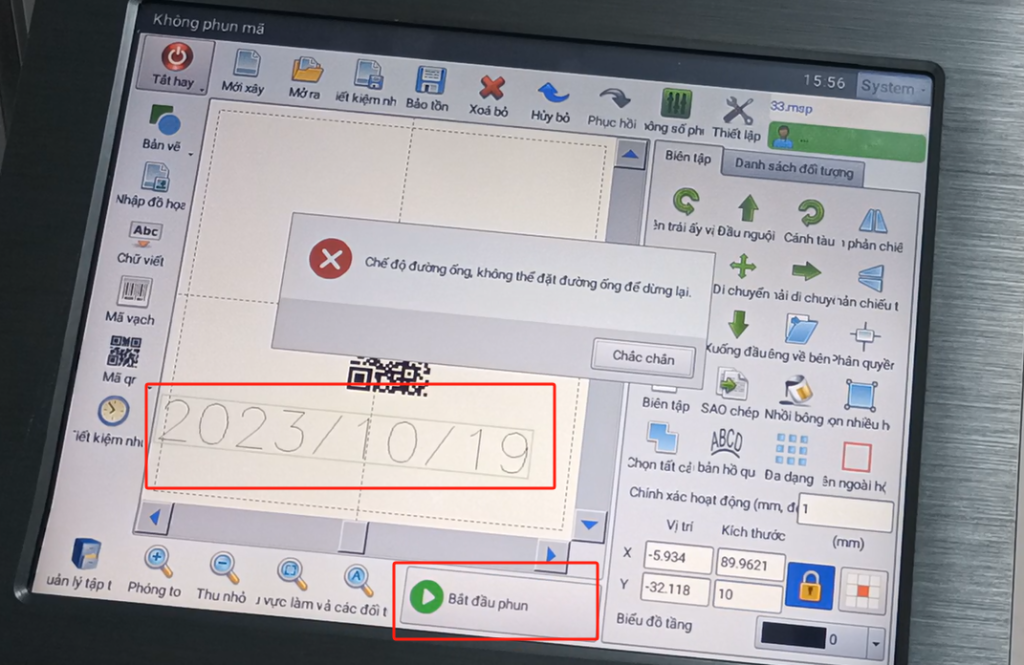
Because we are now in pipeline mode printing. Click print it will come out, we are now in pipeline mode, we have to fly print, not fixed print. And then we pick it, and then the line, now it’s still, pick this. Then click to print, this is printing.

There are several buttons here, which we’ll talk about them later. One of our most commonly used counterpoints. For example, our product area is a size, red light guidance.

This is triggered manually. When we check, we can manually trigger the print once. These are the two we use most.


