Let’s look at the new machine installation. If just installed, he has a guide to go through the new machine. Let’s look at the installation wizard tool, click the tool, and then click control.
Then there’s an installation wizard, and we go through that.

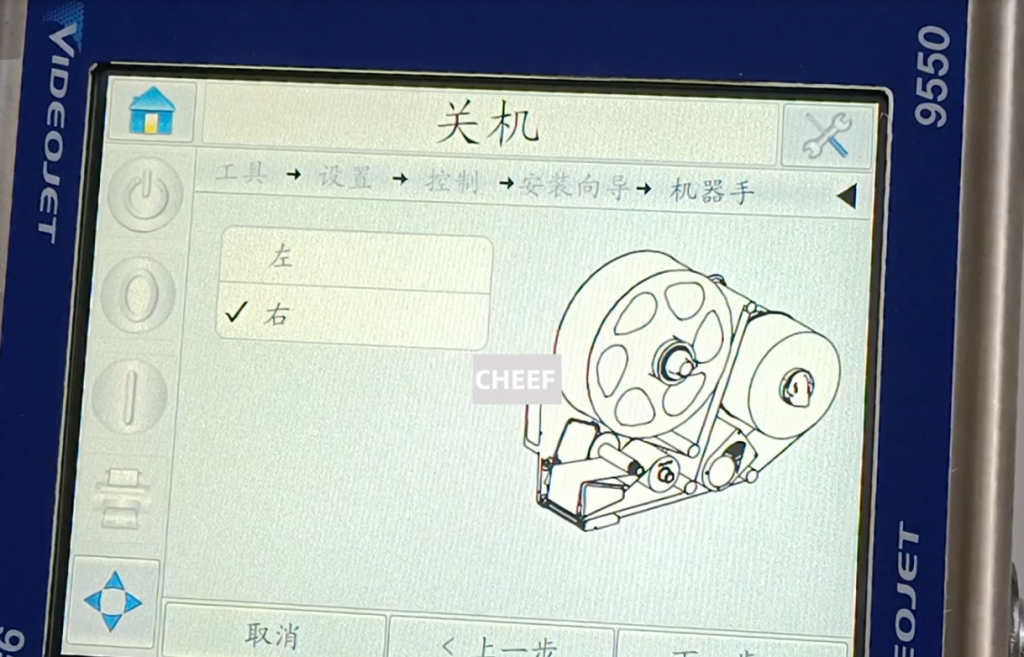
Next, we need to choose a language, and then choose a region, and then the metric system or the British system, the following date and time, the next step is whether our machine is the left phone or the right phone, we can choose here, is the right phone, we choose the right hand.
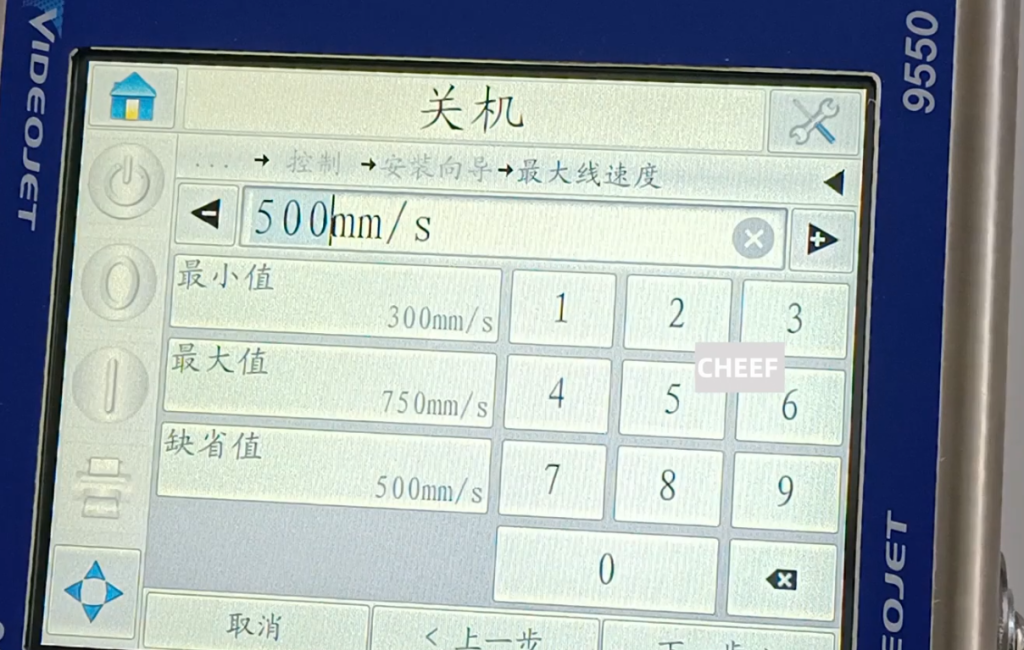
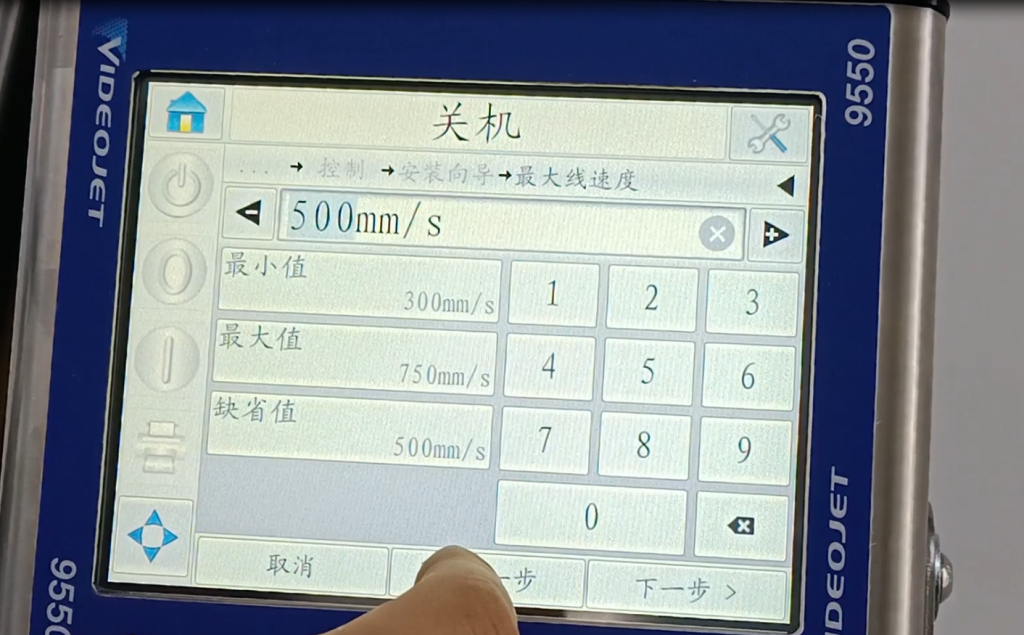
Then feed horizontally to the right, or vertically down. We feed vertically downward, if we are horizontal, we choose horizontal, vertical is vertical. We choose the next step, and then we take the default next step. Then only the label or some preprinted label, because our label is blank, no word is blank. Next step next step, next step. And then we have this value, and we need to lose this value. If we lose to 300 at the minimum value, we finish it out, and then we adjust the limit speed to change the maximum value to 300. So we can choose either 450 or 500 here. Now I can choose from it over here. After the selection, we can take the next step.
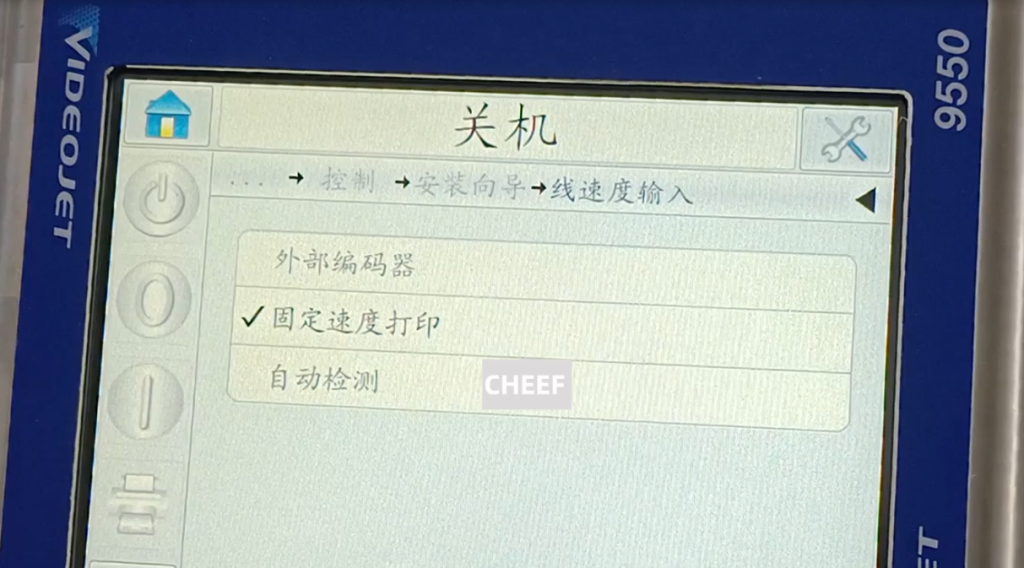
Then is the coder, external coder or fixed print speed, automatic detection. Normally we don’t use the encoder, normally we have fixed speed.
Then measure the line speed or the input line speed, that is, we use the line speed manually input, We select the input line speed. If the automatic measurement we choose the measuring line velocity. And then there’s a line speed here, a speed of our real production line. About how much, we can choose or fill in it, the maximum is 500. Because you look here, just now we entered 500, we are 500. If the previous choice was 750, then the maximum is 750.
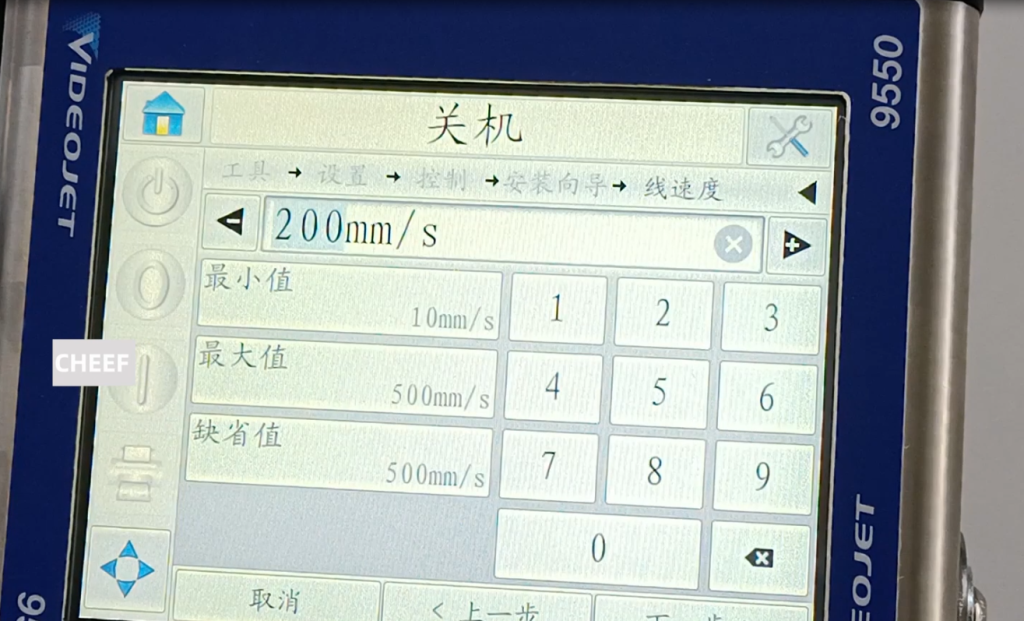
We can do it here is the last step. That’s what I just said, so if I change it to 750, he’s probably about 750.
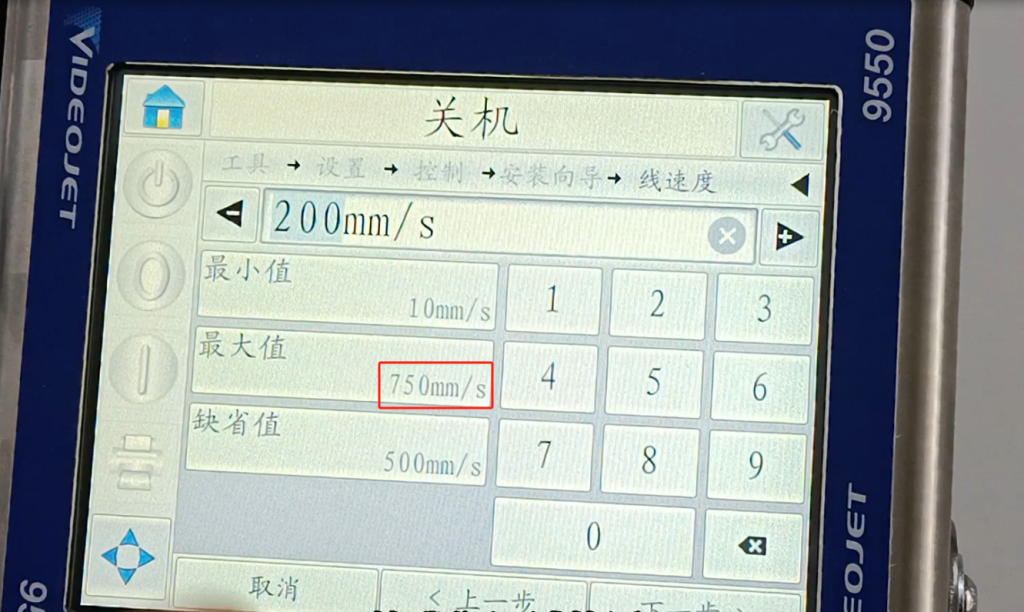
So the next step is the biggest one here is 750. We can now enter a value, and when we debug, we also need to input a matching value according to the speed of the field.
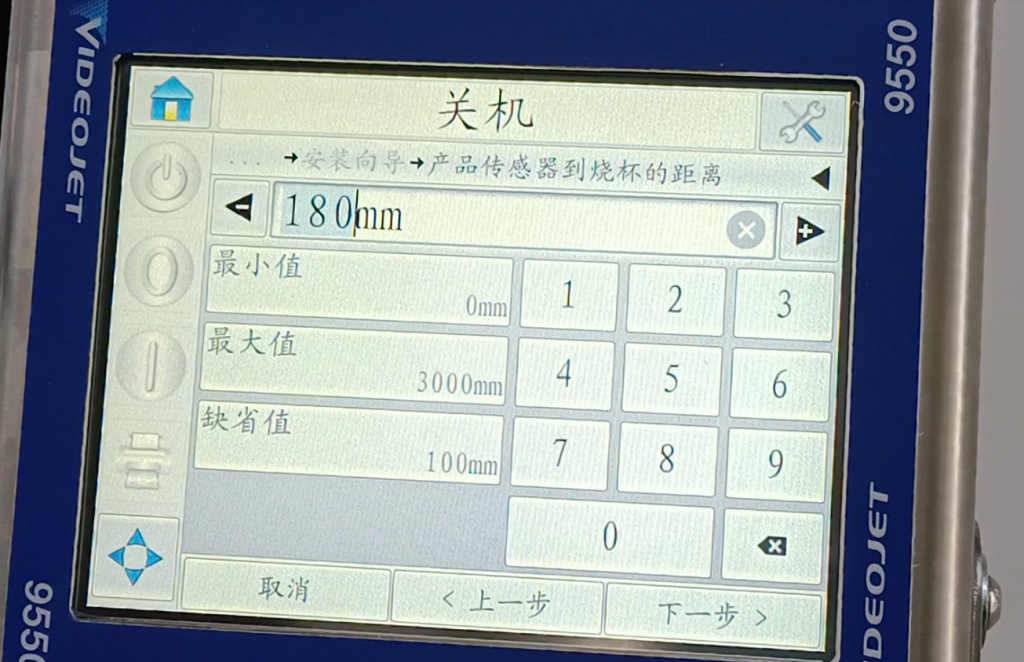
And then this is the delay. This delay we can be the distance from the photoelectric to our nozzle. We can input the number here, and then debug, we need to change. We enter the approximate values first.
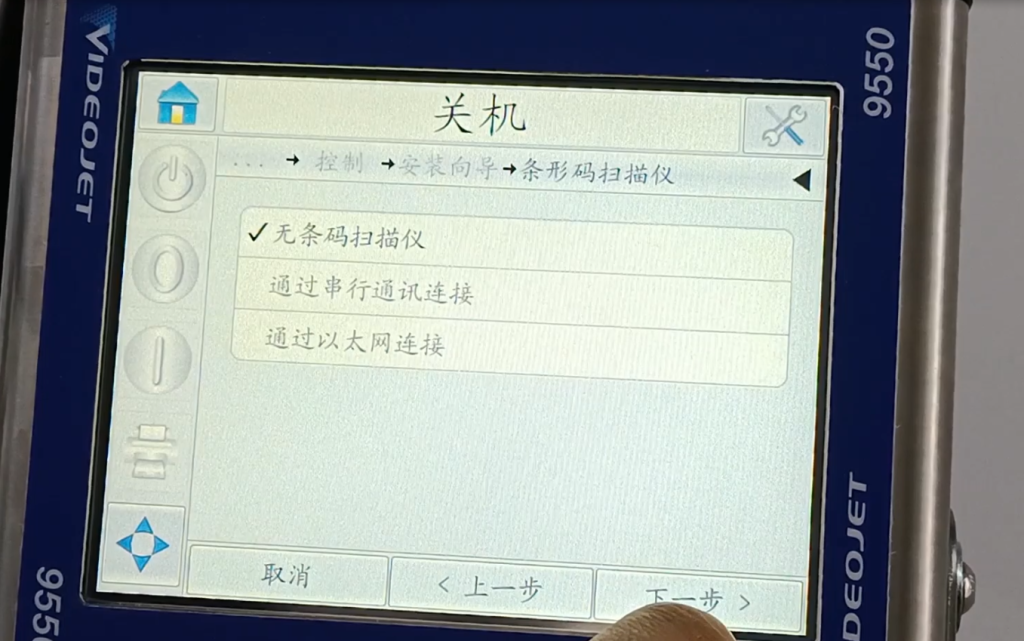
Then give feedback, with no feedback. Then there was a scanner, and no scanning. Next one, is normal. Then this installation wizard is over.