
Resolving Nozzle Clogging in Videojet 43s CIJ Printers
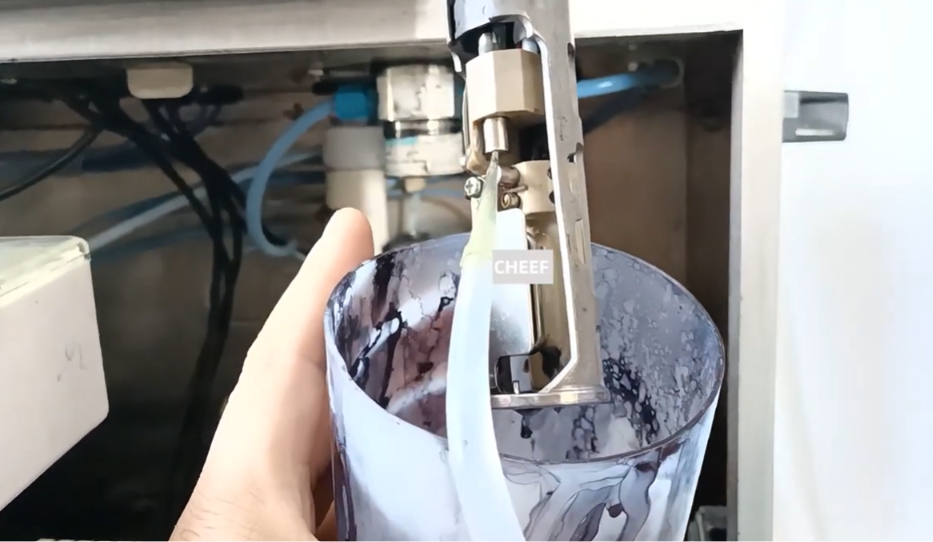
In high-speed production environments, industrial continuous inkjet (CIJ) printers must maintain uncompromised microfluidic stability to prevent costly downtime. For maintenance engineers operating the Videojet 43s, a partial or complete nozzle blockage is a common operational bottleneck.
When particulates, dried binders, or dust compromise the microscopic nozzle orifice, the resulting stream deviation can lead to immediate text distortion, poor droplet formation, or system faults.
Rather than skipping straight to a costly hardware overhaul, this step-by-step diagnostic framework ensures your line operators can safely purge debris, restore a clean fluid path, and verify proper stream alignment back into the recycling return system.
The Mechanical Impact of Nozzle Clogging
The core of the Videojet 43s printhead relies on a high-precision nozzle plate to generate a uniform ink thread. When foreign contaminants enter the fluid line or ink dries during extended shutdowns, the stream faces resistance.
- Partial Blockage: Results in an erratic, wavy ink thread or satellite droplet generation. This path deviation causes ink to miss the recovery gutter and accumulate on the high-voltage deflector plates, triggering a secondary High-Voltage Fault.
- Total Blockage: Completely stops ink flow, resulting in an immediate drop in systemic pressure and triggering line faults that freeze production cycles.
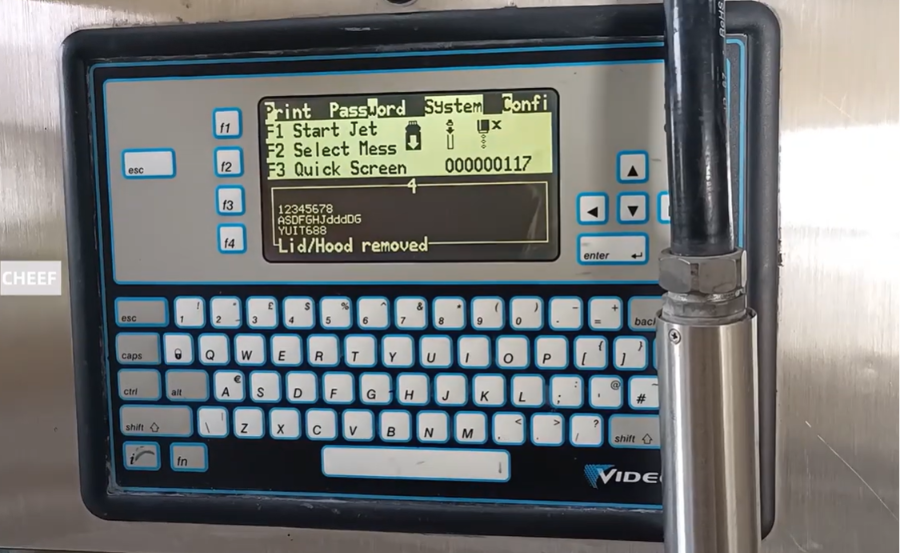
Phase 1: Initiating the Software-Driven Nozzle Flush
Modern industrial printers utilize specialized firmware cycles designed to safely dissolve standard crystallization without manual tool intervention. Always leverage the internal software architecture first.
Step 1: Access System Maintenance
Navigate to the interface panel. Select the System sub-menu from the primary interface display.
Step 2: Select Nozzle Flush Purge
Scroll down through the maintenance items to locate the Nozzle Flush utility. Press OK to execute. The system control board will systematically cycle internal valves, preparing the fluid lines for a targeted cleaning process.
Phase 2: The Physical Micro-Cleaning Procedure
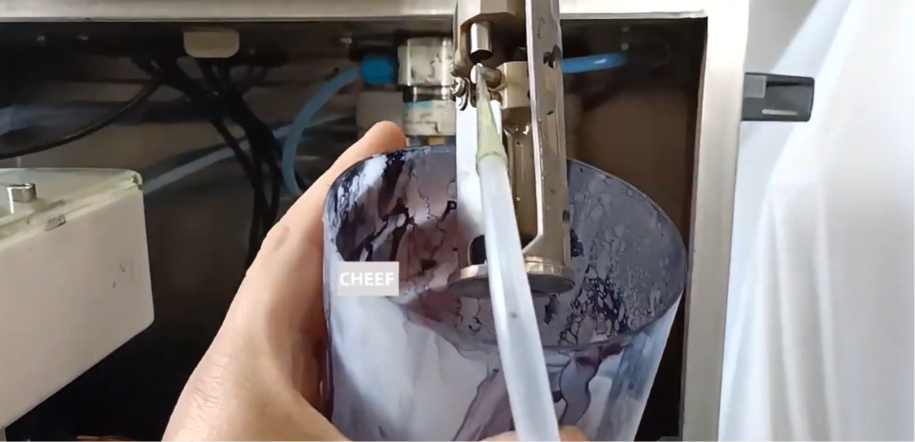
While the printer executes the internal flush sequence, physical intervention at the printhead ensures any hard buildup at the exterior orifice face is completely dissolved.
Step 1: Position the Collection Vessel
Place an approved, industrial fluid collection jug or clean recycling container directly underneath the exposed printhead module to catch runoff solvents.
Step 2: Targeted Solvent Application
Using a standard printhead washdown bottle filled with OEM-specified cleaning solvent, align the nozzle tip directly with the middle of the nozzle orifice. Pressurize the wash bottle to spray a steady stream of cleaner against the orifice.
Step 3: Observe Cycle Duration
Maintain the direct solvent spray for a minimum of 60 seconds per cycle. The chemical action of the pressurized solvent dissolves dried ink matrices clinging to the internal throat of the nozzle jewel.
Step 4: Handle Severe Blockages
If the system has been stagnant for an extended period, a single 60-second wash may not suffice. If the internal ink line fails to push through cleanly, repeat the software-driven flush and manual solvent spray sequence multiple times until the flow path is completely clear.
Phase 3: Post-Cleaning Stream and Alignment Verification
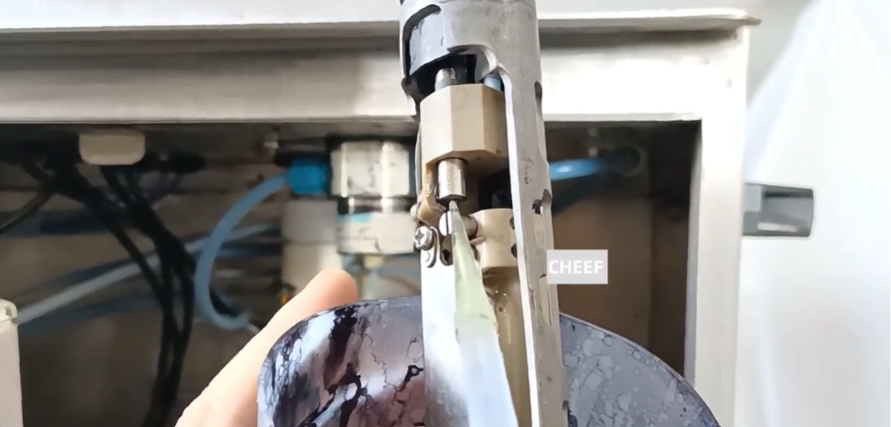
Clearing the blockage is only half the battle; ensuring the ink thread travels along the exact geometric center line is essential before returning the machine to live production.
Incorrect Alignment (Risk of High-Voltage Failure):
[Nozzle] ============\=====> [Misses Return Gutter]
Correct Alignment (Production Ready):
[Nozzle] ==========================> [Recycling Return Tank/Gutter]
1. Inspect the Ink Thread Trajectory
Once the cleaning sequence concludes, re-engage the primary jet loop. Observe the physical ink line using an industrial magnifying glass under the integrated strobe lighting.
2. Verify Gutter Targeting
Confirm whether the ink thread targets the exact center position of the recycling collection gutter.
- If Target is Correct: The stream aligns directly into the recovery system with zero overspray or clipping. No further maintenance is required, and the printhead cover can be re-secured.
- If Target is Incorrect (Misses Gutter): Micro-debris may still be clinging to the side wall of the nozzle orifice, or the nozzle plate itself requires physical micro-adjustment. Shut down the jet loop immediately and continue the solvent cleaning protocol until a straight trajectory is achieved.
Preventative Maintenance Matrix for Distributors & Plant Managers
| Root Cause | Operational Impact | Preventative Best Practice |
| Extended Production Shutdowns | Ink solvent evaporates in the nozzle throat, causing hard crystallization. | Always run the automated “Clean Stop Jet” sequence before shutting down the system for more than 24 hours. |
| Environmental Air Contamination | Airborne dust or packaging fibers cling to the wet nozzle face. | Clean the printhead housing assembly with washdown solvent at the beginning of each production shift. |
| Improper Ink Filtration | Micro-particulates bypass compromised filters and lodge behind the nozzle jewel. | Adhere to scheduled maintenance intervals for replacing internal fluid core and inline ink filters. |
Frequently Asked Questions
Q1: Why is it critical to ensure the ink stream enters the recycling gutter perfectly straight?
If the stream is misaligned by even a fraction of a millimeter, the ink droplets will clip the edges of the gutter or the deflector plates. This creates ink buildup that will bridge the electrical gaps, resulting in immediate “Ultra High Voltage Faults” and messy code print errors.
Q2: What should I do if multiple manual solvent flushes fail to clear the nozzle blockage?
If repeating the manual wash cycle fails, the nozzle plate should be safely removed by an authorized technician and placed in an industrial ultrasonic cleaning bath filled with fresh washdown solvent for 5 to 10 minutes to break down stubborn, deeply lodged particulates.
Q3: Can I use compressed air to blast a clog out of the nozzle orifice?
No. Directly targeting the nozzle orifice with high-pressure compressed air can force debris deeper into the fluid lines or damage the delicate internal seals and the micro-jewel alignment inside the printhead assembly. Stick strictly to software-driven flushes and low-pressure solvent sprays.
Watch the Full Video Tutorial:
This article summarizes the key points from our original video. Watching the full tutorial provides a clearer understanding of the procedures, demonstrations, and practical maintenance tips.
▶ Watch the full video below.
📺 Subscribe to the Cheef YouTube Channel to receive future maintenance guides, troubleshooting tutorials, product demonstrations, and industry updates.
