
Troubleshooting the Videojet 43s Ultra High Voltage Fault
In continuous inkjet (CIJ) printing ecosystems, system uptime is entirely dependent on the stability of the printhead electronics. For operation teams running the Videojet 43s, encountering a high-voltage disruption can instantly halt a production line.
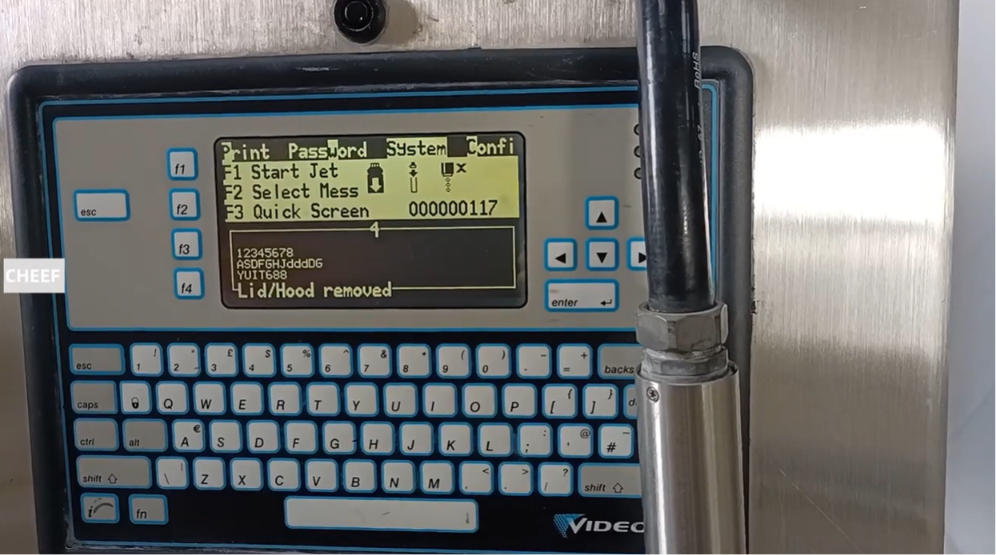
When the system control panel flags a high-voltage warning, it typically manifests on the visual interface as an overpressure trip or a structural high-voltage breakdown, flashing the prompt: “Lid/Hood Removed” followed by “Ultra High Voltage Trip” or “High Voltage Failure.”
Rather than defaulting to an immediate system overhaul, industrial maintenance teams can apply a multi-tier diagnostic approach to identify whether the fault stems from environmental debris, micro-fluidic misalignment, or absolute component degradation.
Understanding the CIJ High-Voltage Architecture
To effectively troubleshoot the Videojet 43s, it helps to understand the underlying mechanics of how images are deflected onto your substrate.
During normal operation, the printer pressurizes ink through a microscopic nozzle, breaking the stream into individual droplets. These droplets pass through a charge electrode before flying past the high pressure deflector plate. The high-voltage field pulls or pushes the charged droplets to precise coordinates on the product, while uncharged droplets pass cleanly into the return gutter.
If this high-voltage circuit experiences a continuity break, ground fault, or structural short circuit, the motherboard immediately triggers a safety trip to protect the printhead assembly.
Phase 1: Deflector Plate Contamination & Cleaning Protocol
The most frequent culprit behind an “Ultra High Voltage Trip” is dry ink accumulation or fluid bridging across the deflector elements.
Step 1: Visual Inspection
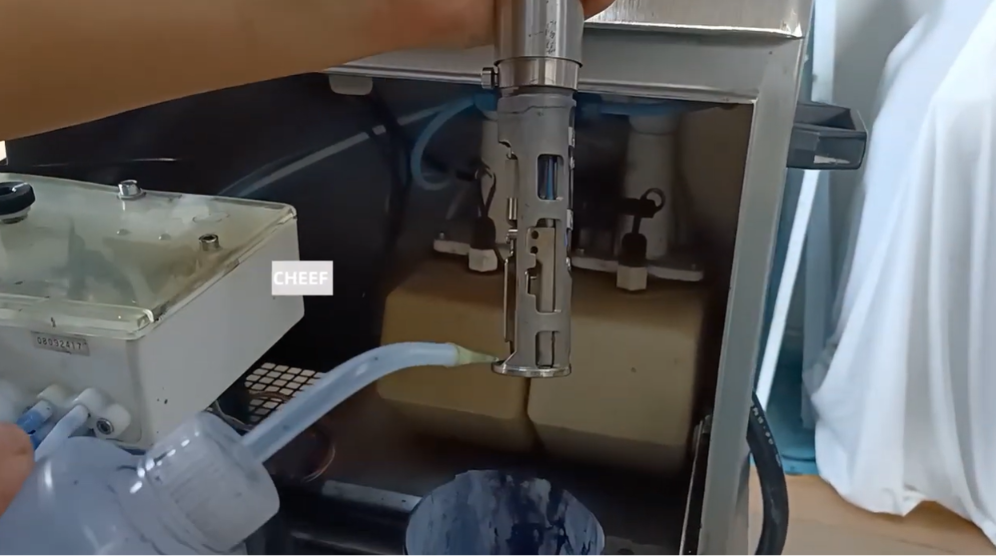
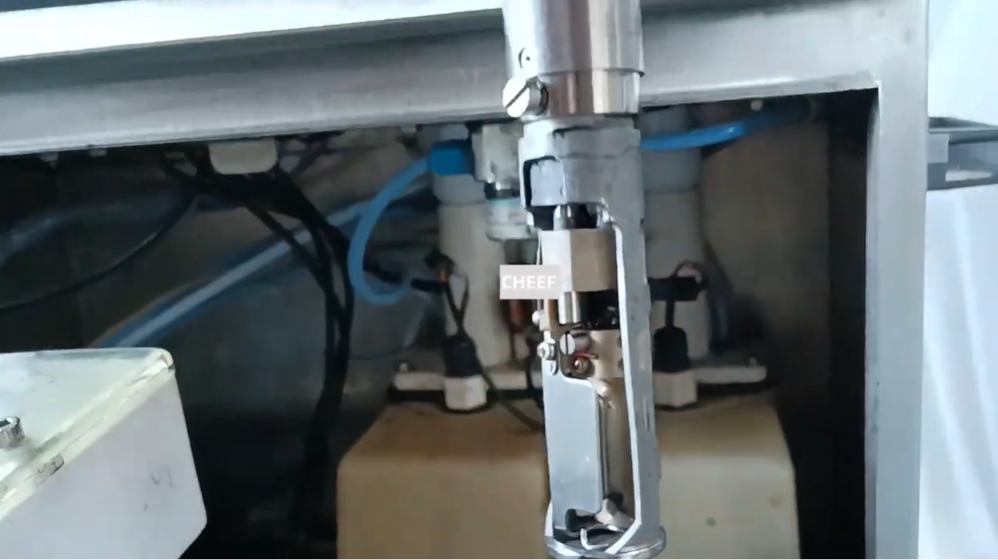
Remove the printhead cover. Inspect the interior block, specifically the high-pressure deflector plate. Under high-speed production, structural ink misting can gradually coat the insulation gap with a conductive film of ink.
Step 2: Wash with Washdown Solvent
Using your plant’s standard cleaning solvent bottle, thoroughly wash the deflector plates, the nozzle plate assembly, and the surrounding chassis body. Ensure all traces of ink build-up are completely melted away.
Step 3: Evacuation and Forced Drying
- Wipe: Use a lint-free industrial wipe to gently absorb excess cleaning solution around the base of the printhead structure.
- Blow Dry: Use clean, dry, oil-free compressed air (or an approved air bulb) to thoroughly blow dry the high-pressure deflector plates and the charge line array.
CRITICAL MAINTENANCE NOTE: Any residual solvent trapped between the high-voltage plate and the ground chassis will mimic an electrical short, causing the printer to re-trip as soon as the ink jet sequence restarts.
Phase 2: Micro-Fluidic Analysis (Ink Split & Nozzle Inspection)
If the high-voltage fault immediately triggers again after a thorough cleaning and drying cycle, the root cause is likely physical: the ink stream is physically clipping or impacting the deflector plate.
1. Evaluate the Ink Drop Split
Using an industrial magnifying glass under the printhead strobe LED, closely observe the ink stream at the point where it breaks into distinct droplets (the drop split point).
- Symptoms of Failure: If the split point is unstable, wavy, or producing erratic “satellite” micro-droplets, the stray ink will drift onto the deflector plate, bridging the high-voltage gap within seconds of starting the jet.
2. Remediate Nozzle Clogging
A microscopic, partial obstruction inside the nozzle orifice can skew the ink line by just a few degrees. This trajectory variation causes the jet to strike the high-pressure deflector plate rather than shooting down the center line into the gutter.
- Action: Perform a dedicated nozzle backflush or sonic cleaning sequence to remove micro-particulates disrupting the straight stream line.
3. Review Ink Rheology and Aging
Over-concentrated or chemically degraded ink changes the electrical conductivity and viscosity of the fluid matrix. If the ink chemistry has expired or been altered by poor solvent balancing, the target charging parameters fail, causing a system-level fault.
- Action: Drain the internal reservoir mixer, flush the fluid paths, and introduce a fresh batch of certified industrial ink.
Phase 3: Mainboard Electronics & High-Voltage Pack Diagnostics
When the printhead is completely clean, perfectly dry, the jet alignment tracks cleanly into the center of the return gutter, and the warning still persists, the fault transitions from fluidic to electronic.
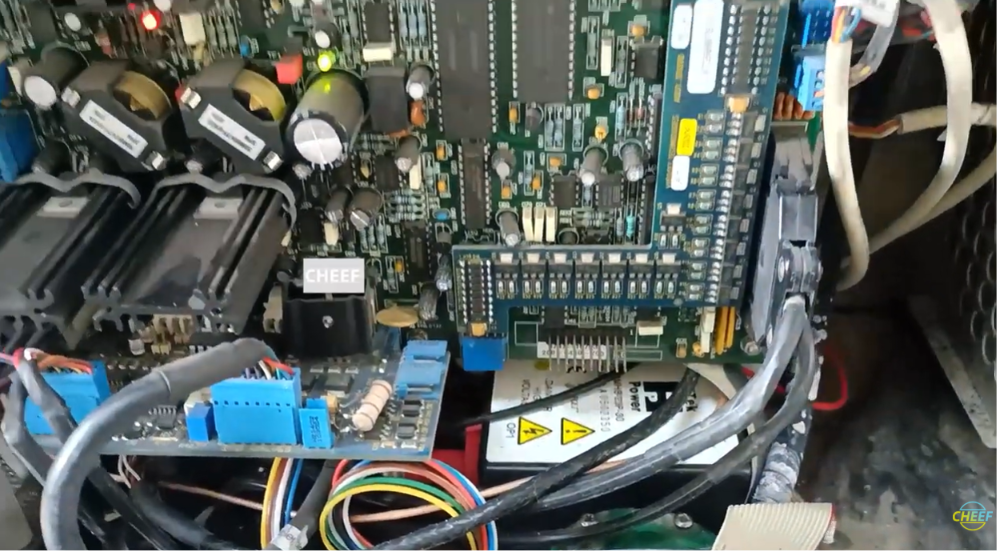
The primary power driver for this system sits inside the main enclosure: the High-Voltage Pack (HV Pack Module).
Isolating a Blown HV Pack
The High-Voltage Pack is a sealed, potted step-up transformer module located directly underneath or adjacent to the primary machine control board. Over years of deployment in harsh industrial environments (high humidity, heat, vibration), the internal insulation of this transformer module can break down.
If the internal insulation components fail, the module cannot maintain the target output potential needed to create a stable static deflection field. The control loop reads this drop as a system failure and shuts down the ink line.
Replacement Strategy
- Isolate primary AC line power from the printer assembly.
- Open the electronics access vault to expose the motherboard layout.
- Locate the lower-tier High-Voltage Pack.
- Disconnect the dedicated wiring harnesses feeding the printhead umbilical cord.
- Swap the module out with a certified OEM or equivalent industrial replacement part.
Troubleshooting Summary Matrix
| Observed Symptom | Potential Root Cause | Corrective Field Action |
| Fault clears temporarily after cleaning, trips instantly when jet hits. | Conductive fluid bridging due to trapped solvent. | Extend air drying step; use clean compressed air on the deflector plate gaps. |
| Fault occurs as soon as the jet starts up, plates are completely dry. | Physical ink jet deflection or poor droplet formation. | Check nozzle straightness with a magnifying glass; execute nozzle flush or replace degraded ink. |
| Permanent fault code; trips immediately without starting fluid pressure. | Internal component short or insulation failure inside the HV transformer block. | Inspect mainboard layout; replace the underlying High-Voltage Pack module. |
Frequently Asked Questions
Q1: Can I use alternative solvents or generic alcohol to clean the deflector plate area?
No. Using unauthorized or non-CIJ formulated solvents can leave thin, high-resistance residues or fail to fully dissolve specialized ink binders. Always use the specified washdown solvent that matches your ink’s chemical base (MEK, Ethanol, or Acetone) to ensure complete evaporation and residue-free surfaces.
Q2: How often should the high-voltage deflector plate assembly be cleaned to prevent unexpected trips?
In standard industrial packaging lines, a visual check should be performed at the start of every shift. A deep washdown and dry cycle are recommended once a week or immediately following any production lines experiencing high ambient dust or product vibration.
Q3: Why does the system read “Lid/Hood Removed” alongside a High Voltage Fault?
The printhead cover houses an integrated proximity sensor or magnetic safety switch. If the cover is loose or warped, the printer cuts high voltage to the printhead as an operator safety precaution. Ensure the printhead cover is physically seated correctly and flush before pursuing deeper electronic troubleshooting.
Watch the Full Video Tutorial:
This article summarizes the key points from our original video. Watching the full tutorial provides a clearer understanding of the procedures, demonstrations, and practical maintenance tips.
▶ Watch the full video below.
📺 Subscribe to the Cheef YouTube Channel to receive future maintenance guides, troubleshooting tutorials, product demonstrations, and industry updates.
