
System Recovery Protocols: Reviving Videojet 1000 Series Printers After Extended Shutdowns
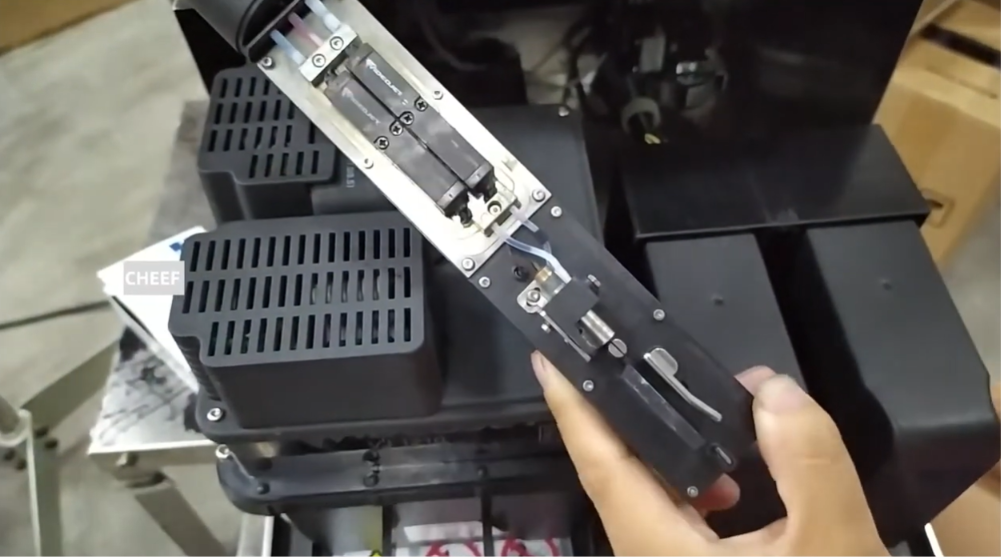
Returning Continuous Inkjet (CIJ) printers to production after weeks or months of storage requires a specific technical approach. On manufacturing lines using the Videojet 1000 Series (such as the 1210, 1510, or 1610), extended downtime causes distinct challenges. Industrial marking fluids rely on volatile solvents that evaporate when stagnant, leaving behind thick ink sludge, dried particulate deposits, and trapped air pockets inside the fluid lines and printhead assembly.
This technical breakdown covers the essential diagnostic checkpoints and system recovery routines needed to safely recommission a dormant printer without damaging the internal pumps or clogging the nozzle.
Technical Challenges of Extended Stagnation
The main issue during prolonged printer storage is solvent evaporation and the resulting changes in ink chemistry:
- Fluid Viscosity Spikes: Any residual ink left inside the core manifold or printhead lines gradually thickens into a dense sludge. If the pump is forced to turn on while this sludge is present, the motor can draw excessive current, leading to a system error or pump failure.
- Nozzle and Gutter Crystallization: The micro-orifice in the nozzle and the narrow opening of the recycling gutter are prime spots for ink to dry out completely. This crystallization forms a hard barrier that deflects or completely blocks the pressurized ink stream on startup.
- Filter Saturation and Air Pockets: Over months of non-use, internal fluid lines dry out, creating large air pockets. When the system is restarted, these pockets cause pressure fluctuations that prevent a stable ink stream from forming.
Recommissioning Protocol: Step-by-Step Recovery Routine
Follow this multi-phase routine before starting the primary ink jet on a machine that has been sitting idle.
Phase 1: Physical Inspection and Manual Solvent Pre-Flushing
Do not power on the machine immediately. Open the printer cabinet and check the fluid cartridge bays for any signs of leaking or dried ink crust around the intake needles. Move to the printhead, remove the protective cover, and inspect the entire internal deck.
Before starting the printer, use a wash bottle filled with fresh, matching cleaning solvent to thoroughly flush the printhead components. Generously spray the nozzle faceplate, the charge tunnel slot, and the mouth of the recovery gutter. This manual flush softens any dried ink crust before it can be pushed deeper into the internal lines.
Phase 2: Power Initialization and Fluid Level Verification
Plug in the printer and turn on the main power switch. Allow the software to complete its initial boot sequence and hardware check. Look at the fluid level indicators on the screen.
Because makeup fluid evaporates faster than ink, the printer will likely need a fresh makeup cartridge right away. Ensure both the ink and makeup cartridges are properly locked into their slots and showing active status on the screen.
Phase 3: Purging and Priming the System Lines
To clear out air pockets and dense ink sludge, the internal plumbing must be thoroughly primed before opening the nozzle valve. Navigate to the diagnostic or service menu on the screen:
- Run the system “Ink Line Prime” or circulation routine. This activates the internal pump at a low speed, pulling fresh solvent and ink through the core module to blend away stagnant sludge.
- Perform a manual nozzle backflush sequence. While this sequence runs, hold a lint-free wipe or a service syringe against the nozzle faceplate and apply a small amount of clean solvent to clear any softened debris out of the micro-orifice.
Phase 4: Jet Startup and Stream Calibration
Once the fluid lines are fully primed and showing stable pressure readings, initiate the standard “Jet Start” command. Watch the ink stream as it shoots across the printhead deck.
It is normal for the stream to waver or miss the gutter completely during the first few seconds as the last remnants of air exit the nozzle. If the stream remains crooked after a minute, use the manual alignment screw on the printhead to center the stream perfectly into the middle of the recycling gutter.
Troubleshooting Common Restart Faults
| Post-Storage Symptom | Probable Technical Root Cause | Field Action Plan |
| Ink Pump Motor Overload Error | Heavy ink sludge inside the pump head creating mechanical resistance. | Disconnect power, access the pump module, inject warm cleaning solvent directly into the intake line, let it sit for 30 minutes, and re-prime. |
| Immediate Gutter Fault on Startup | The ink stream is shooting crooked or the gutter tube is blocked by dried ink. | Stop the jet. Use a service syringe filled with solvent to flush out the gutter return line. Clean the nozzle plate, then re-test. |
| Unstable System Pressure Readings | Large air pockets trapped inside the internal filters of the ink core. | Run the automated priming loop two to three times consecutively to force all trapped air back into the mixing tank. |
Field Practices for Long-Term Storage
To prevent these issues during future production gaps, always perform a proper storage shutdown sequence:
- Execute an Extended Flush: If the printer will be idle for more than two weeks, run the deep automated flushing cycle. This replaces the ink inside the printhead lines and nozzle assembly with clean, clear makeup solvent.
- Seal the Printhead: After completing the flush, clean the printhead deck thoroughly, wrap it in a protective plastic seal or specialized storage cap, and close the cabinet door completely to minimize solvent evaporation.
Frequently Asked Questions
What happens if I try to start the jet without pre-flushing the printhead?
If you skip the manual pre-flush, the pressurized ink stream will hit a hard wall of dried ink inside the nozzle or gutter. This can deflect the stream wildly, spraying ink all over the high-voltage deflector plates and causing an immediate electrical short circuit.
Can I add pure solvent directly into the ink tank to thin out thick sludge?
No. Pouring raw solvent directly into the main reservoir can disrupt the printer’s automated viscosity monitoring system and ruin the fluid balance. Always allow the machine to draw solvent naturally from the dedicated makeup cartridge during its automated priming and cleaning routines.
How long can a Videojet 1000 Series printer sit idle before it requires a deep solvent flush?
As a general rule, if a standard MEK-based printer sits idle for more than seven days in a warm manufacturing environment, a full automated wash-down or manual line prime should be performed before resuming normal production coding.
Watch the Full Video Tutorial:
This article summarizes the key points from our original video. Watching the full tutorial provides a clearer understanding of the procedures, demonstrations, and practical maintenance tips.
▶ Watch the full video below.
📺 Subscribe to the Cheef YouTube Channel to receive future maintenance guides, troubleshooting tutorials, product demonstrations, and industry updates.
